HPA Load Station Module Removal and Replacement
Parts and Materials Required
- Hex wrench, 4 mm (long shank preferred)
- LOAD STATION, MODULE
Time Required
Removal Procedure

|
Wear clean nitrile gloves while performing the following procedures. |
- Put on proper PPE.

|
WARNING—MTUs may be present in module. It is necessary to remove all MTUs to avoid contamination. |
- Clear MTUs using one of the following methods
- Close Service Software, if necessary, and power down the Panther System.
- Open the left side door panel.
- Carefully slide the Service drawer out 1/4 of the way to access the HPA Load Station module. Pay careful attention that no cables, lines, or hoses are caught when opening the drawer.
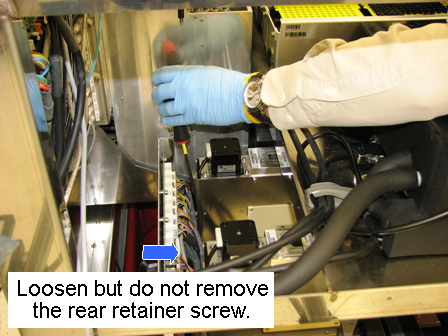
 Using a long shank 4 mm hex wrench, loosen the 5 mm socket head cap screw that secures the rear of the Load Station. This screw may be difficult to see due to the wires in the rear of the module. The screw does not need to be removed; it only needs to be loosened to allow the module to slide out from under it.
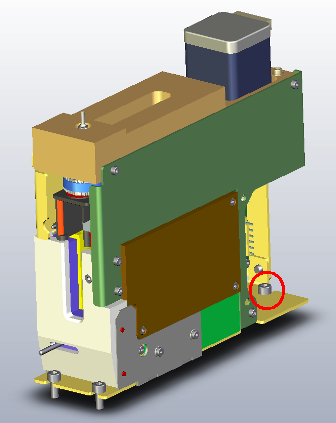
- Using a 4 mm hex wrench, remove the two 5 mm socket head cap screws from the front of the module.

- Open the Service Drawer 3/4 of the way.
- Slide the module toward the front of the system to free it from the rear screw.
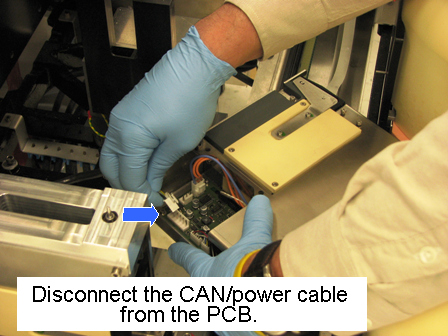
- Disconnect the CAN/Power bus from the PCB.
- Lift the module out of the Service Drawer and place on a properly prepared work surface.
Replacement Procedure
- Verify the following DIP switch settings:
| DIP Switch | HPA Load Station |
|---|
| 1 | OFF |
| 2 | OFF |
| 3 | OFF |
| 4 | OFF |
- Reverse the removal procedure.
- While watching that no hoses or cables are caught, gently push the Service Drawer into the system and confirm that all latches are properly locked.
- Close the left panel door.
- Power on the Panther System.
- Install Firmware to the module.
Alignment/Calibration
- Using Service Software, teach the Distributor to the HPA Load Station.
- Teach the Pipettor to the HPA Load Station.
Verification
- Perform a System Level Operational Qualification.
- Verify that the HPA Load Station's temperature and mixing speed is within the acceptable range.
Click the  button at the top of the page to send feedback, comments, or change requests.
