Fuse Procedure (Re-Attach the Fusion to the Panther System)
Parts and Materials Required
Time Required
- 45 minutes
Procedure
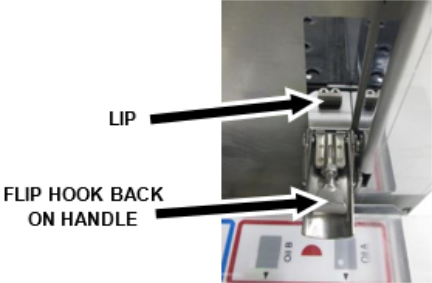
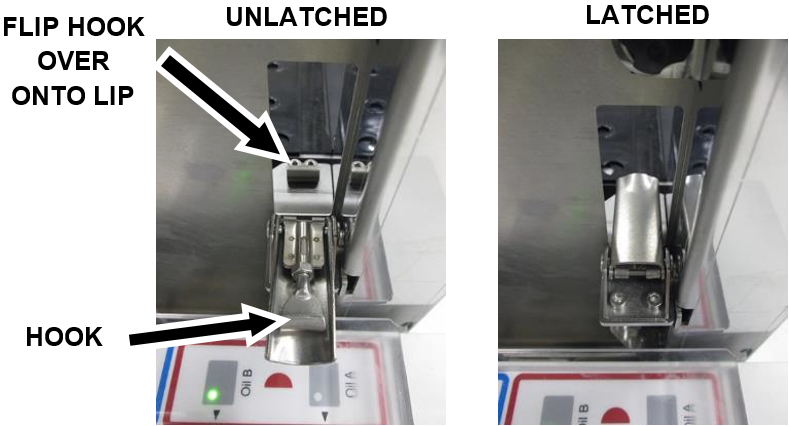
 Make sure that the hooks on all four Fusion latches are flipped back onto the handle so that they don’t catch the lip when the Fusion Module is fused.

Note—You can temporarily tape the latches in place to prevent them from falling down. - Carefully roll the Fusion Module back into the Panther System.
Note—Verify that the power cable from the Fusion Module is still securely plugged into the Panther System and that the Panther System power switch is switched to the ON position before fusing. - Make sure that the Handoff Station and the Elution Buffer Transfer Arm do not come into contact with the Panther System frame during this movement.
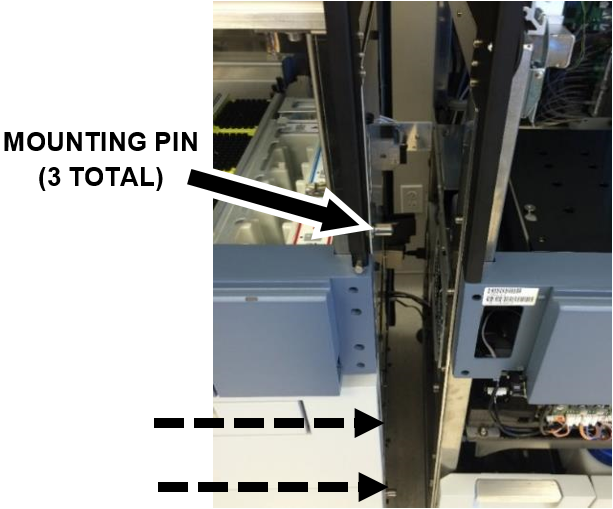
- Make sure that the Fusion Module mounting pins (3) align into the corresponding mounting holes on the Panther System. Additional leveling of the Fusion Module caster wheels may be necessary to re-mount the Fusion Module. If possible, avoid altering the leveling of the Panther System.
- Make sure that no cables are pinched between the modules, or in the movement path of the Fusion Waste Drawer.
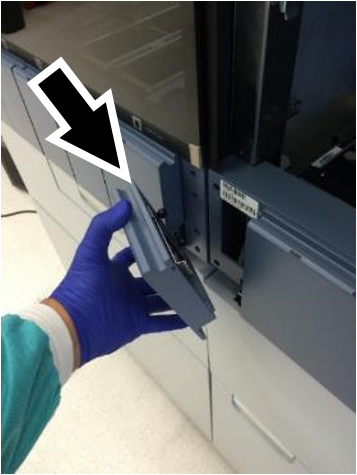
- After the Fusion Module has been fused back onto the Panther System, flip each hook back over the lip and latch (4x). Re-adjust latches if necessary.
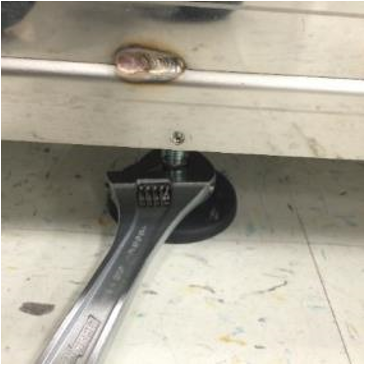
- Lower the Fusion Module mounting foot using an adjustable wrench. Confirm that the Fusion Module and Panther System Canopy heights are even.
Note—Only lower the mounting foot enough to slightly raise the Fusion and relieve stress on the mounting side of the system. - Attach the intermediary front cover panel.
- Attach the main power cable and turn ON the system power switch.
- Turn on the PC.
Verification
-
Perform the following Service Procedures:
- Open the Panther Main software from the Customer Shield and make sure system initialization completes successfully.
 button at the top of the page to send feedback, comments, or change requests.