Tip Eject Chute Removal and Replacement
Parts and Materials Required
- Ball driver, 12"
- Hex screwdriver, 4 mm long
- TIP EJECT CHUTE, MODULE
Time Required
- 60 minutes
Removal Procedure
- Put on proper PPE.
|
|
WARNING—MTUs may be present in module. It is necessary to remove all MTUs to avoid contamination. |
- Clear MTUs using one of the following methods
- Reboot the Panther System main software.
Or
 Start Service Software, navigate to the Service Software System tab, and click Clear MTUs.
- Reboot the Panther System main software.
- Power down the Panther System.
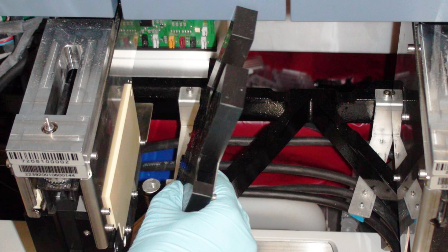
- Carefully open the Service Drawer.
- Open the Mid Bay
- To remove the Sample Tip Chute:
- Remove the Sample Dispense Slot.
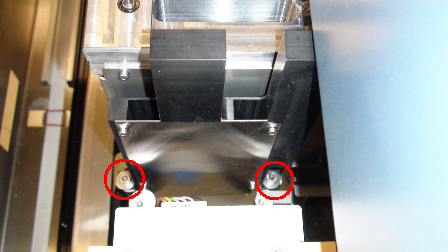
- Remove the screws that secure the Tip Chute Station.
- Remove the rear screw and washer.
- Carefully pull the Tip Chute Station out of the system.
- To remove the Reagent Tip Chute:
- Remove the Magnetic Parking Module.
- Remove the Tip Chute washer and screws on the front and back of the module.
- Carefully remove the Tip Chute.
- Remove the rear screw and washer.
- Carefully pull the Tip Chute Station out of the system.

|
Note—If returning the module, decontaminate and fill out the appropriate paperwork to return the module. |
Replacement Procedure
- Reverse the removal procedure.
Alignment/Calibration
Sample Tip Chute
- Teach the Sample Pipettor to the Sample Dispense Slot.
- Teach the Sample Pipettor to the Sample Tip Eject Chute.
- Teach the Distributor to the Sample Dispense slot.
Reagent Tip Chute
- Teach the Reagent Pipettor to the Reagent Tip Eject Chute.
- Teach the Distributor to the Magnetic Parking Module.
Verification
- Verify pick and strip tip with Service Software.
 button at the top of the page to send feedback, comments, or change requests.
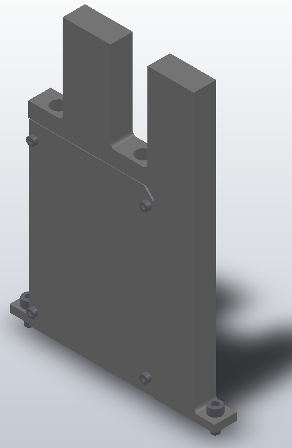