Instrument Preparation
- Open the Service Drawer.
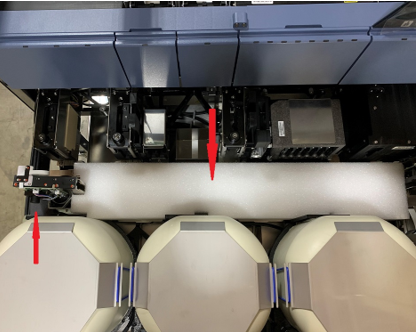
 Remove both packing foam blocks from around the Distributor.
- Remove the foam from above the Cooling module.
- Check to be sure that all modules are intact and have not shifted during relocation.
- Check all modules for missing screws and that all screws are tight.
- Inspect and verify that all three incubator lids are fully seated.
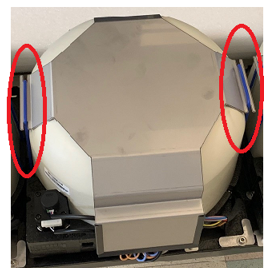
- Inspect and verify that all six rubber restraints securing the incubator weights are in place and are not damaged..
- Install RTFs (as needed).
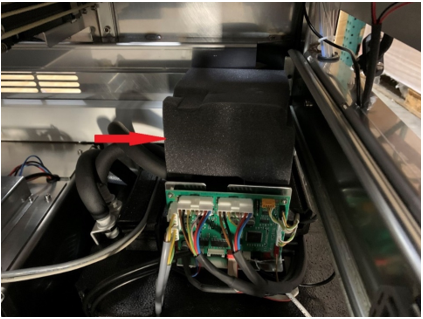
- Close the Service Drawer and route tubing and wires so that they do not interfere with Distributor or pipettor movement.
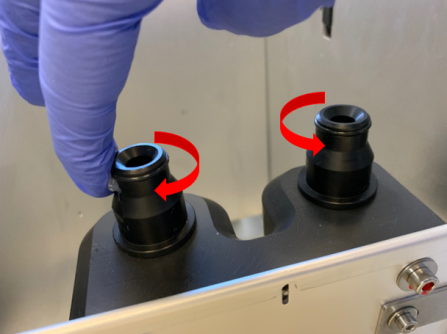
- Hand-tighten the two pipettor DiTi thumbscrews. The thumbscrews may come loose during shipping.
- Adjust the MTUMulti-tube unit—Container used to process tests in the instrument. An MTU contains five separate reaction tubes. The MTU is moved through the instrument by the linear distributor and includes five tiplets for pipettiing to be used in the mag wash station. Input Queue ball detent.
- Verify the MTU Input Queue ball detent is lubed. If ball detent is not lubed, lightly apply a Teflon-based grease to the ball detent.
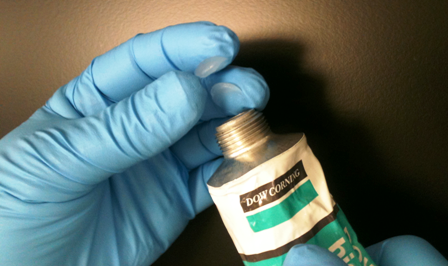
- Open the Waste Drawer and lightly apply High Vacuum Grease to the Waste Bottle fittings and O-rings. Verify fittings and O-rings are lubricated.

NOTE—Do not use Dow Corning 55 O-Ring Lubricant or any other lubricant. Use only Dow Corning High Vacuum Grease.
- Using Proper PPE, apply two dabs of Dow Corning High Vacuum Grease to fingertips.
- Wipe both the Waste Bottle fittings and O-rings with the grease.
- Retrieve the Output Queue Lid from the Universal Fluids Drawer and install it on top of the Output Queue.
- At High Altitude Sites (over 2000 feet or 610 meters), replace the Detect LCM Pumps.
- Install any other Hardware Upgrades.
- Install the Peri Pump Tubing.

 button at the top of the page to send feedback, comments, or change requests.