Parts and Materials Required
- Proper PPE
- Allen wrench, 3 mm
- Absorbent pad
 PUMP (OIL/AD1/AD2), LCM 500UL
Time Required
-
Part replacement - 10mins
-
Then firmware - 30mins
-
Lumo visual dispense verification - 20mins
-
Initialization/Prime
Operation of pumping fluid through tubing to ensure proper and consistent fluid delivery (remove air from the tubing, etc.). - 20mins -
Flashcheck - 25mins
- Total ≤ 2hrs
Removal Procedure
- Put on proper PPE.
- Power down the Panther System.
- Open the right side panel door.
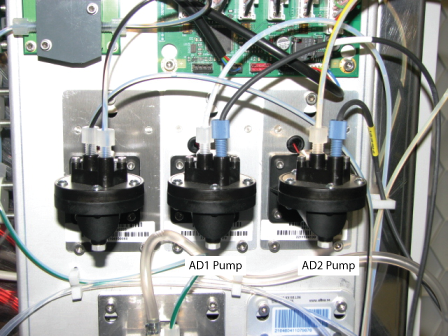
- Locate the Auto Detect LCMP pumps.
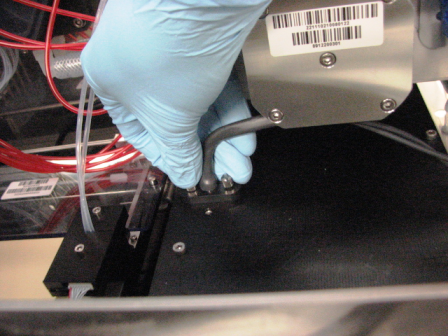
The AD1 Pump is located on the left and the AD2 Pump is located on the right, closest to the right cover. - Remove the Luminometer injectors by unscrewing the two screws that secure the injectors to the Luminometer module.
- Place the injectors on an absorbent pad.
- Unscrew and remove the Luminometer injector fittings from the Auto Detect 1 and/or 2 pumps.
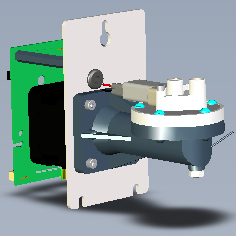
- Using a 3 mm Allen wrench, loosen, but do not remove, the three screws that secure the pump.
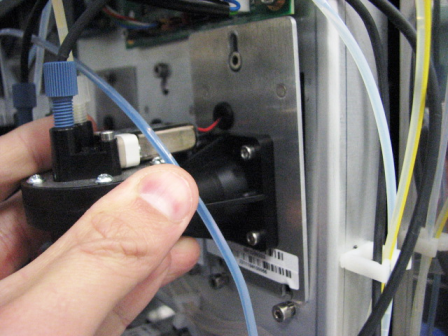
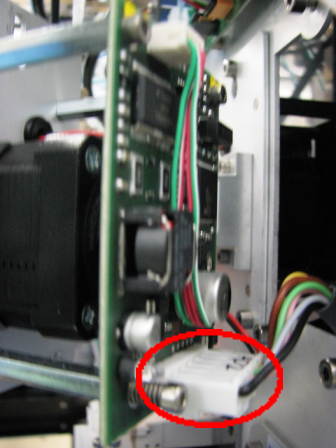
- Lift the Auto Detect LCMP pump up and slightly out to gain access to the pump power connector.
- Disconnect the Auto Detect LCMP pump power connector and remove the pump.
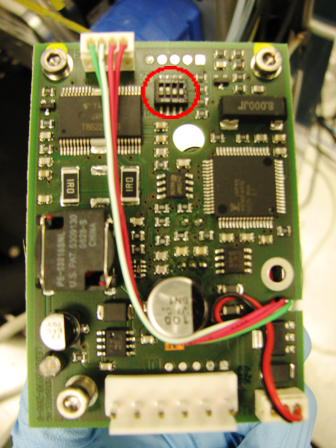
- Note the positions of the pump DIP switches.
- Carefully remove the LCMP.

Note—If the module will be returned, clean the module.

Replacement Procedure
- Make sure the new LCMP pump DIP switches are set correctly.
- Locate the pump DIP switches.
- Set the DIP switches on the new pump according to the following table.
DIP Switch AD1 AD2 1 OFF ON 2 ON ON 3 OFF OFF 4 OFF OFF
- Reverse the removal procedure.
- Attach the Auto Detect fluid lines.
- Place the Luminometer injector back into the Luminometer module and finger-tighten the screws.
- Close the right side panel door.
- Install Panther System firmware.
Verification
- Perform a Luminometer Visual Dispense Verification procedure.
- Prime the system (see the Panther System Operator's Manual).
- Perform a Panther Luminometer Flashcheck Verification procedure.
 button at the top of the page to send feedback, comments, or change requests.