Distributor Hook-Axis Flex Cable Removal and Replacement
Parts and Materials Required
- Allen wrench or ball driver, 2.5 mm
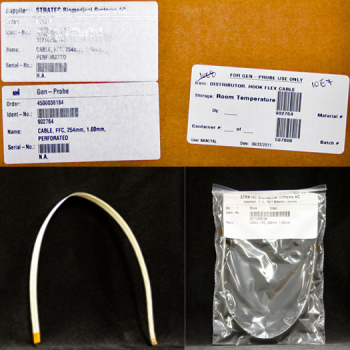
 DISTRIBUTOR, HOOK FLEX CABLE
Time Required
- 30 minutes
Removal Procedure
|
|
Caution—During this procedure, be very gentle with the flex cable. Do not crease or bend it unnecessarily. |
- Put on proper PPE.
- Fold the new Hook-axis flex cable.
- Remove the Luminometer Injector.
- Carefully open the Service Drawer.
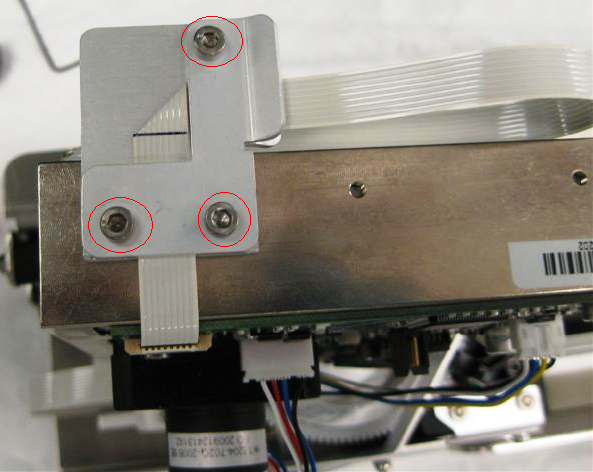
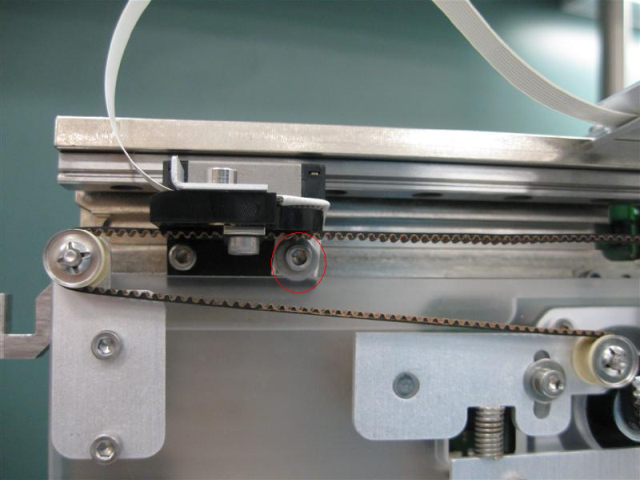
- Using a 2.5 mm Allen Wrench, remove the 3 screws securing the L-Shaped hook flex cable strain relief plate.
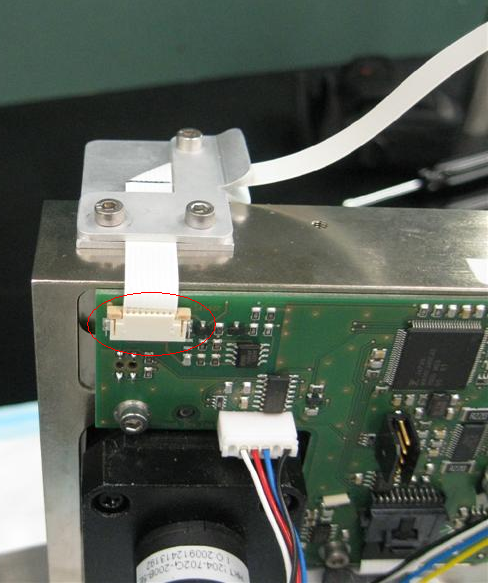
- Unplug the hook flex cable from the hook-axis PCB.
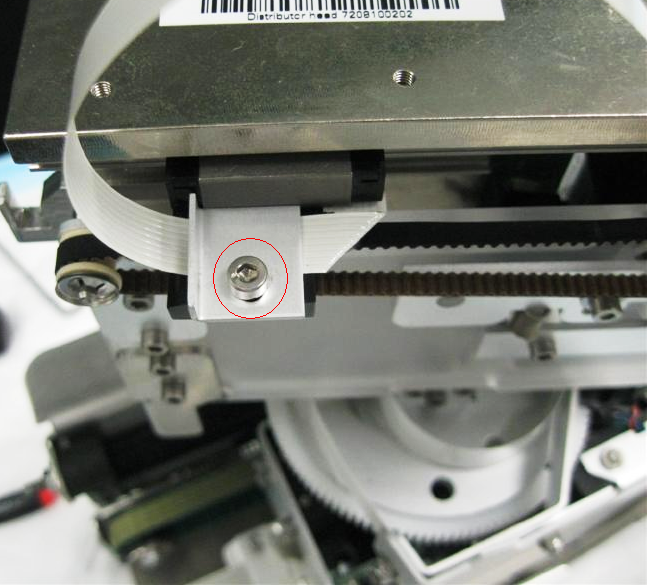
- Using a 2.5 mm Allen Wrench, remove the screw securing the square hook flex cable strain relief plate.
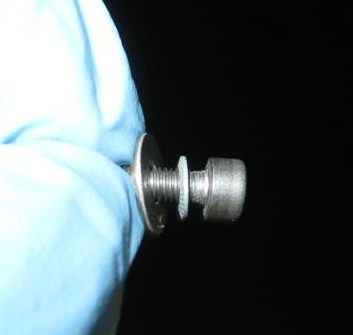
- Using a 2.5 mm Allen Wrench, carefully remove the screw securing the Hook Flex cable to the hook. Note that there are 2 washers on the screw.
- Remove the Hook Flex Cable.
Replacement Procedure
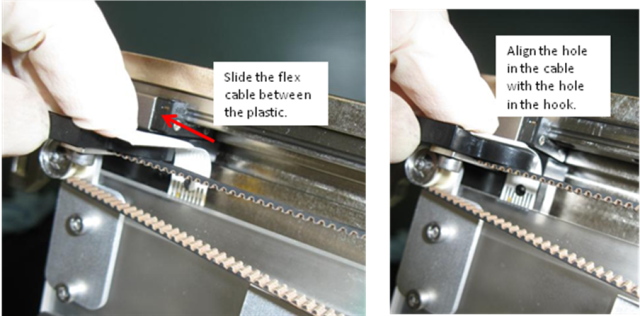
- Align the hole in the hook flex cable with the hole in the hook, as shown in the following picture.
- Replace the screw and washers securing the hook flex cable to the hook.
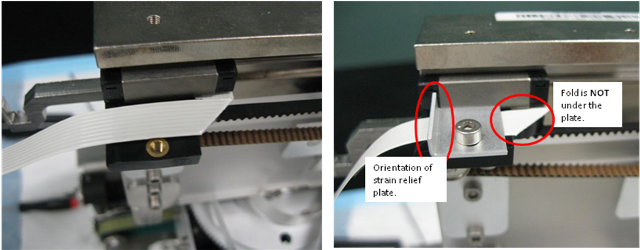
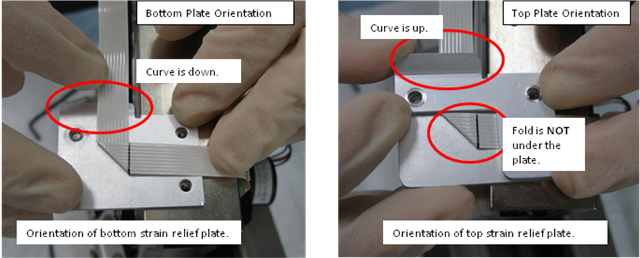
- Route the hook flex cable over the plastic piece, and secure it with the square strain relief plate. Note the orientation of the curve in the strain relief plate. The following picture shows the correct orientation. Ensure that the fold is not under the plate.
- Plug the flex cable into the Hook PCB, and snap the connector in place.
- Secure the flex cable with the L-Shaped strain relief plate and replace the screws, as shown in the following picture. Note the orientation of the bends in the strain relief plates. Also, ensure that the flex cable fold is not sandwiched between the plates.
- Close the Service Drawer.
- Reinstall the Luminometer Injector.
- Start Service Software.
Verification
- None
 button at the top of the page to send feedback, comments, or change requests.