Parts and Materials Required
- Allen wrench, 3 mm, extended
- CHILLER RAMP, MODULE
Time Required
- 30 minutes (does not include re-teaching the Distributor)
Removal Procedure
- Put on proper PPE.
|
|
WARNING—MTUs may be present in module. It is necessary to remove all MTUs to avoid contamination. |
- Clear MTUs using one of the following methods
- Reboot the Panther System main software
 Start Service Software, navigate to the Service Software System tab, and click Clear MTUs.
- Close Service Software, if necessary, and power down the Panther System.
- Raise the pipettor flaps.
- Carefully open the Service Drawer.

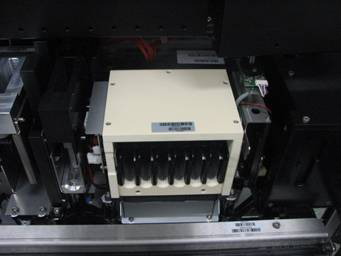
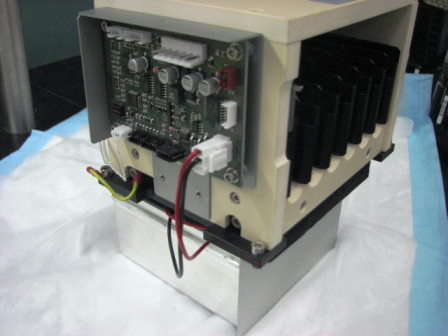
Note—It may be easier to remove the sample dispense slot before removing the Chiller Ramp. - Locate the Chiller Ramp module.
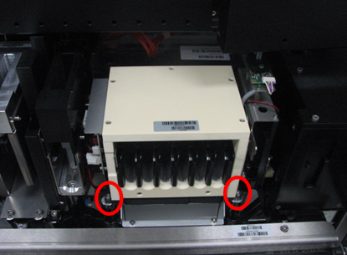
- Unscrew the two front screws of the Chiller Ramp.
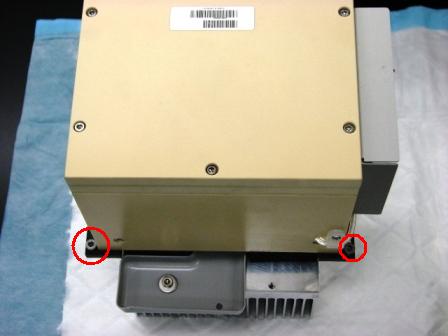
- Unscrew the two back screws.
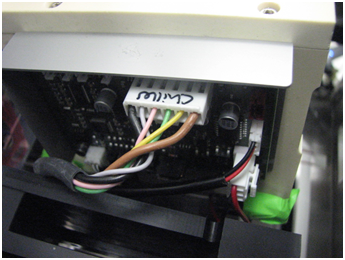
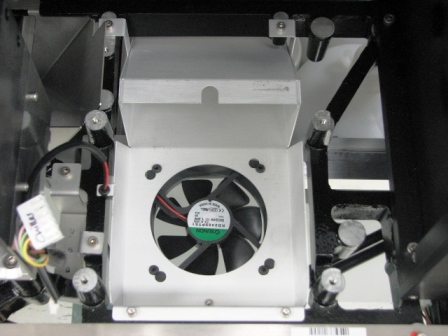
- Slightly lift the Chiller Ramp up so that you can get to the PCB on the side of the Chiller Ramp.
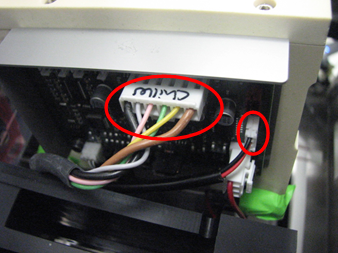
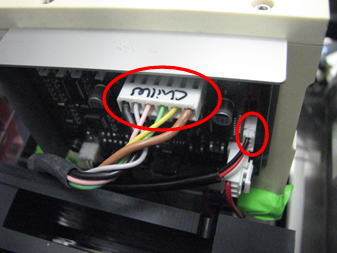
- Disconnect the power cable and fan from the Chiller Ramp PCB.The fan and fan shroud will remain in the system.
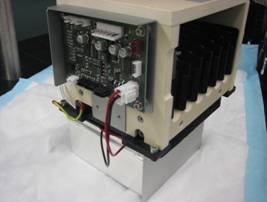
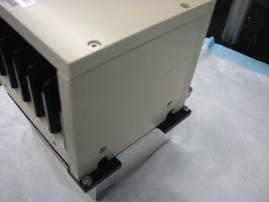
- Lift and remove the Chiller Ramp out of the system and place on an absorbent pad.

|
|
NOTE—If returning the module, decontaminate the module and complete the COD/OBF/RMA Form [19-02-APX-A]. |
Replacement Procedure
- Make sure the Service Drawer is fully open.
- Put the screws in the Chiller Ramp slots. Make sure the grounding lug is installed on the left rear mounting screw..
- Place the Chiller Ramp partially into its mounting location so that the cables can be connected.
- Connect the power cable and fan cable to the PCB.
- Align the mounting screws to the mounting locations.
- Tighten the screws in the Chiller Ramp slots to the Service Drawer.
- Close the Service Drawer.
- Install the Panther System firmware to the module.

 button at the top of the page to send feedback, comments, or change requests.
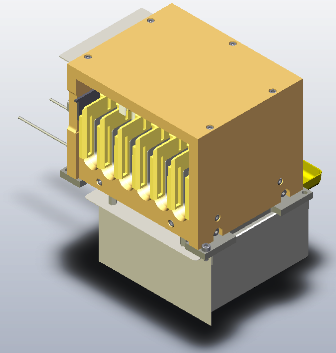