TCR Carousel Home Sensor Removal and Replacement
Parts and Materials Required
- 2.5 mm ball driver or Allen key
- Carousel Home Sensor
Time Required
Removal Procedure
- Put on proper PPE.
- Carefully open the Service Drawer.
- At the TCR Carousel PCB, unplug the cable that goes from the TCR Carousel to the COP.
- Unplug the TCR Carousel home sensor from the PCB.
- Using the 2.5 mm ball driver, remove the bolt and washer that secure the plastic wire router/clip for the TCR Carousel home sensor cable.
- Remove the plastic wire router/clip from the TCR Carousel home sensor cable (unless the new TCR Carousel home sensor comes with a new wire router/clip).
 Using the 2.5 mm ball driver, remove the screws that secure the TCR Carousel home sensor.
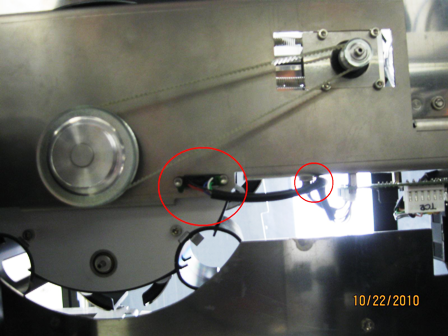
- Remove the TCR Carousel home sensor taking note of the orientation of the colored wires from each side of the sensor.
Replacement Procedure
- Insert the new TCR Carousel home sensor. Ensure that the lip of the sensor goes underneath the base plate bracket
- Using the 2.5 mm ball driver, insert and tighten the bolts that secure the TCR Carousel home sensor to the base plate.
- If the new TCR Carousel home sensor does not have a plastic wire router/clip, attach the old plastic wire router/clip and use the 2.5 mm ball driver to insert and secure the bolt.
- Plug the TCR Carousel home sensor into the PCB.
- Close the Service Drawer.
Verification
- Load a TCR bottle with at least 20 mL of saline on slot 1 of the TCR Carousel.
- Start up Service Software.
- In the main Pipettor tab, select Pipettor, and initialize All Dialog Controlled Modules.
- In service Software, navigate to the Pipettor screen and select the Move tab.
- Pick a tip with the Right Arm.
- In the Right Arm box, select TCR Carousel. Double-click the 1x1 box to move the Pipettor to the TCR Carousel, bottle 1.
- Select Bar to perform a barometric level sense of the TCR.
Click the  button at the top of the page to send feedback, comments, or change requests.