Pipettor X-Axis Motor Replacement
Use discretion to determine whether an X-axis Motor or X-Axis Motor Encoder should be replaced.
The encoder is a simpler and less expensive repair than replacing the X-axis motor.
If servicing a System for a Pipettor X-axis Motor failure, order both an X-axis motor AND
an X-Axis Motor Encoder for the failed motor.
Remove the encoder cap and inspect as per X-Axis Motor Encoder procedure.
If the encoder wheel is visibly damaged, replace the Encoder.
If the encoder wheel is NOT damaged replace the motor as per this procedure.
Additionally, to reduce the corrosion affects, a Encoder cap should be installed on all motors to protect the encoders from corrosion.
Parts and Materials Required
- Pipettor X-Axis Motor
- Pipettor X-Axis Motor Encoder
- Pipettor, Sample, X-Axis Encoder Cable (only required if existing cable on System is damaged)
- SCR-01915; SCREW, FH, TORX 10, M3X6, 0.5MM PITCH, 18-8 SS (BAG OF 12)
- PH0 screwdriver
Procedure
- Safely shut down the PC and Power off the System.
- Remove the rear Panther (and Fusion, if servicing a Fusion) canopy to access the X-motors.
- Remove the 4 hardware screws that hold the side Plexiglas.
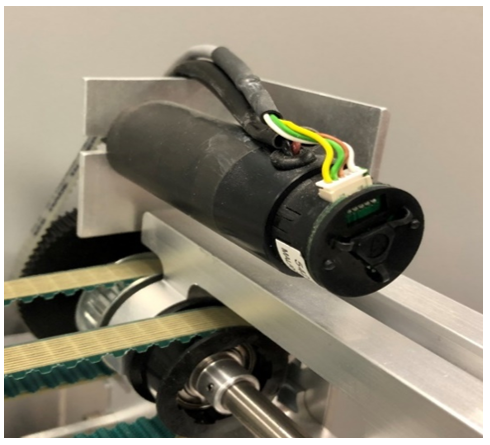
Carefully remove the Plexiglas and set aside.  Carefully inspect the encoder cable’s wire sockets.
Confirm they are firmly attached to the connector.- (Optional Step) Remove the X-Axis Motor cable harness.
The harness would need to be removed ONLY if it is difficult to install the Encoder Cap. - Disconnect the encoder cable from the X- Axis motor.

Caution— DO NOT pull out by wires! Loose wire/connections here will cause intermittent encoder related errors. - Place an absorbent pad underneath the X-Axis motor being replaced.
This is to catch the motor screws if the screws fall during removal or replacement. - Remove the x-axis motor by unscrewing the 3 countersunk screws.
Gently move the X-Axis Motor away from the X-Axis Motor belt. - For Replacement, place the X-axis Motor gear on the X-axis motor belt.
- Screw in the three countersunk fasteners (PH0 fasteners (M3x0.5 – 6mm length)).
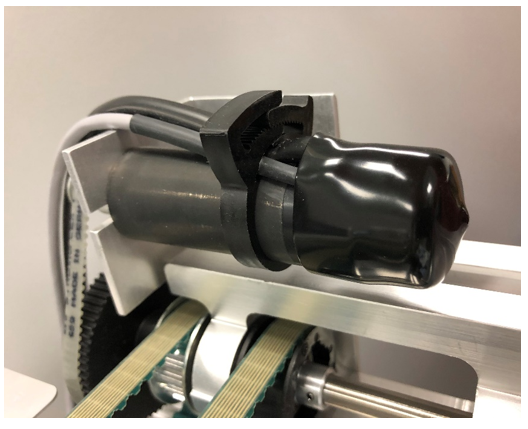
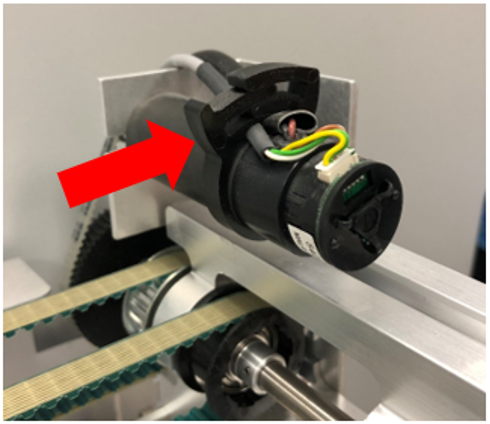
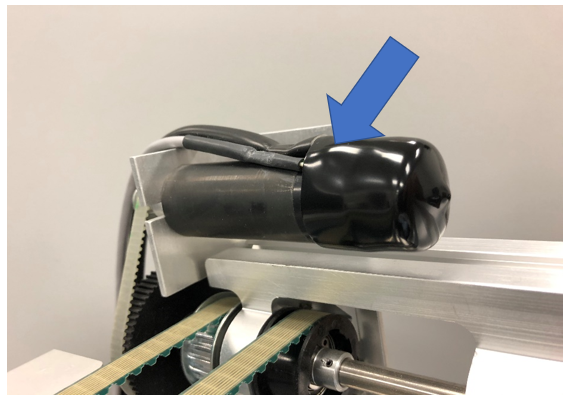
- Install the Encoder Cap, by pressing on the cap so that the cap covers the encoder cable and motor power cables.
During installation be careful not to put excessive strain on the cables. - Ensure that the cap is fully seated onto the X-Axis Motor and fully covering encoder.
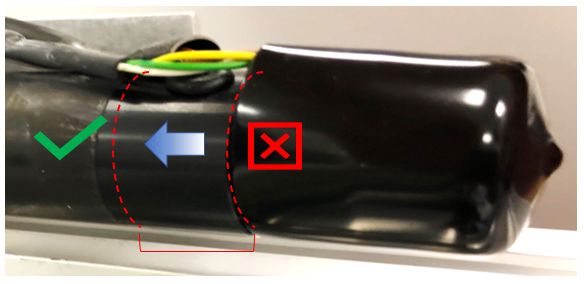
Below are examples of incorrect & correct installation of the encoder cap. - If the X-Axis Motor cable harness was removed, re-install now.
- Final Procedures

Verification
 button at the top of the page to send feedback, comments, or change requests.