Parts and Materials Required
- Allen wrench, 2.5 mm
- Allen wrench, 3 mm
- Allen wrench, 4 mm
- Output Queue Hook Loader Home Sensor
Time Required
- 45 minutes
Removal Procedure
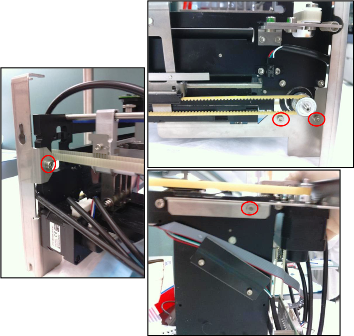
- Remove the Output Queue module.
 Remove the mounting bracket from the load side of the Output Queue by removing the four screws that secure it.
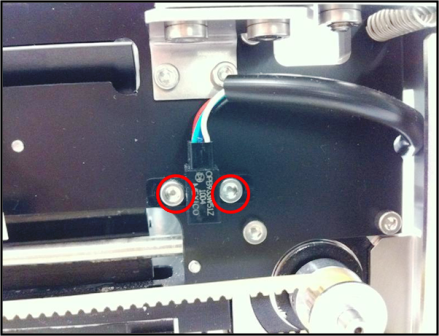
- Remove the two screws that secure the home sensor.
- Disconnect the sensor from the main PCB.
- Remove the Output Queue hook loader home sensor.
- Perform a cleaning.
Replacement Procedure
- Reverse the removal procedure.
- Ensure the sensor cable is properly routed through the groove, and the mounting bracket is oriented correctly, as shown in the following pictures.
- Verify that connections are properly seated and that screws are all in place.

Alignment/Calibration
Verification
- Perform a system Operational Qualification.
- Start the Panther System main software and PrimeOperation of pumping fluid through tubing to ensure proper and consistent fluid delivery (remove air from the tubing, etc.). the system (see the Panther System Operator's Manual).
 button at the top of the page to send feedback, comments, or change requests.