Fusion Centrifuge Removal and Replacement

|
Note—A Firmware Installation procedure must be performed when replacing a module or PCB. |
Parts and Materials Required
- Bench Top Pads
- Centrifuge Module
- FSE Tool Kit
- Proper PPE
Time Required
- 30 Minutes
Centrifuge Removal Procedure
- Put on proper PPE.
- Start Service Software.
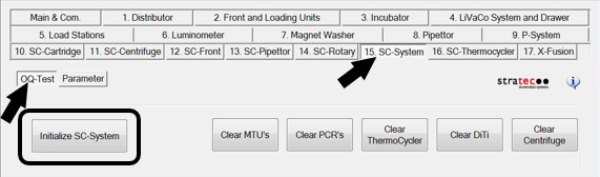
 From the 15. SC-System tab, select OQ-Test, then click Initialize SC-System.
- Click Clear Centrifuge.
Allow the System to clear any cap & vials from the Centrifuge. - Power down the Panther System and PC.
- Move the Pipettor arms to the left & rear of the system to prevent any accidental damage.
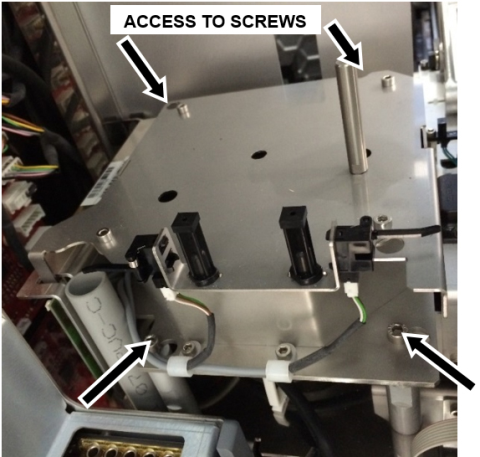
- Using a 4mm hex driver, loosen the 4 mounting screws that hold the Centrifuge module.
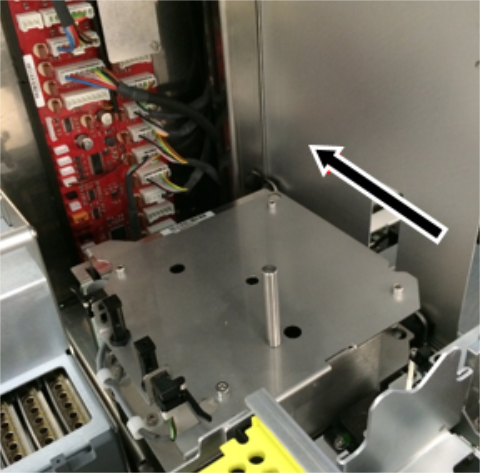
- Slide centrifuge towards the back of the system then slowly pull up and turn it clockwise until exposing the CAN cable connector found at the back end of the module. Disconnect the CAN cable.
- Carefully place the Centrifuge Module on a sterile benchtop pad.

Caution—Whenever setting the Centrifuge down on a flat surface, there is a danger of damaging the encoder as it is located on the bottom, underneath the motor. Ensure the encoder on the bottom of the Centrifuge is not damaged.

Centrifuge Replacement Procedure
- Reverse the Removal Procedure.
Verification
- Power on the Panther System and PC.
- Load firmware to the new Centrifuge module.
Refer to Panther Fusion System Installation > Run Instrument Setup (Fusion). - Teach both Pipettors to the Centrifuge module.
Refer to Service Procedures > Panther Fusion System Pipettor Teaching. - Perform a Sidecar Pipettor OQ Test.
Refer to Service Procedures > Side Car Pipettor OQ Test. - 7 cycles
- Cap & Vial only (uncheck DiTi)
- Check the Report, Initialize, and Shutter checkboxes only
- Continue to Enable Thermocycler Banks and Centrifuge.
 button at the top of the page to send feedback, comments, or change requests.