Dell OptiPlex XE3 Installation

Prerequisites

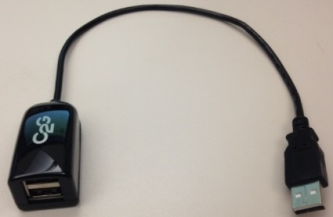
If installing an XE3 on a Panther with an LCD monitor, a USB 2.0 2-Port Passive Hub [CBL-02158] MUST be installed to enable LCD touch-screen functionality.

  • The Dell XE3 requires a Windows 10 Image or higher.
  • LCD Monitors were installed on Panthers 1404 and lower.
  • LED Monitors are installed on Panthers 1405 and higher.
  • LED Monitors do not require the USB 2.0 2-Port Passive Hub.
  • OptiPlex XE3 + LCD Monitor > NEEDS the 2-Port Passive HUB [CBL-02158]

Parts and Materials Required

Time Required

  • 45 Minutes

Procedure

ClosedPart A: Hardware Installation

  1. Perform a Database Backup, if an existing database needs to be transferred to the new XE3.
  2. Power down the Panther System.
  3. Power down the PC.
  4. Disconnect all cables from the old PC.
  5. Remove the old PC from the Panther PC Bay.
  6. Place the XE3 into the Panther PC Bay.
  7. ClosedConnect the various cables to the XE3 PC.

  8. ClosedVerify any computer cables will not interfere with the Drawer lock.

ClosedPart B - Install Panther Image

  1. Create a Panther Image on a USB 
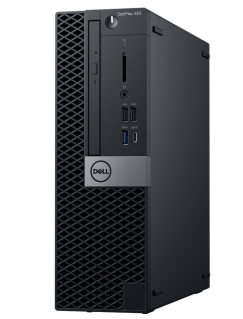
  2. Install the Panther Image for Dell XE3
  3. Make sure to affix the Win10 License sticker (Certificate of Authentication) onto the Panther PC (if not already present)

ClosedPart C: BIOS Configuration Procedure

  1. Restart the Panther PC.
  2. Immediately press the F12 key when the boot process begins to access the Boot Menu.
  3. ClosedEnable UEFI Boot mode, Secure Boot OFF.
    1. Use the arrow keys to select *Change Boot Mode Settings.
    2. Press Enter.
    3. Highlight UEFI Boot Mode, Secure Boot Off.
    4. Press Enter.
    5. Select Yes when asked DO YOU WISH TO PROCEED?
    6. Press Enter.
    7. Select Yes for Final Confirmation.
    8. Press Enter.
    9. Restart the PC.
  4. ClosedUse the arrow keys to select BIOS Setup.

  5. Press Enter.
  6. The BIOS Configuration window will now appear.

    ClosedNote—If the BIOS Menu is locked:

    1. Click the Unlock Button (at the bottom of the screen)
    2. Enter "gpservice" in the input field and click Enter.
    3. If "gpservice" is NOT accepted as a password, you will have to reset the BIOS password.
  7. Expand the POST Behavior section.
  8. Select Numblock LED.
  9. ClosedUn-check Enable Numlock LED.

  10. Expand the Security section and select Admin Password.
  11. Type gpservice as the password in both the New Password and Confirm Password fields.
    Warning—MAKE SURE THAT NUMLOCK IS TURNED OFF.
  12. Click OK.
  13. ClosedClick Exit.

  14. The PC will reboot into Windows.
    Note—Windows may need to be Activated.
  15. On initial boot up, USB drivers will auto install.
  16. Set the PC clock.
  17. Reboot the PC once the USB drives are installed.
  18. If the installing an Dell XE3 PC with 16GB RAM [CMP-01672], complete the BIOS Settings before Imaging (SATA RAID On) procedure.

ClosedPart D: Enable Touch Screen Functionality on LCD Monitors - for Panthers Serial #01404 and lower (with LCD Monitors) 

  1. Shutdown and Restart the PC
  2. ClosedOnce the PC has booted in to Windows right-click on the Start menu and select Computer Management.

  3. ClosedClick on Device Manager in the Computer Management screen.

  4. ClosedExpand the Universal Serial Bus controllers section.

  5. To identify which USB cable is connected to the monitor, unplug all the USB cables then plug them back in one at a time.
  6. The USB cable connected to the Monitor will display as Unknown Device.
  7. ClosedYou will briefly see a USB Device Not Recognized message displayed.

  8. With the Monitor USB cable identified, shutdown the PC.
  9. Unplug the Monitor USB cable.
  10. Use a piece of tape to clearly label the Monitor Cable for future reference.
  11. Then connect the monitor cable to one of the ports in the 2-Port Passive Hub [CBL-02158].
  12. Connect the 2-Port Passive Hub to the port labeled Monitor/Touchscreen in Part A: Step 7.
  13. Re-connect all other USB cables as per Part A: Step 7.
  14. Power on the Panther PC and verify that the monitor touch screen is functioning.

ClosedPart E: Adjust Monitor Brightness, as necessary for LED Monitors (Panther SN <02307)

  1. Monitor Contrast/Brightness with XE3 Upgrade: Panther Systems with LED monitors (Panther SN <02307) may exhibit a bright screen when the PC is upgraded to XE3 (Win10).
    1. Workaround: Log in to the GPService account.
      1.   ClosedRight-click in the middle of the desktop and select Intel Graphics Settings:
      2. ClosedSelect Display.
      3. ClosedSelect Color Settings and adjust brightness to -50 and select Apply
      4. ClosedSelect Yes to apply changes and close the window.