Installing Image v6.0.13 (for System v7.1.5.4)
- Start the Panther PC and press F12 during bootup to enter the BIOS menu.
- In the BIOS menu, Enable “UEFI Boot mode, Secure Boot OFF”:
 Use the arrow keys to highlight Change Boot Mode Settings and press ENTER.
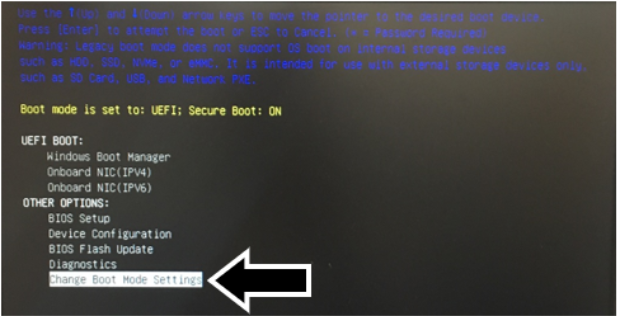
- Verify which Boot mode is selected.
- IF set to: UEFI; Secure Boot: OFF, then exit Setup and proceed to Install / Deploy the Windows Image below.
- IF set to: UEFI; Secure Boot: ON, proceed to Step c below.
- Highlight UEFI Boot Mode, Secure Boot OFF.

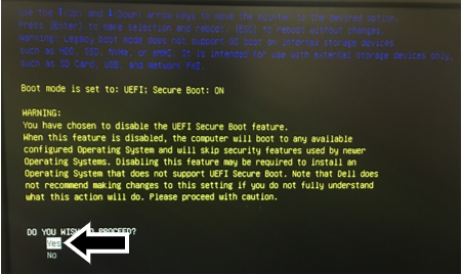
- Press Enter.
- Select Yes when asked DO YOU WISH TO PROCEED?
- Press Enter.
- Select Apply the Changes.
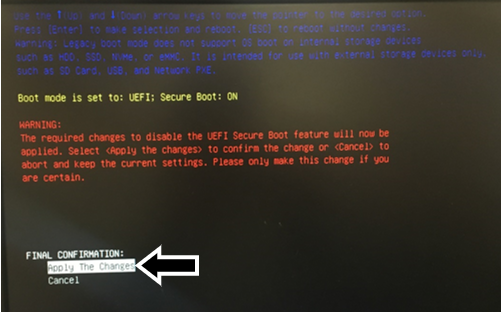
- Press Enter. The PC will restart.
- Refer to the latest System v7 software TB to confirm what Image version must be installed.
- Insert the Bootable USB drive with the Panther Image into one of the PC's front USB ports.
- Restart the PC.
- Press F12 while the PC is booting to access the Boot Menu.
- Select UEFI: Kanguru SS3 under UEFI Boot.
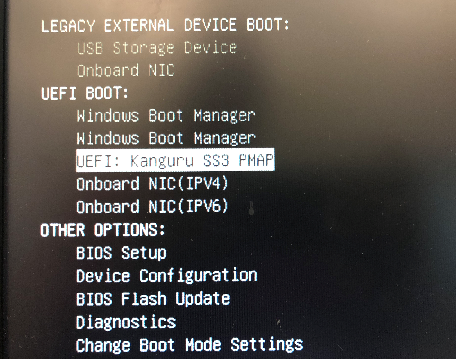
- Press Enter.
- The Imaging Tool application will be displayed.
- Select the UEFI/GPT radio button.
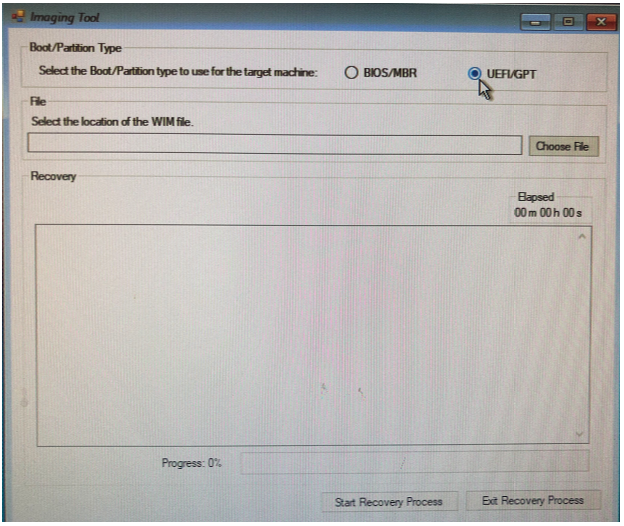
- Click on Choose File.
- Double click on This PC.
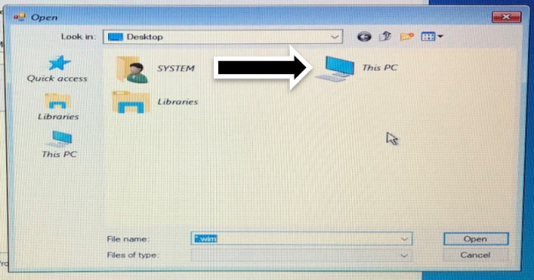
- Open the USB device containing the Panther Image.
- Select the Panther Image .wim file and click Open.
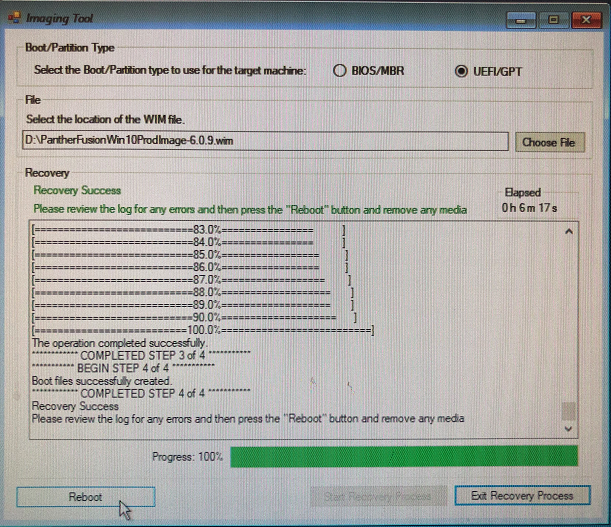
- Click on Start Recovery Process.
- Once the Progress reaches 100% (less than 10min), Click Reboot and Remove the Bootable USB Flashdrive.
- Press F12 during bootup to enter the BIOS menu.
- In the BIOS menu, Enable “UEFI Boot mode, Secure Boot ON”:
- Use the arrow keys to highlight Change Boot Mode Settings and press ENTER.
- Highlight UEFI Boot Mode, Secure Boot ON.
- Press Enter.
- Select Yes when asked DO YOU WISH TO PROCEED?
- Press Enter.
- Select Apply the Changes
- Press Enter. The PC will restart.
- After rebooting the PC boot will into Windows. Re-name the PC
- Right click on the Windows icon in the bottom left of the screen.
- Click System.

- Click Change Settings.
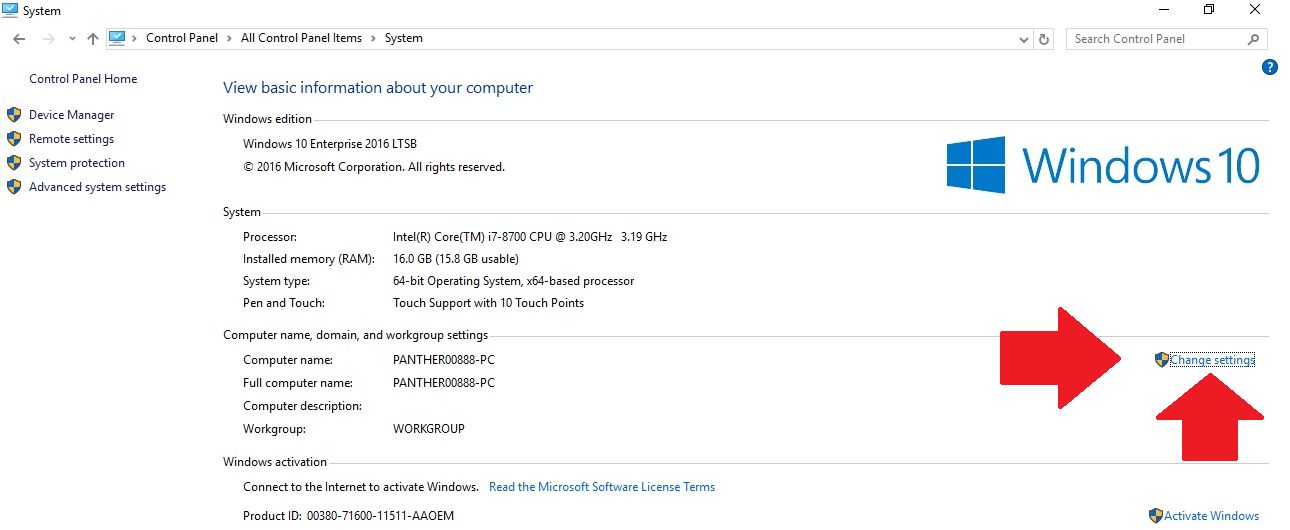
- From the System Properties Pop-Up, click on Change.
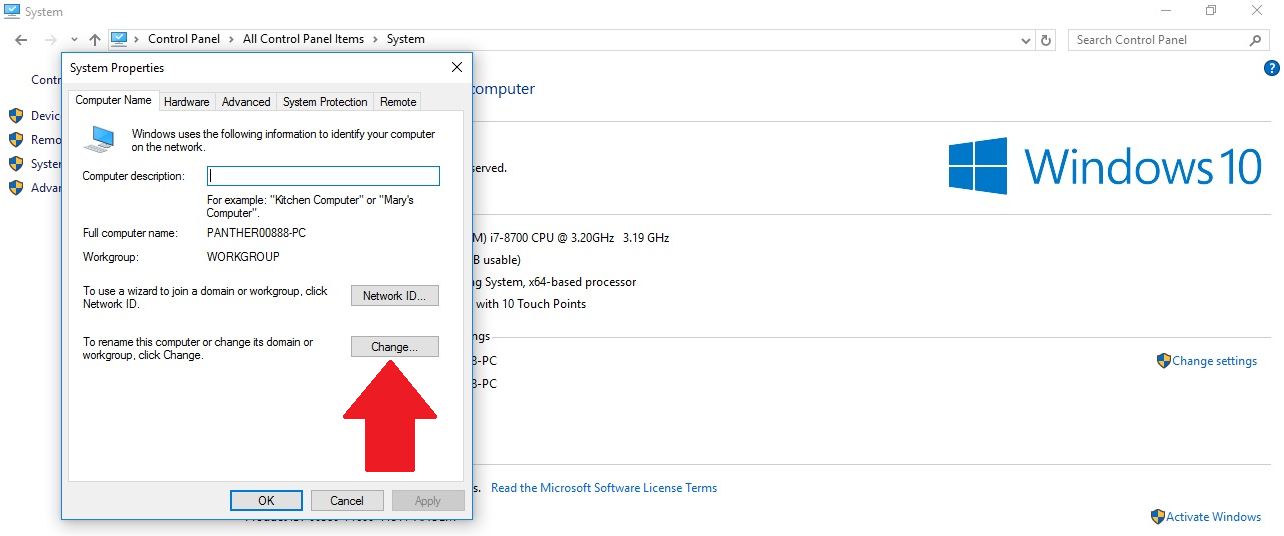
- In the Computer Name Field: enter the name of the Panther System in the following format:
PANTHERXXXXX-PC.
Where XXXXX is the Panther System serial number located below the main power switch. (Example full name: PANTHER00888-PC)
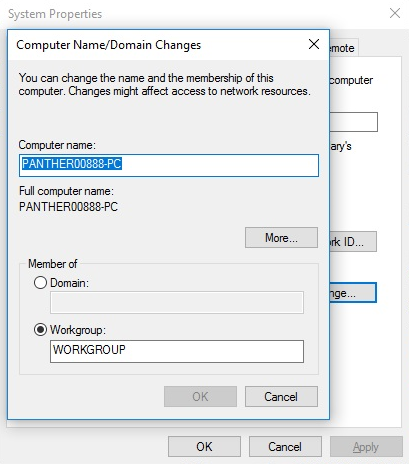
- Click OK and Click OK again.
- Affix the Win10 License sticker (Certificate of Authentication) onto the Panther PC (if not already present).
Click the  button at the top of the page to send feedback, comments, or change requests.