Parts and Materials Required
- VACUUM MUFFLER
Time Required
- 60 minutes
Removal Procedure
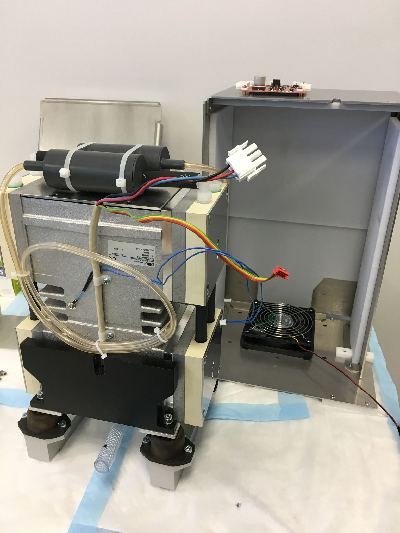
To replace the mufflers, the vacuum module must first be removed from the system, then the pump assembly must be taken out.
- Remove the vacuum module from the system.
 Remove the pump assembly. Follow Steps 1–6 of the Removal procedure in the Vacuum Module Pump Removal and Replacement procedure.
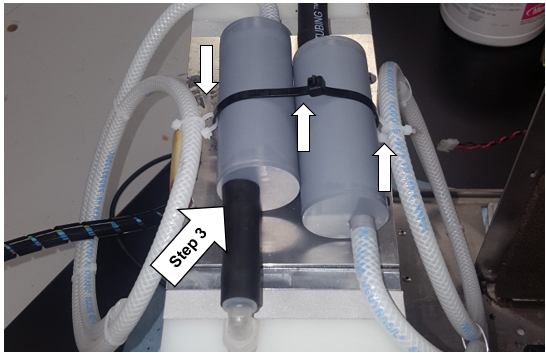
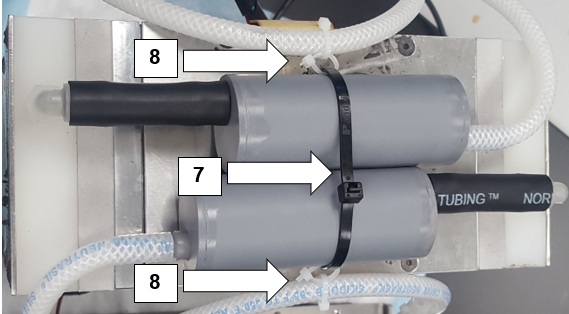
- Cut the cable ties that are holding the mufflers to tubing or the pump.

Note— Use the small arrows in the image below as a reference.
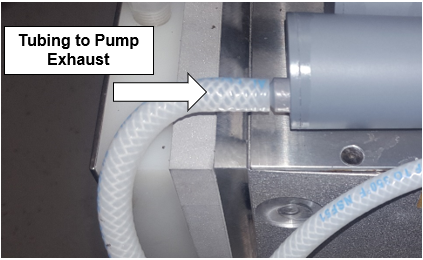
- Disconnect the old muffler from the tubing that connects it to the pump exhaust.
Note—The black tubing will be reused with the new muffler. - Discard the old mufflers.
Replacement Procedure
- Connect the free end of the coiled tubing to the end of each muffler.
-
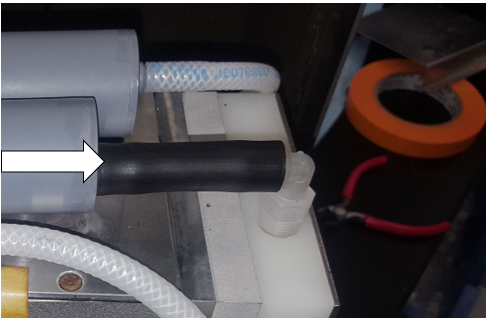
Attach the large fitting of each muffler to the black tubing that connects to the pump.
-
Bind the two mufflers together using a large cable tie.
Note—Do not over-tighten the cable tie and clip off the excess cable tie material once tightened. -
Use two smaller cable ties to attach each exhaust tube to the larger cable tie that binds the mufflers together. Secure one cable tie around coiled tubing and one around the large zip tie and interlock the two ties.
Note— Do not over-tighten the cable ties. Use the image below as a reference.
- Re-install the pump assembly. Follow Steps 5–10 of the Replacement procedure in the Vacuum Module Pump Removal and Replacement procedure.
 button at the top of the page to send feedback, comments, or change requests.