Vacuum Pump (Configuration 1) Wiring Inspection and Rerouting
Purpose
The purpose of this procedure is to provide instructions for inspecting the wiring on the Vacuum Pump Module and addressing any wiring damage or potential for damage.
Parts and Materials Required
- Proper PPE
- 2.5mm Allen Wrench
- 3mm Allen Wrench
Time Required
- 45 Minutes
Procedure
- Remove the Vacuum Pump Module.
- Place the Vacuum Pump Module on an absorbent pad on a workbench.
-
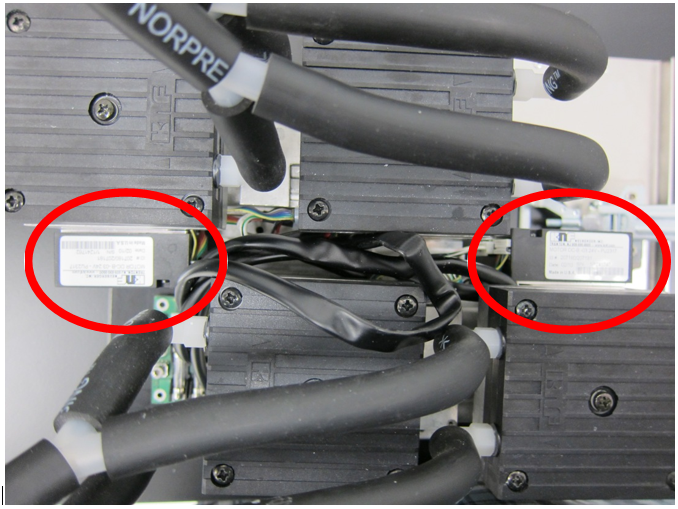
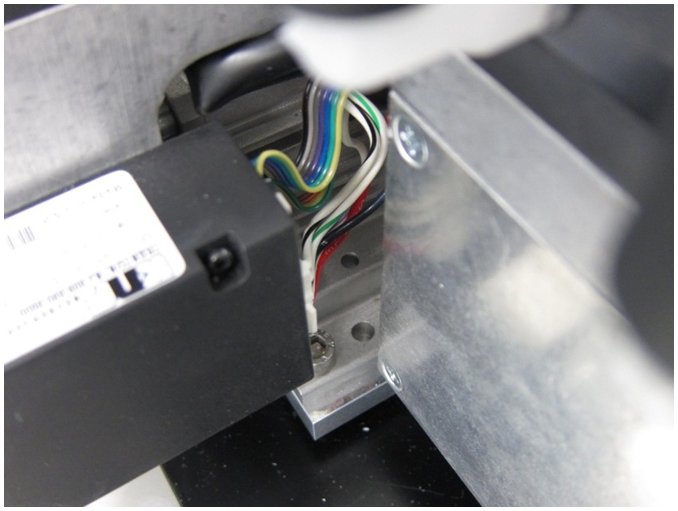
 Locate the pump controller module on each vacuum pump shown in the image below.
 - Locate the power wires exiting the controller modules shown below.

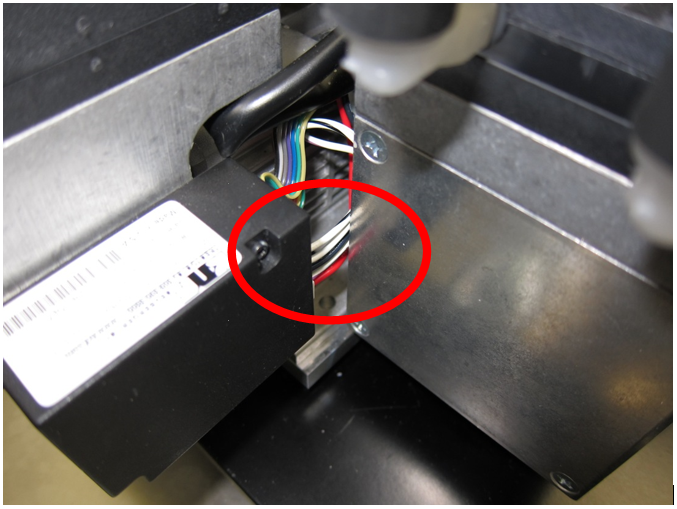
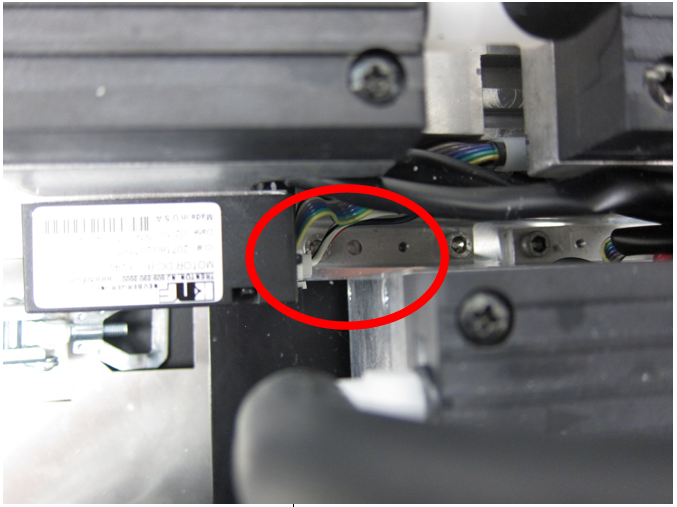
Note—The power wires may be in contact with the housing of the adjacent pump, which can damage the insulation of the wires. - Inspect all power wires for damage to the insulation.
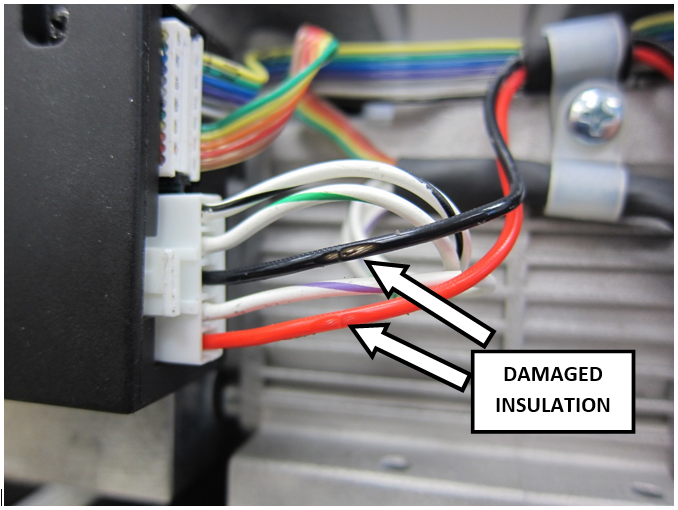
Note—If damage is present and the metal wire is exposed the Vacuum Pump Module must be replace.
Note—Minor abrasion to the insulation where the metal wire is not exposed is acceptable. 
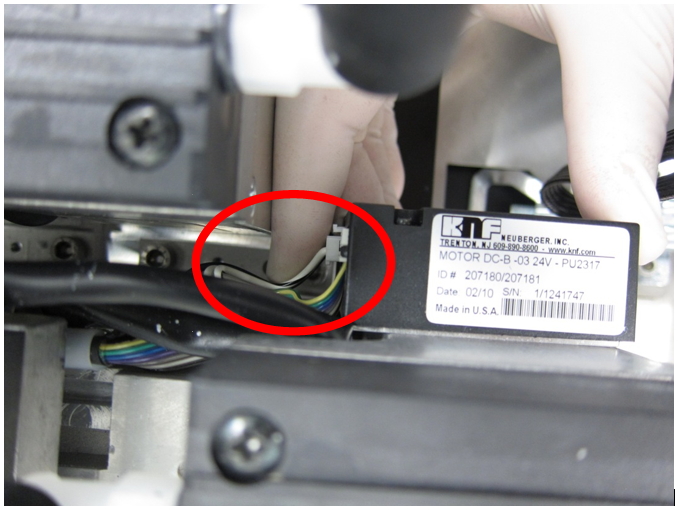
Caution— Replace both pumps if there is damaged insulation. - Route the wiring from the controller module connector so that the wires are away from the adjacent pump.
- Install the Vacuum Pump Module into the Panther System.
Verification
- Power on the Panther System and PC.
- Log in to the FSE shield.
- Open the Service Software.
- Initialize the Vacuum.
- Activate the Vacuum & Read the Vacuum pressure.
- Verify the vacuum is within specifications.
- Maintains a vacuum level between -203mbar and -270mbar
AND
- Maintains a vacuum pump speed above 1650RPM.
- Maintains a vacuum level between -203mbar and -270mbar
- Exit Service Software.
- Start Panther Main.
- Check Vacuum in Panther Main.
- PrimeOperation of pumping fluid through tubing to ensure proper and consistent fluid delivery (remove air from the tubing, etc.). the system.
- Verify the Vacuum is within Specification.
- Shutdown and restart the Panther System and PC in Customer Mode and return to customer.
 button at the top of the page to send feedback, comments, or change requests.