Molded TCR Carousel PCB Removal and Replacement
Parts and Materials Required
- 1.5 mm ball driver or Allen key
- 3 mm ball driver or Allen key
- 4 mm Ball driver or Allen key
- Thin flat head screwdriver
- Phillips screwdriver
- Molded Carousel PCB
Time Required
Removal Procedure
- Follow the removal procedure for the Molded TCR Carousel Barcode Scanner to gain access to the PCV. It is not necessary to remove the scanner from its mounting bracket.
- Remove the home sensor and motor connection from the PCB.
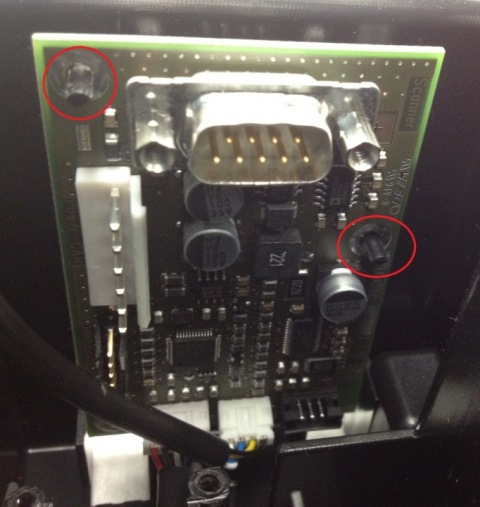
 Using your finger to push downwards, toward the motor and home sensor connection, pull the PCB off the tabs.
Replacement Procedure
- Attach the new PCB to the TCR Module.
- Connect the home sensor and motor cables to the PCB.
- Attach the scanner, ensuring the edges are square as described in the replacement procedure for the scanner.
- Connect the scanner cable to the PCB.
- Plug in the CAN cable.
- Re-install the TCR Module.
Alignment/Calibration
- Teach the Sample Pipettor to the TCR Carousel.
Verification
- Load a TCR bottle with at least 20 mL of saline in slot 1 of the TCR Carousel.
- Start up Service Software.
- Click the Pipettor tab.
- Initialize the Pipettors, TCR Carousel, Tip Drawers, and the Reagent Module.
- Click the Move tab.
- In the Right Arm box, select a tip tray position containing a tip and double-click the position to move the pipettor to that location.
- Click Pick in the Tip section under Right Arm.
- In the Right Arm box, select TCR Carousel and double-click position 1x1 to move the pipettor to this position.
- Click Bar in the LLD section under Right Arm.
- Ensure the tip goes into the bottle without hitting the sides of the bottle opening.
- Go to the Front and Loading Units tab.
- Click TCR Scanning.
- Scan position 1 and ensure you have a successful read.
Click the  button at the top of the page to send feedback, comments, or change requests.