Thermocycler Fiber Cleaner Nest Installation
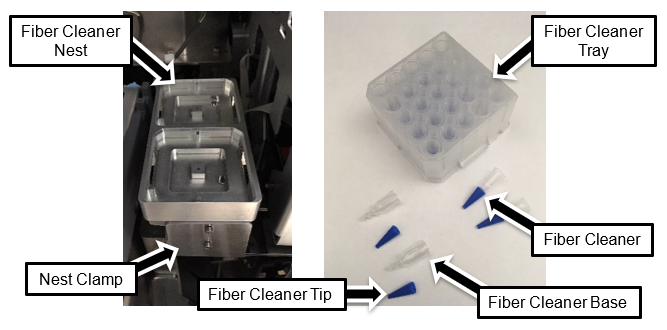
This procedure applies to any Panther Fusion System that does not have the Fiber Cleaner Nest installed. The Fiber Cleaner Nest is used to clean the wells located inside of the Thermocycler.

|
Note—The Thermocycler Fiber Cleaner Nest requires the Panther Fusion System to be running System Software v6.2.3.1 with Service Software v4.0.7.0 and Panther Fusion Teacher v1.0.15.0 or higher. |
This topic includes the following procedures:
Part A: Install the Fiber Cleaner Nest
Part B: Perform Pipettor Teaching
Parts and Materials Required
- Panther Tool Kit
- Thermocycler Fiber Cleaner Nest Upgrade Kit
 Thermocycler Fiber Cleaner Set of 5 Trays
Time Required
30 minutes to install the Fiber Cleaner Nest
Procedure
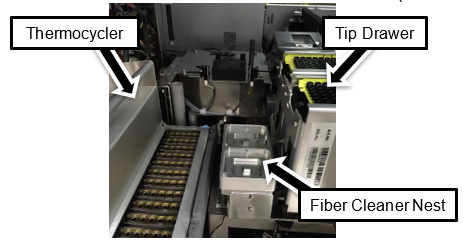
Part A: Fiber Cleaner Nest Installation
|
|
Note— |
- Note the following:
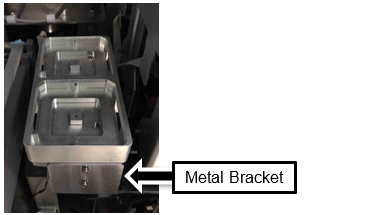
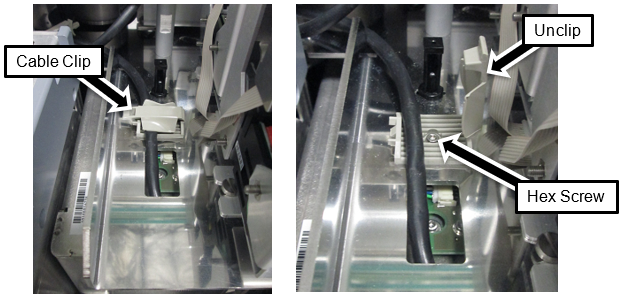
- Remove the bracket and the two bracket screws (2.5mm hex).
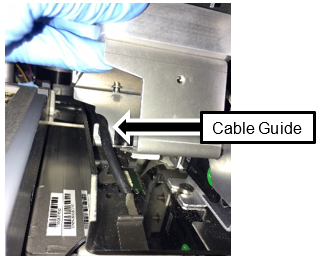
- Ensure the cable is routed through the cable guide and is not pinched. The holder should sit tight and flush with the frame.
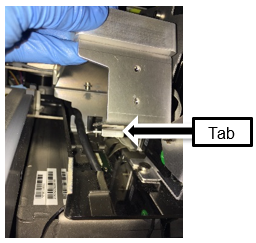
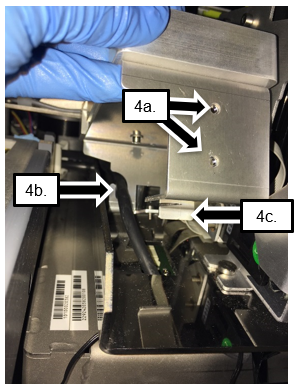
- Set the Fiber Cleaner Nest on the frame, with the Guide Tab in the rectangular hole.
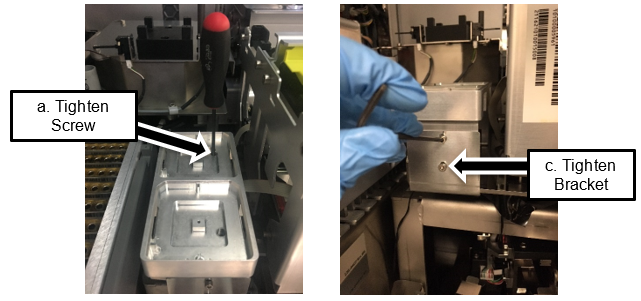
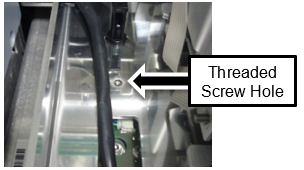
- Tighten the 2.5mm screw into the previous existing cable clip hole from the top of the holder.
- Slide the bottom lip of the bracket underneath the frame to hold the Fiber Cleaner Nest in place. Secure the Fiber Cleaner Nest to the Frame.
- Insert the bracket screws and loosely tighten. Shift the bracket upwards, while shifting the Fiber Cleaner Nest down, such that the bracket clamps the Fiber Cleaner Nest to the frame. Then tighten the screws.
Part B: Enabling Fiber Cleaner Nest in Fusion Teach Software
- Enabling Fiber Cleaner Nest in Fusion Teach Software
Note—Enabling Fiber Cleaner Nest in Fusion Teach software only applies to Fusion Teacher software v1.0.17.0 and is not required with Fusion Teacher software v1.0.18.0.
Part C: Automatic Teaching

-
Panther Fusion System Pipettor Teaching
Note—For Step2, only prepare a cap on the vial robot and teach the fiber nest cleaning location.
Part D: Enabling Fiber Cleaner Nest in the GUI
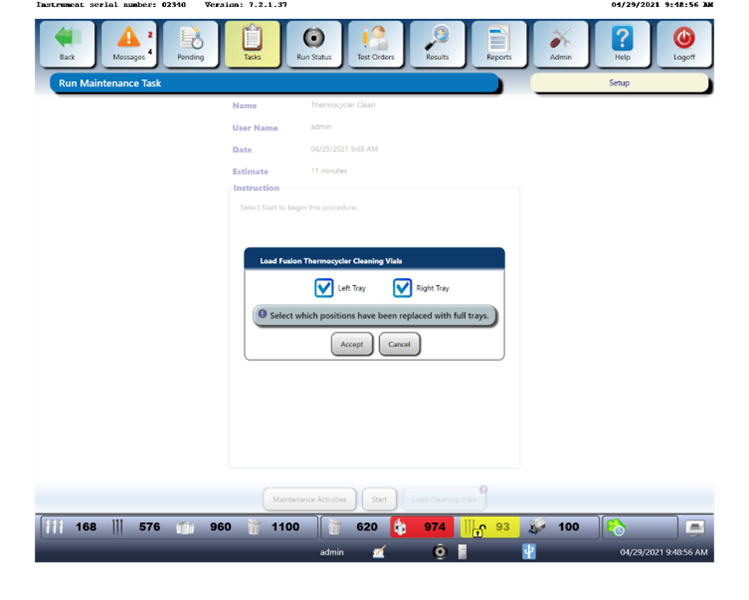
- Load two full cleaning nests. Select both the Left and Right trays and click Accept.
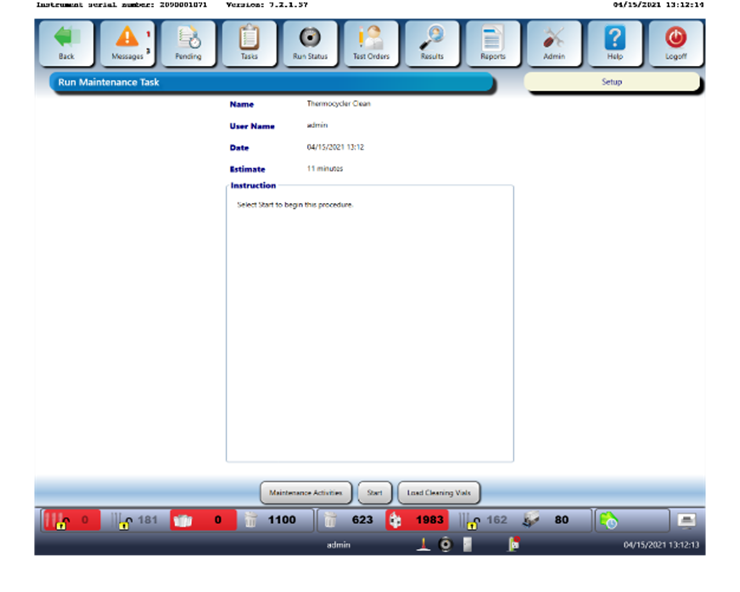
- Click on Maintenance Activities to exit the screen.

Complete a Thermocycler Scanning and Automatic Cleaning Instructions
 button at the top of the page to send feedback, comments, or change requests.