Parts and Materials Required
- High Temp Thermal Grease
- COOLING MODULE, TEMPERATURE SENSOR
Time Required
- 30 minutes
Removal Procedure
- Remove the Cooling Module from the system.
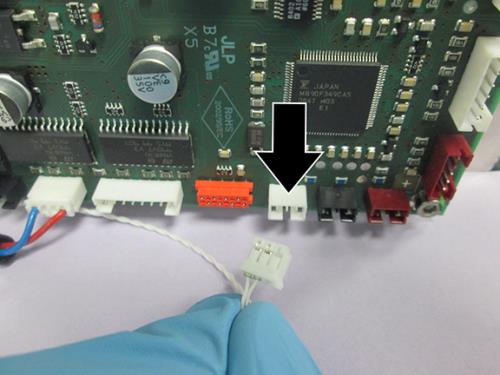
 Disconnect the Temperature Sensor cable from the PCB.
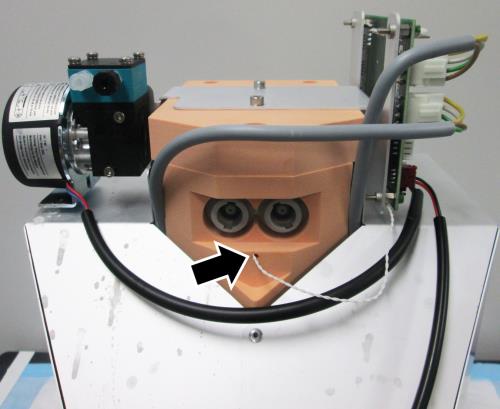
- Locate the other end of the Temperature Sensor, right below the inlet/outlet fluid connections to the reservoir.
- Carefully remove temperature sensor from the hole and discard. (The sensor is at a 90˚ angle inside the foam and must be carefully pulled out or the wire will break). DO NOT REMOVE the orange foam.

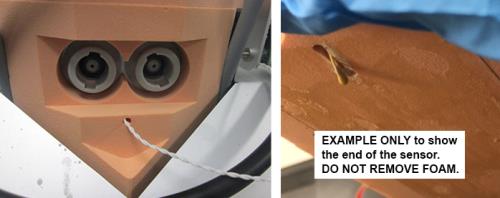
Note — The image on the right is provided only as an example to show the end of the sensor in the channel on the inside of the foam. DO NOT REMOVE the orange foam. It is glued onto the module and cannot be removed.
Replacement Procedure
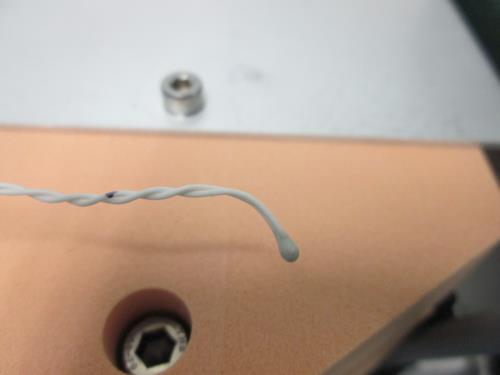
- Slightly bend the end of the sensor as shown and completely coat the end of the sensor with thermal grease.
- Insert the new temperature sensor into hole. Carefully slide it in until the end of the sensor touches the back and slides down into the channel on the inside of the foam. (The image on the right is provided only to show the sensor channel on the inside of the foam.) DO NOT REMOVE any of the orange foam.
IMPORTANT!—It is critical that the end of the sensor touches the back and then slides down into the channel. This ensures the sensor makes contact with the side of the reservoir to report accurate temperature readings. - Connect the new sensor to the PCB.
- Reinstall the Cooling Module.
IMPORTANT!—Use caution when re-assembling the cooling module. Do not pull on or put any pressure on the sensor wire so it remains positioned correctly in the foam until it is connected to the PCB.
Verification
- Verify the temperatures of the Sample Bay and Reagent Bay.
- Visually inspect the fluid height within the Cooling Module.
- Verify vacuum pressure is in range.
- Verify that the Universal Fluid Drawer opens, closes, locks, and unlocks.
- Verify that the Waste Drawer opens, closes, locks, and unlocks.
- Verify that the waste bag presence sensor operates.
- Verify Liquid Waste Bottle level sensing.
- Verify that the right side Panther System cooling fan functions properly.
 button at the top of the page to send feedback, comments, or change requests.