Pipettor DiTi Cleaning
When to Clean the DiTi
- Clean the DiTi, if excessive VVFS flags are generated (typically > 2.5% per 2000 tests)
Perform Pipettor DiTi Cleaning Procedure before replacing the pipettor. (Check the One-Day Health Report.) - cLLD
 Capacitive liquid level detection is susceptible to droplets on the walls of smaller reagent vessels (100 TK).
Use caution when handling to minimize droplets. - Incorrect TCRTarget capture reagent—An assay-specific reagent added as part of specimen pipetting. Carousel positioning can cause a tip to scrape the bottle opening as it enters.
This can create an LLD High event. Ensure TCR carousel teaching and bottle position are accurate. - Clean the DiTi, when troubleshooting issues related to capacitive level detection
Parts and Materials Required
- Proper PPE
- Panther Tool Kit
- Compressed Air
- Isopropyl Alcohol
- Lint-free cloth/wipes
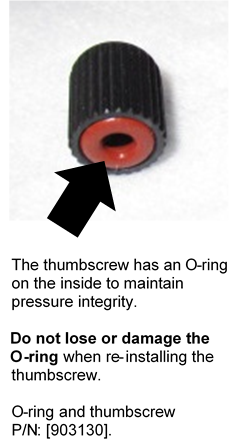
- (If required) O-ring and thumbscrew
Time Required
- 60 minutes
Procedure
Instructions to manually clean the Pipettor DiTi and DiTi Sleeve.
- Shutdown the Panther System and PC.
- Lay bench pad(s) under the pipettor arm to prevent parts from falling into the system.
- Manually move the pipettor above the bench pads.
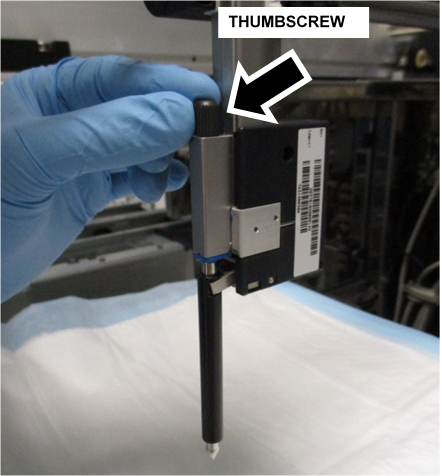
- Loosen and remove the pipettor thumbscrew.
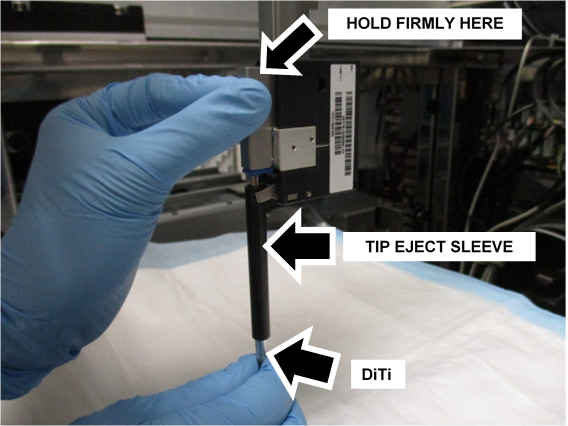
- Firmly hold the pipettor.
- Pull the DiTi down from the pipettor to remove the DiTi and the DiTi Sleeve.

Note—Raise the pipettor if necessary. - Clean the DiTi and the Tip-Eject Sleeve.
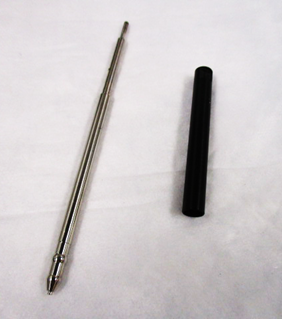
- Wipe the DiTi with isopropyl alcohol and a lint-free cloth/wipe.
- With compressed air, clear out dust and debris from the inside of the Tip-Eject Sleeve.
- Check the sleeve and internal bore of the DiTi are clear of debris and dust.
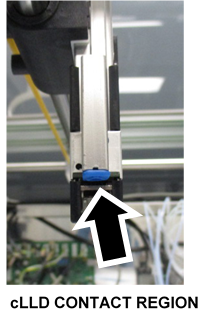
- Inspect and clean the cLLD contact.
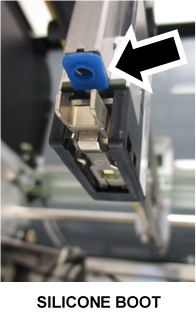
- Remove and clean the silicone boot.
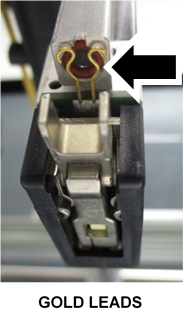
Note—Gently pull the silicone boot off the leads, taking care not to rip or tear the boot. - Gently clean the gold leads with isopropyl alcohol and a lint-free cloth/wipe.
- Allow to air dry prior to reassembly.
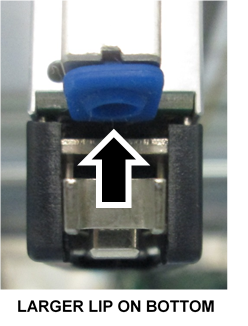
- Reinstall the silicone boot over the gold leads.
Note—Ensure the orientation of the silicone boot is correct. There is a small tab on the top, and the round lip on the bottom of the boot is noticeably larger on the bottom. - Position the DiTi Sleeve under the silicone boot so the notches slide back into the Tip Release Mechanism.
- Slide the DiTi back into place until the shoulder is flush with the silicone boot.
Note—Use caution when inserting the DiTi, there are O-rings that can be damaged if the DiTi is inserted incorrectly. - Reinstall and finger tighten the thumbscrew.
- Remove and discard the bench pads.

Verification
Complete a Pipettor Pressure Integrity Test for ALL Pipettors (that had their DiTi cleaned and DiTi sleeve replaced)
 button at the top of the page to send feedback, comments, or change requests.