Defragmentation Procedure on Windows 7
Parts and Materials Required
Time Required
- 30 minutes (may take more or less time dependent on the size of the PC hard drive and the degree of fragmentation of that hard drive).
Procedure
- From the FSE Shield, select Command Prompt.
- Enter Services.msc in the Command Prompt window.
 In the new window that appears, scroll down to Disk Defragmenter.
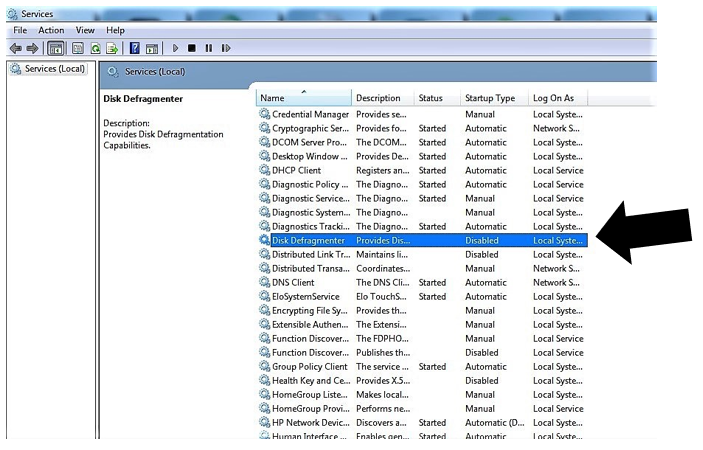
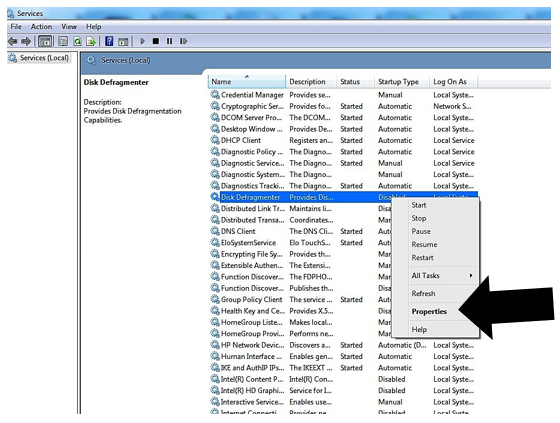
- Defragmentation will be disabled. Right-click the text that reads Disabled and select Properties from the drop-down list.
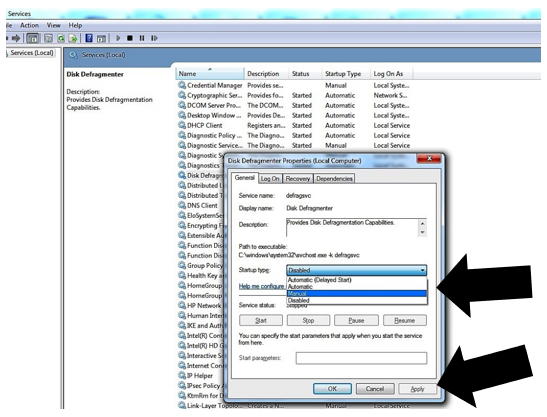
- From the Disk Defragmenter Properties pop-up, change Startup type from Disabled to Manual and click Apply.
- You can now run defragmentation.
- You can follow the procedures in Defragmenting the Panther System PC. Or you can run defragmentation from the already open Command Prompt window using the following steps:
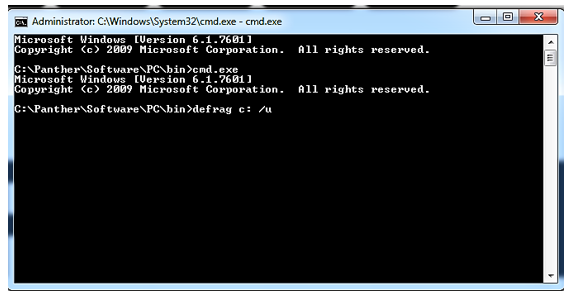
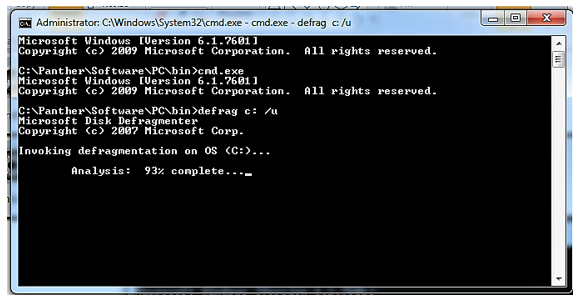
- At the Command Prompt, enter: defrag c: /u ("u" allows you to see the progress of the defragmentation process on the display).
 | Note—If Defragmentation will not run, restart the PC, repeat steps 1 through 7, and you should then be able to run defragmentation. |
- The defragmentation process is automatically performed. The process will first do an analysis of the hard drive.
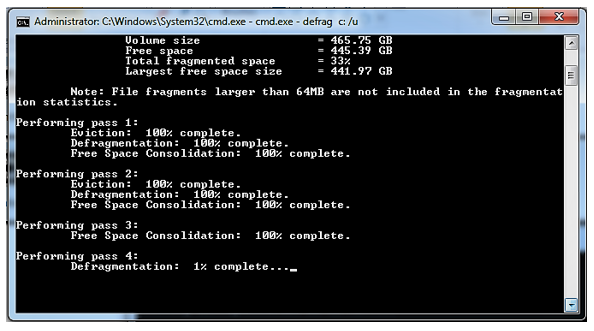
- When the analysis is complete, defragmentation begins and proceeds through multiple passes as noted on the display. The larger the hard drive and/or the greater the degree of fragmentation, the longer defragmentation will take.
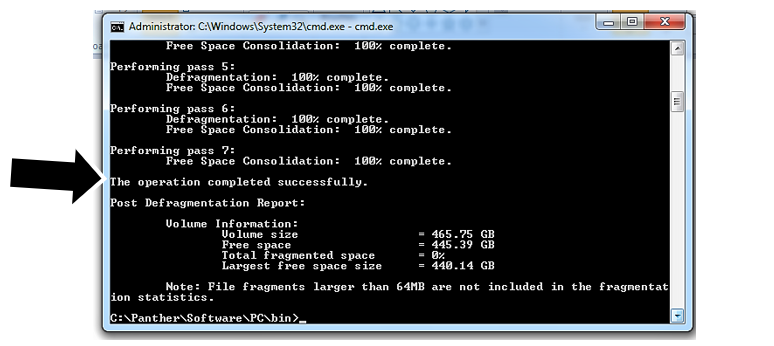
- When the process is complete, the message "The operation completed successfully" will be displayed.
- Once Defragmentation is completed, disable the Disk Defragmentation Service:
- Starting from Step 1 in this procedure, repeat steps 1 through 4.
- At Step 5 change Startup Type: from Manual to Disabled and click Apply.
Verification
- As per Step 7d:
When the defragmentation is complete, the message "The operation completed successfully" will be displayed.
Click the  button at the top of the page to send feedback, comments, or change requests.