Distributor Alignment to the MTU Barcode Scanner
Parts and Materials Required
Time Required
- Put on proper PPE.
- Remove the Luminometer Injector.
- Carefully open the Service Drawer.
- Using Service Software, initialize Distributor and Input Queue.
- Open the Input Queue drawer and load at least one .
- Retrieve the MTU from the input Queue with the Distributor.
 On the Distributor tab, select Sledge, MTU Barcode and then double-click Move Theta & Z & X to selected position (!!fast move!!).
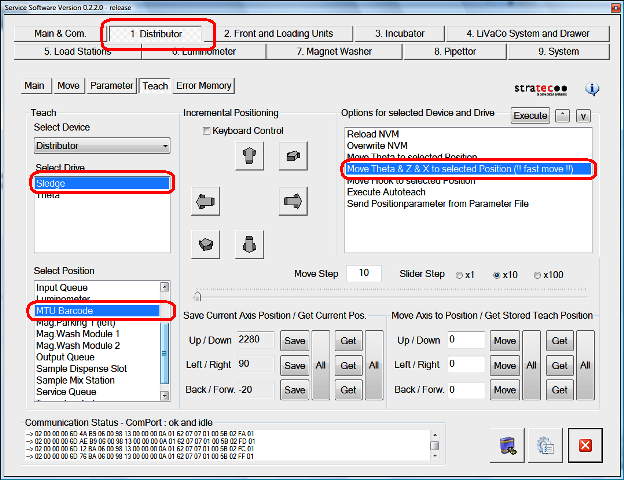
The Distributor moves the MTU in front of the MTU scanner.
- Slide open the Input Queue drawer.
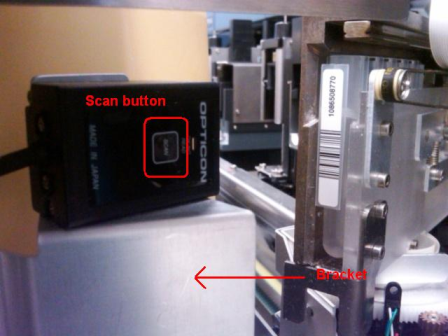
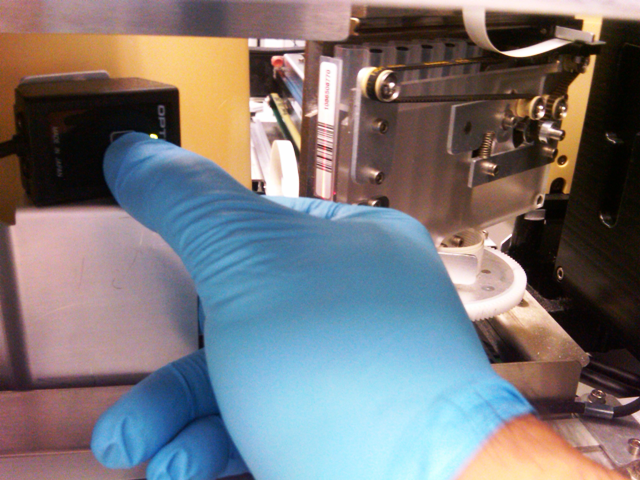
- Press the Scan button to determine where the laser projects in relation to the MTU barcode label.

|
Note—When selecting Scan, make sure to hold the bracket mount. Otherwise, the laser might shift toward the direction of the AMP Incubator and possibly mislead the Service Engineer. |
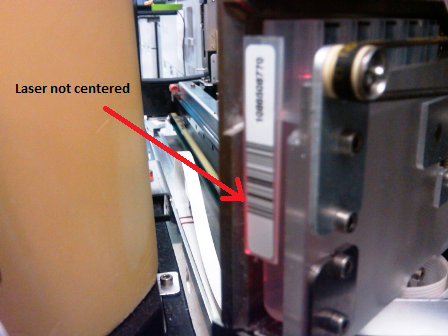
- Adjust the Distributor until the laser is centered.
|
|
Note—Adjust the Distributor until the laser is centered by adjusting the x-axis position only. |
|
|
Note—If you make any adjustments to the distributor alignment, make sure to save the parameters and overwrite non-volatile memory (NVM). |
- Complete steps 1-7 of the Distributor Alignment to the MTU Scanner Using the Scanner Scan Button to Activate the Laser procedure.
- In Service Software, select the 2. Front and Load Units tab, Main tab, and then select Read Code.
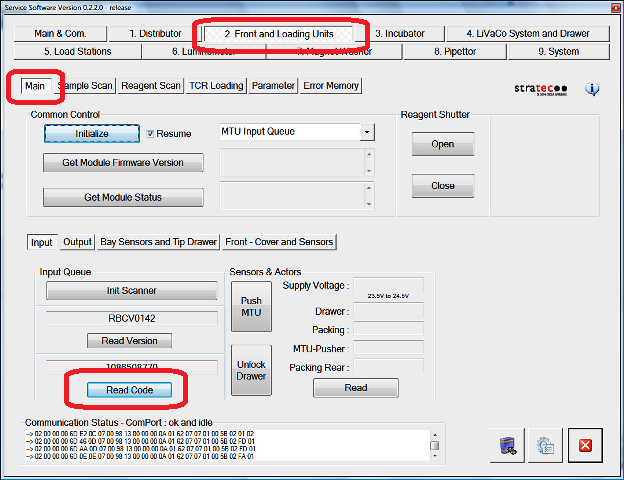
After you select Read Code, a Service Software prompt appears.
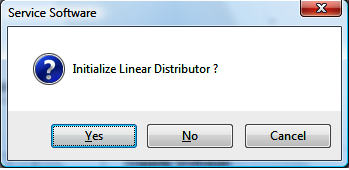
- Select Yes.
The Distributor moves the loaded MTU in front of the scanner, the MTU is scanned, and the Distributor returns to its initial position.
- Make sure the scanner laser scans in the middle of the MTU label. Otherwise, Distributor adjustment may be required.
Verification
- Pick MTUs from the Input Queue and make sure that MTUs are properly scanned.
- the system through the GUI.
Click the  button at the top of the page to send feedback, comments, or change requests.