Parts and Materials Required
- Panther Tool Kit
- VACUUM PUMP, MODULE
Time Required
- 30 minutes
Removal Procedure
- Put on proper PPE.
- Power down the Panther System.
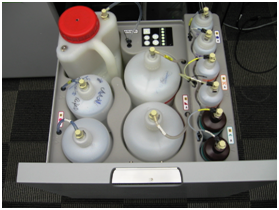
 Open the Universal Fluid Drawer.
Note—It is not necessary to remove or disconnect all the fluid bottles to perform the procedure. Note—It is also not necessary to remove the front cover of the Universal Fluid Drawer. If left in place, find a box or similar object to provide some support when the drawer is removed from the rails. - Remove the Universal Fluids Drawer as shown below:
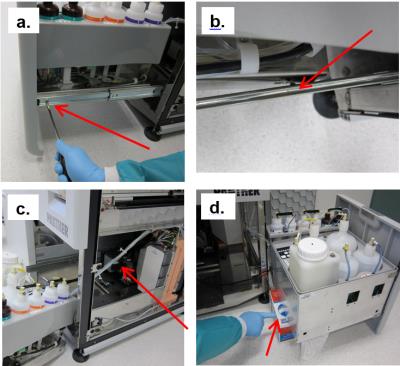
- Free the drawer from the slides in the front (left side and right side) by twisting each front tab up with a flathead screwdriver.
- Supporting the drawer, push the slides back. Then pull drawer forward to unhook from back horizontal tabs.
- Turn the drawer to the side and move out of the way. Do not stretch or strain any tubing.
- Set the drawer on an appropriately-sized supporting object. (If front cover was removed, the drawer can sit flat on the floor.
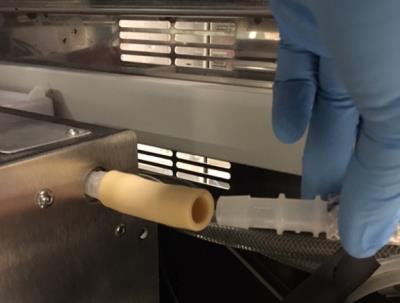
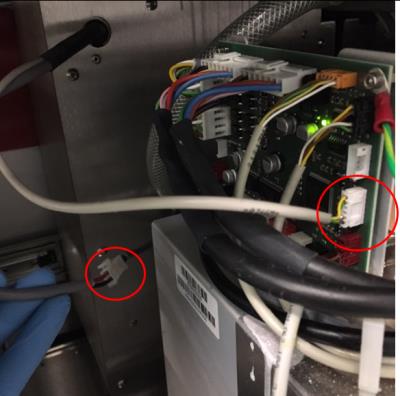
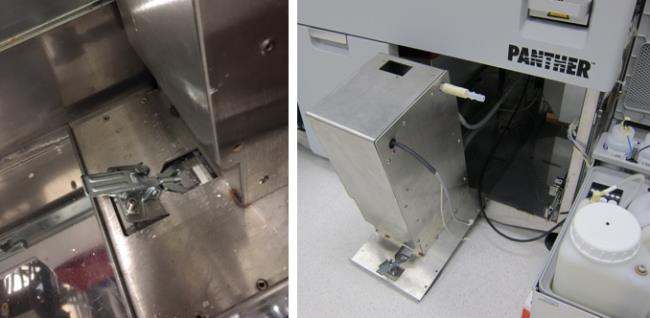
- Disconnect the vacuum tube from the side of the module and the cable that is connected to the Cooling Module PCB.
- Remove the module from the system by unlatching and unhooking the latch from the base. Then pull module forward by sliding it out the system.

Caution—This module is very heavy and can be difficult to carry out. Do not lift by vacuum fittings. Be aware from any cables and other parts near you when pulling out.
Replacement Procedure
- Reverse the Removal Procedure.
 button at the top of the page to send feedback, comments, or change requests.