Parts and Materials Required
- Absorbent pads
- Allen wrench, 2.5 mm
- Allen wrench, 3 mm
- Long flat head screwdriver
- UNIVERSAL FLUIDS DRAWER
Time Required
- 30 minutes (without verification—60 minutes with verification)
Removal Procedure
- Put on proper PPE.
- Power down the Panther System.
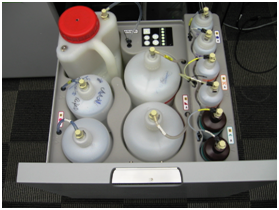
 Locate the Universal Fluid Drawer.
- Remove all fluid bottles from the Universal Fluid Drawer.
- Slide the Universal Fluid Drawer open as far as possible.
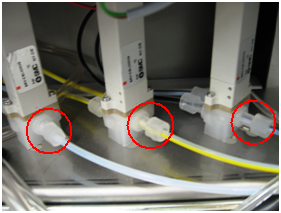
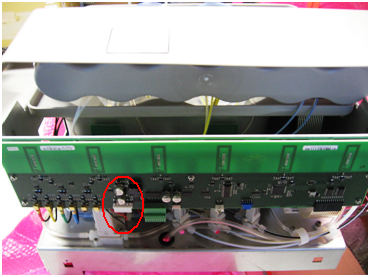
- Disconnect the Auto Detect 1, Auto Detect 2, and Oil fluid lines from each solenoid valve outlet (fluid lines that lead to the pumps). Use an absorbent pad to catch any fluid that drains from the disconnected lines..
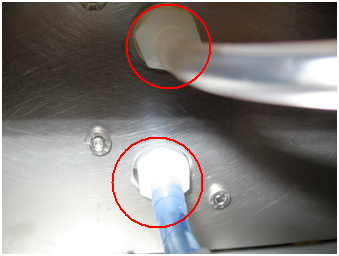
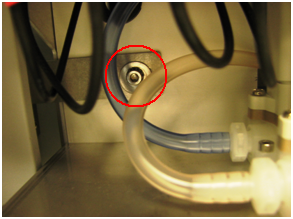
- Disconnect the two fluid lines underneath the Universal Fluid Drawer by pulling the tubing off the barb.
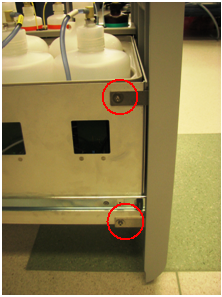
- Remove the Universal Fluid Drawer door panel by removing the three 3 mm screws from the sides of the Universal Fluid Door.
- Unplug the Universal Fluid Drawer power cable.
- Remove the three 4 mm screws and retaining anchors securing the power cable and tubing.
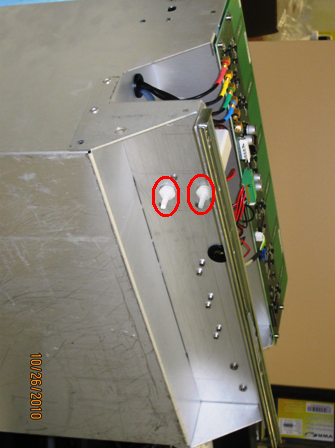
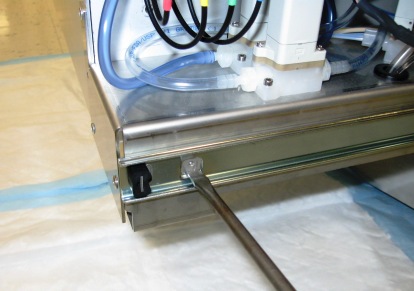
- The drawer is secured to the slides by a total of 4 mounting tabs, two on each side. Locate the front tabs of the linear slide mount. Lift the drawer up while pushing the slide downward to disengage the slide from the drawer. This may require considerable force. Alternatively, you may insert large flat-head screwdriver into the gap and twist to pry the drawer free as shown in the following picture..
- Remove the drawer from the rear slide tabs by pulling the drawer forward and pushing the slide back.
- Remove the Universal Fluid Drawer.

Note—If the module will be returned, clean the module.
Replacement Procedure
- Reverse the Removal procedure.
- Run Instrument Setup.
|
|
Note—Adjust the front cover so that it aligns properly and flush with the other system front covers. |
Verification
- Start up the Procleix Panther System and PrimeOperation of pumping fluid through tubing to ensure proper and consistent fluid delivery (remove air from the tubing, etc.). the system (see the Panther System Operator's Manual).
- Inspect for leaks around the valve fittings.
 button at the top of the page to send feedback, comments, or change requests.
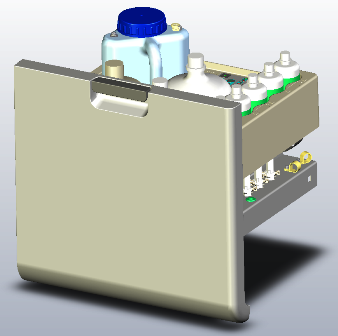