Molded TCR Carousel Motor Removal and Replacement
Parts and Materials Required
- 5.5 mm wrench or nut driver
- 1.5 mm ball driver or Allen key
- 3 mm ball driver or Allen key
- 4 mm ball driver or Allen key
- Molded Carousel Motor
Time Required
Removal Procedure
- Put on proper PPE.
- Power down the Panther System.
- Ensure that the Sample Pipettor is out of the way, so that it will not be damaged.
 Using a 4 mm ball driver or Allen key, unscrew the two mounting bolts at the front of the module.

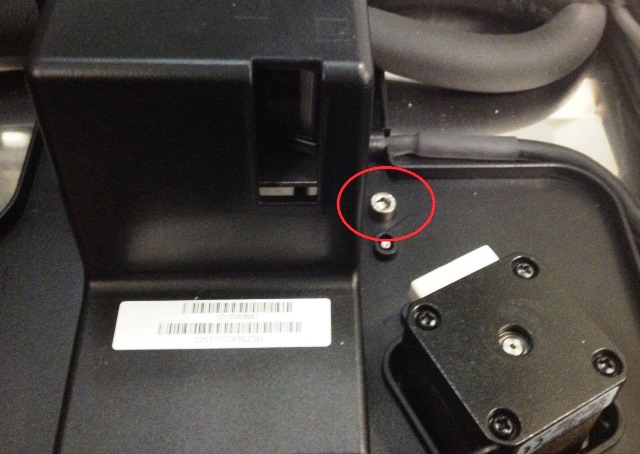
- Using a 4 mm ball driver or Allen key, unscrew the mounting bolt near the scanner housing.
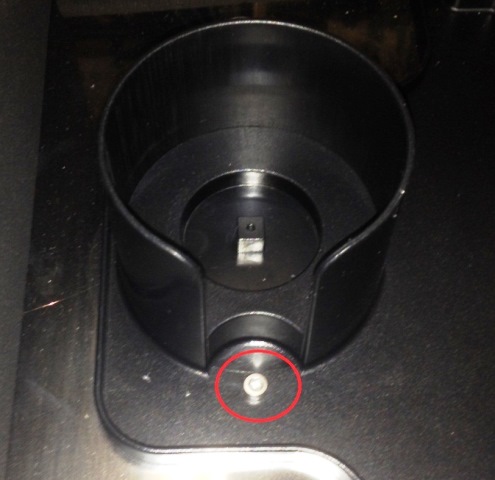
- Using a 3 mm ball driver or Allen key, unscrew the mounting bolt near the Endozime cup.
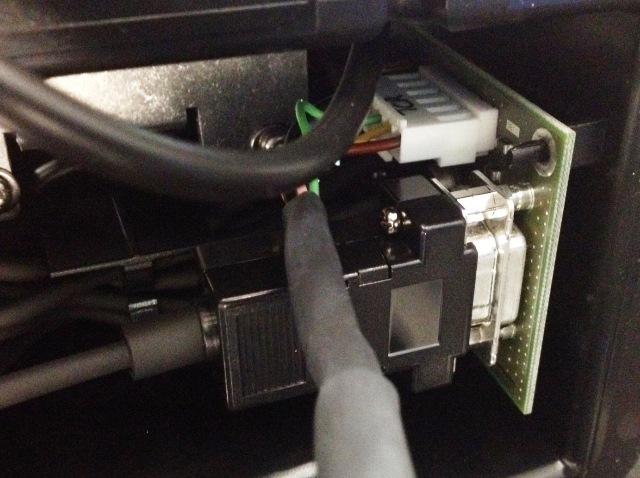
- Locate the TCR Carousel PCB in the scanner housing and unplug the CAN cable that goes from the TCR Carousel to the COP.
- Pull the TCR Carousel out of the system.
- Place the TCR Carousel upside down on a bench top.
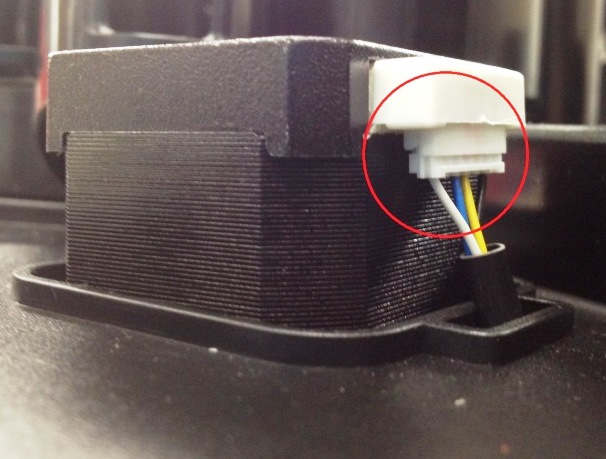
- Remove the motor control cable.
- Using a 3 mm ball driver or Allen key, loosen the belt auto-tension bracket.

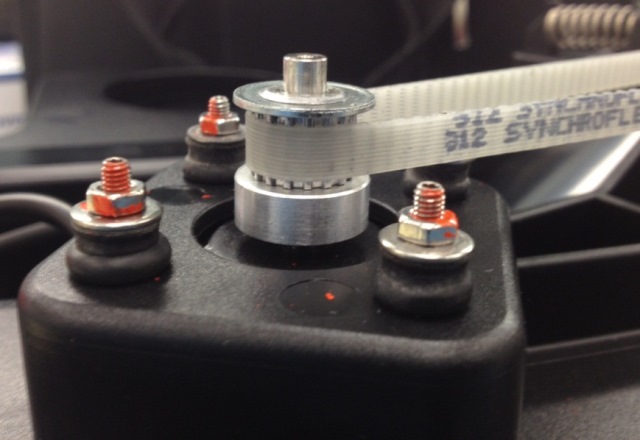
- Using a 5.5 mm wrench or nut driver, remove the four nuts securing the motor and keep them for the replacement motor.
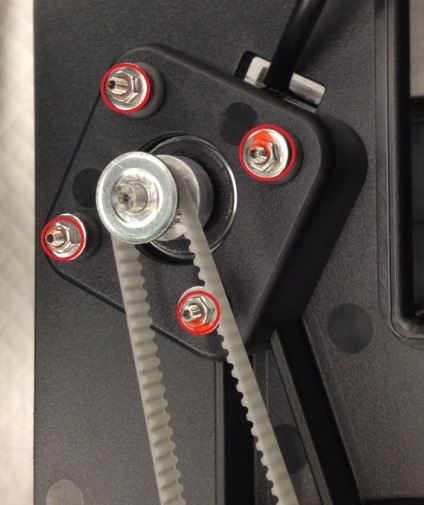
- Pull the motor out of the mount while also removing the belt. The belt is tough to remove when the motor is fully seated in the mount. It is best to remove the motor fully from the mounting, allowing you to remove the belt.
- Remove the four rubber grommets and keep them for the replacement motor.
- Using a 1.5 mm ball driver or Allen key, remove the four standoffs from the motor and keep them for the replacement motor.

Replacement Procedure
- Using a 1.5 mm ball driver or Allen key, insert the four standoffs onto the replacement motor.
- Place the four rubber grommets onto the standoffs.
- Attach the motor control cable, orienting the connector towards the back of the TCR Module.
- Insert the motor into the mount while also connecting the drive belt.
- Using a 5.5 mm wrench or nut driver, secure the four nuts onto the standoff. Tighten until the motor feels secure. Do not over-tighten as this could damage the rubber grommets.
- Place the belt over the auto-tension bracket and using a 3 mm ball driver or Allen key, secure the auto-tension bracket.
- Ensure the TCR Module rotates smoothly.
- Plug in the CAN cable.
- Reinstall the TCR Module.
Alignment/Calibration
- Teach the Sample Pipettor to the TCR Carousel.
Verification
- Load a TCR bottle with at least 20 mL of saline in slot 1 of the TCR Carousel.
- Start up Service Software.
- Click the Pipettor tab.
- Initialize the Pipettors, TCR Carousel, Tip Drawers, and the Reagent Module.
- Click the Move tab.
- In the Right Arm box, select a tip tray position containing a tip and double-click the position to move the pipettor to that location.
- Click Pick in the Tip section under Right Arm.
- In the Right Arm box, select TCR Carousel and double-click position 1x1 to move the pipettor to this position.
- Click Bar in the LLD section under Right Arm.
- Ensure the tip goes into the bottle without hitting the sides of the bottle opening.
Click the  button at the top of the page to send feedback, comments, or change requests.