Inspecting and Replacing Canopy Door Shocks
Over time, the gas shocks that hold up the Canopy doors will begin to lose their strength.
This procedure explains how to verify the shocks' performance and if the shocks need to be replaced.
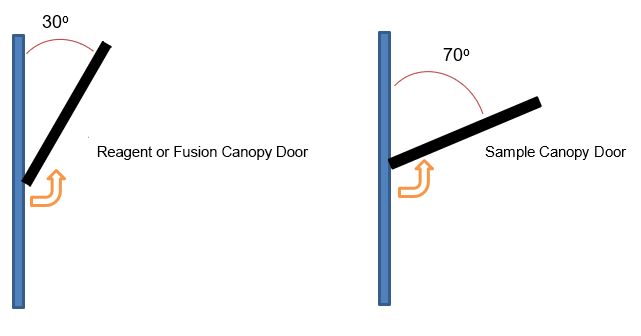
A gas shock is considered functional if it holds the Reagent or Fusion Canopy Door open at an angle of 30° from the top of the Front Canopy Cover.
With the Sample Canopy Door, the shock is considered functional if it holds the door open at an angle of 70° from the top of the Front Canopy Cover.
Parts and Materials Required
- Proper PPE
- Flat-head Screwdriver
- Metric Ruler
- Replacement Canopy Door Shocks (If replacement is needed)
- Shock Compression Tool
- 2 mm Hex Key
Time Required
- 15 Minutes
Procedure
Part A: Inspect the Door Shocks
- Put on proper PPE.
- Shutdown the Panther System and PC.
- Open both the Reagent and Sample Canopy doors.
- Unscrew the 2 screws securing the clear Pipettor Gantry cover using a 2mm Hex key.
- Remove the Pipettor Gantry cover.
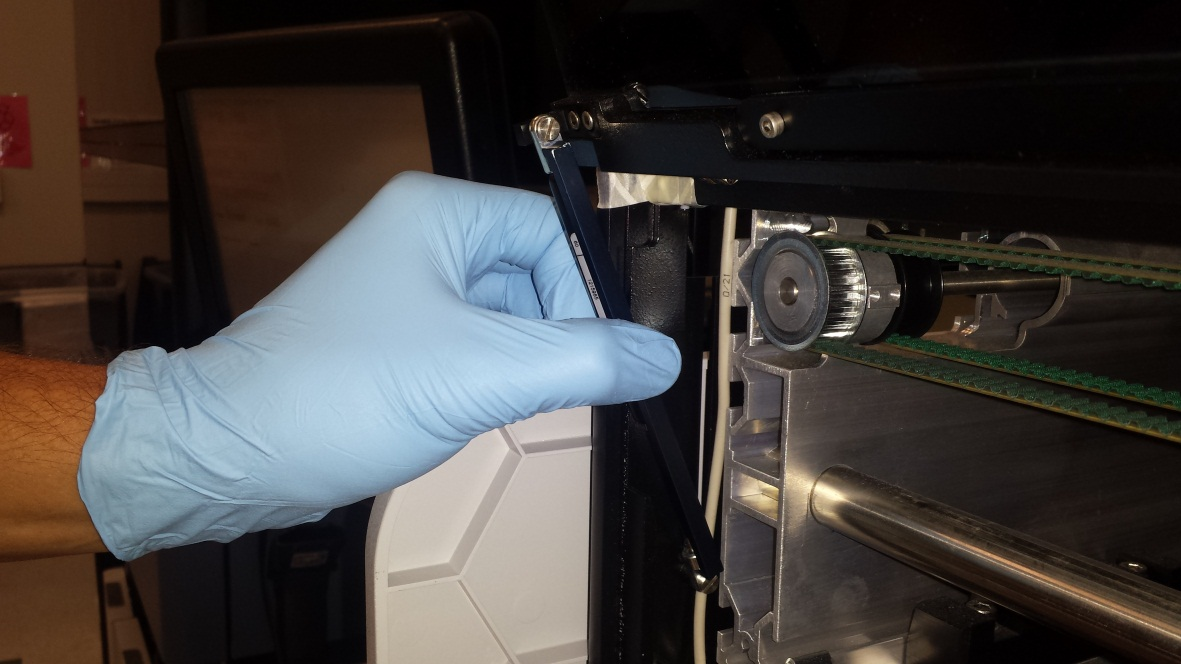
- Pull the Reagent Canopy Door downwards until it reaches the farthest position at which the shock can hold it open.
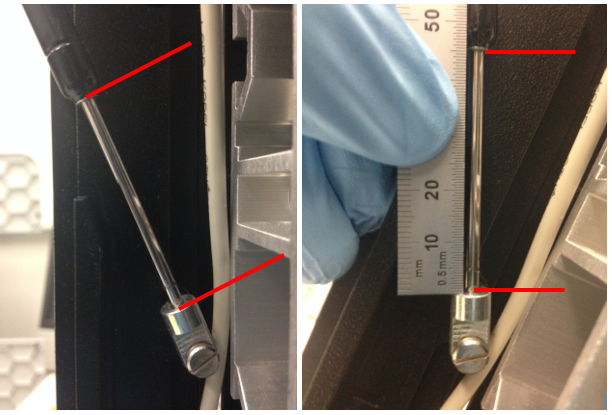
 Use a metric ruler measure the distance between the two lines shown below.
- If the distance measured is greater than 46mm, replace the Reagent Canopy Door Shock by following the instructions in Part B.
- Close the Reagent Canopy Door.
- Repeat steps 6 and 7 with the Sample Canopy Door.
- If the distance is greater than 26mm replace the Sample Canopy Door Shock by following the instructions in Part B.
Part B: Replace the Door Shocks
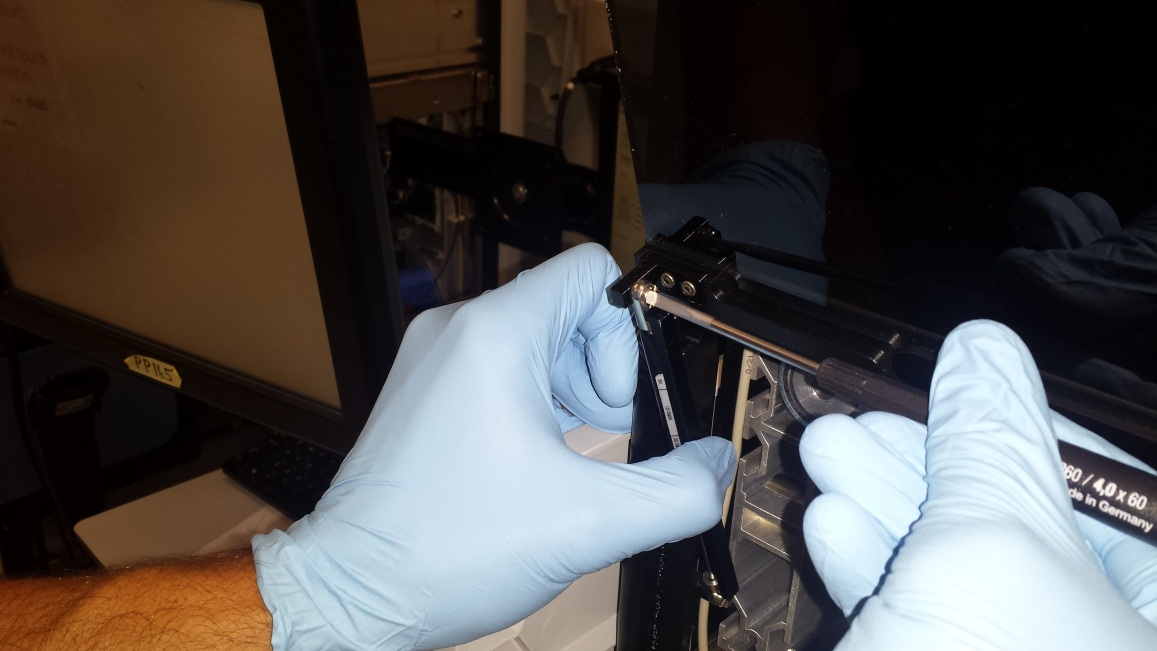
- Place the Shock Compression Tool onto the Canopy Door Shock.

Note—You will need to pull the Canopy Door down slightly to place the tool onto the Canopy Door Shock. - Unscrew the top of the shock from the Canopy Door using a flat-head screwdriver.
Note—Use caution as the Canopy Door will now fall freely. - Unscrew the bottom of the shock from the side cover frame.
- Air Springs Removal and Replacement Procedure

 button at the top of the page to send feedback, comments, or change requests.