Cisco 5506 Hardware Setup after Firewall has Been Configured
- Set the Cisco ASA 5506 firewall in a central location near the customers network port and electrical power.
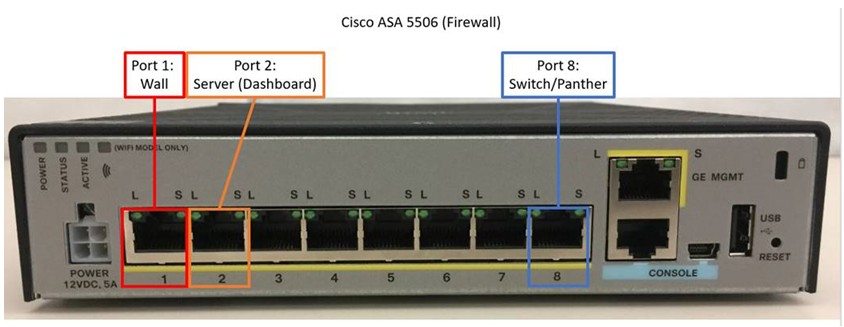
- Connect the Firewall to a power outlet.
- Connect an Ethernet cable from the customers network port to Port 1 of the Cisco ASA 5506 Firewall.
- If installing a Dashboard Server, connect an Ethernet cable from the Server to Port 2 of the Firewall
- If only ONE Panther is being networked, connect Port 8 of the Cisco ASA 5506 Firewall to the Ethernet Port of the Panther PC
- If multiple Panthers are being networked:
- first connect Port 24 of the SG112-24 Cisco Switch to Port 8 of the Cisco ASA 5506 Firewall.
- then connect all Panthers to the switch starting at Port 1 to Port 16.

Note—The order/port does not matter.
- On the FSE laptop in which the firewall was configured on, open the instructions.txt file.
- Setting a Panther IP Address on the Panther Workstation provided from the instructions.txt file.

Caution—It is important to remember which IP address is assigned to each instrument. - On each Panther, configure the LIS Port Number with its respective number.
Note—LIS Port numbers are mapped to specific Instruments/Panther IP addresses.
 button at the top of the page to send feedback, comments, or change requests.