RDxM and LIS Configuration Capture
Parts and Materials Required
- Panther System PC
- USB memory stick or USB external hard drive
Time Required
Procedure
- Insert the USB external hard drive or USB memory stick into the Panther System PC.
- From the FSE Panther Shield software, launch the Panther Dashboard software.
 Navigate to the NIC Configuration tab on the right side of the Panther Dashboard software screen.
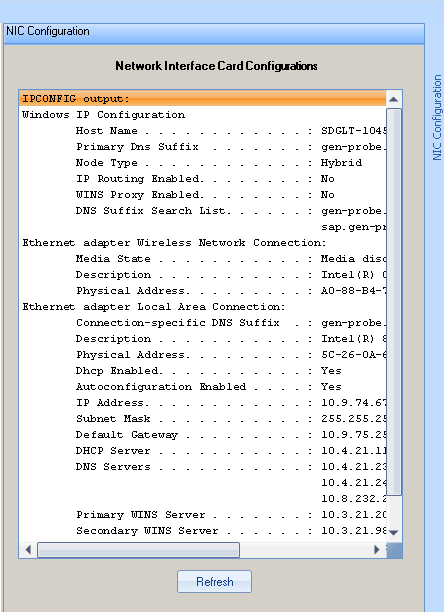
- Print or capture the Network Connectivity information.
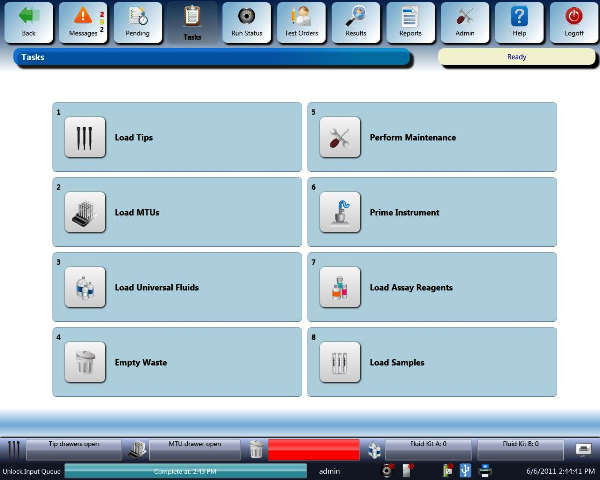
- Launch the Panther System main assay software and log in as an Admin User.
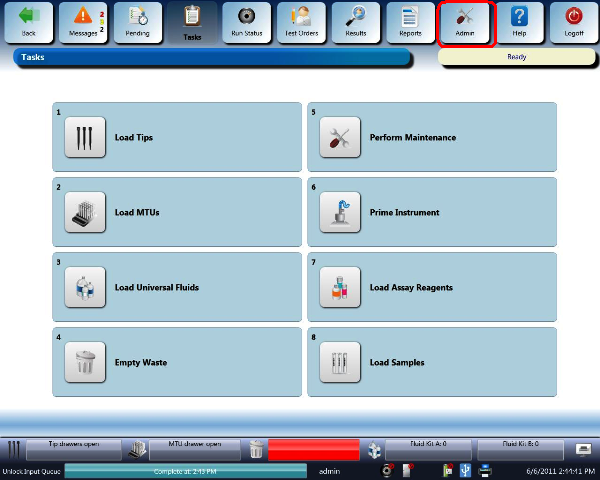
- Select Admin.
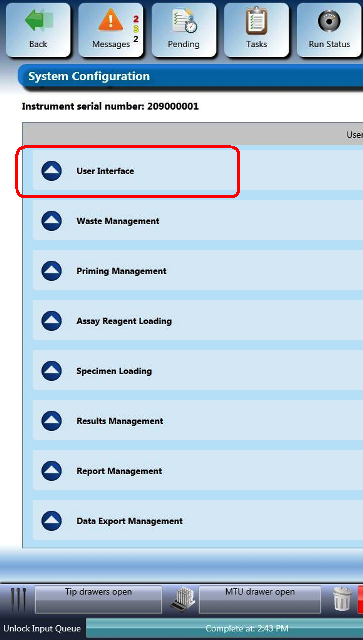
- Select System Configuration.

RDxM Configuration Capture
- Select the User Interface drop-down menu.
- Print or capture the User Interface configuration by saving a screen shot of the User Interface fields to the USB memory stick. Name the image Screen Shot, User Interface-RDxM.

| |

|
Screen Shot, User Interface-RDxM will be used during the RDxM Configuration procedure. |
LIS Configuration Capture
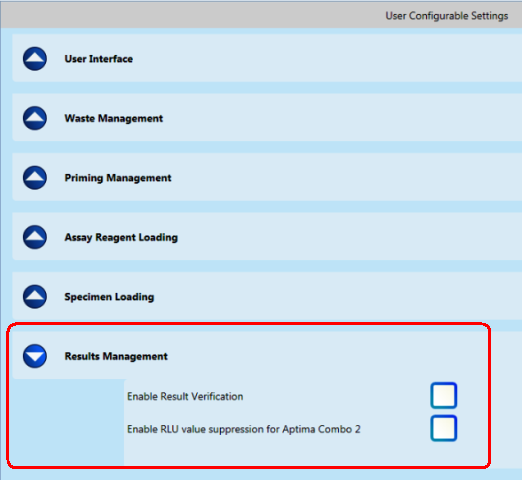
- Select the Results Management drop-down menu.
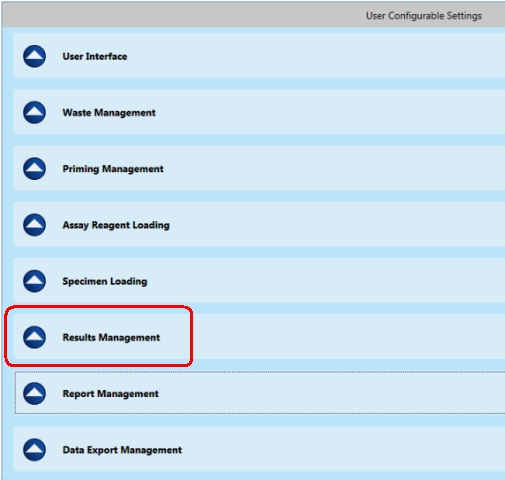
- Print or capture the Results Management configuration by saving a screen shot of the Results Management fields to the USB memory stick. Name the image Screen Shot, Results Management-LIS.
|
|
Screen Shot, Results Management-LIS will be used during the LIS Configuration procedure. |
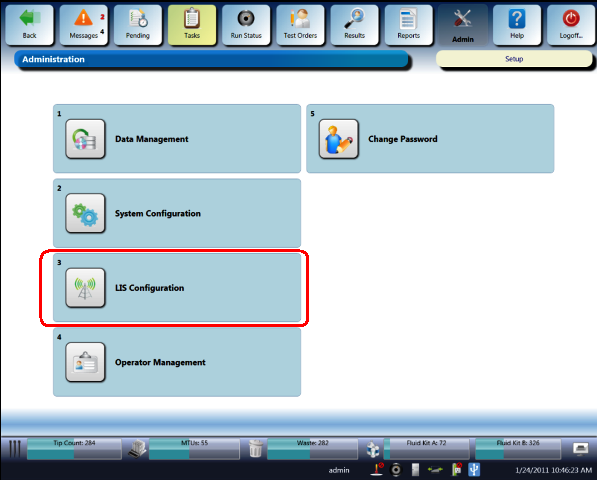
- Select Admin.
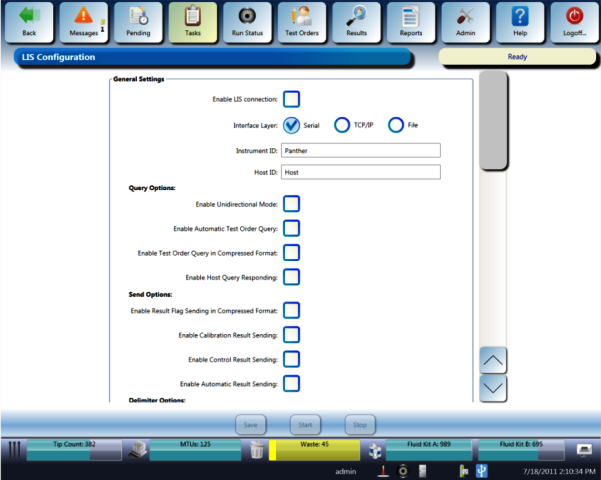
- Select LIS Configuration.
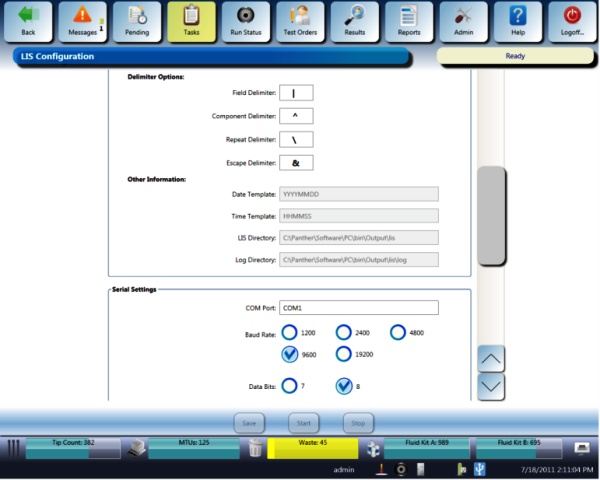
- Print or capture the LIS Serial Configuration by saving a screen shot of this page to the USB memory stick. Name the image Screen Shot, LIS Serial-Screen1.
|
|
Screen Shot, LIS Serial-Screen1 will be used during the LIS Configuration procedure. |
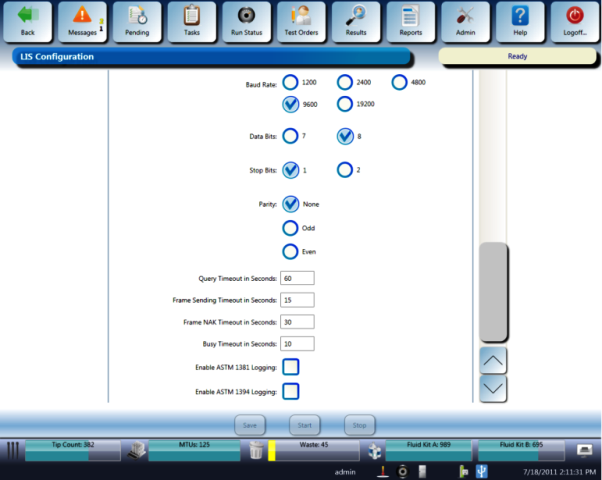
- Scroll down the page to capture the second screen shot for LIS Serial Configuration. Print or capture the configuration by saving a screen shot of the fields to the USB memory stick. Name the image Screen Shot, LIS Serial-Screen2.
|
|
Screen Shot, LIS Serial-Screen2 will be used during the LIS Configuration procedure. |
- Scroll down the page to capture the third screen shot for LIS Serial Configuration. Print or capture the configuration by saving a screen shot of the fields to the USB memory stick. Name the image Screen Shot, LIS Serial-Screen3.
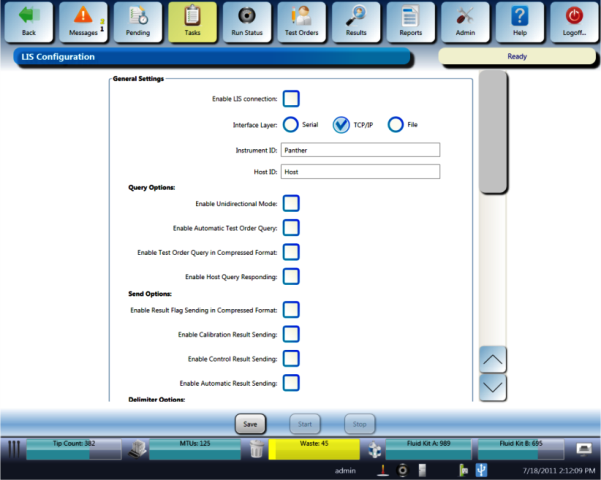
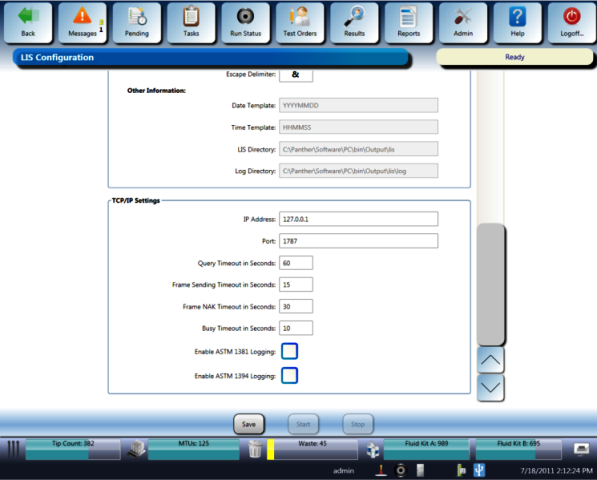
- Navigate to the TCP/IP section and capture the LIS TCP/IP Configuration by printing or saving a screen shot of this page to a USB memory stick. Name the image Screen Shot, LIS TCPIP-Screen1.
|
|
Screen Shot, LIS TCPIP-Screen1 will be used during the LIS Configuration procedure. |
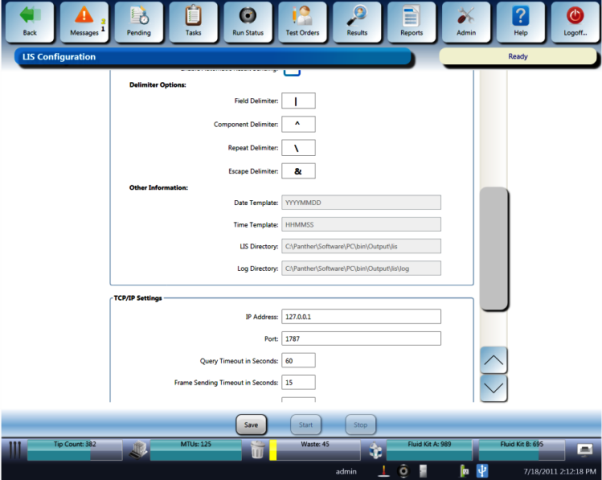
- Scroll down the page to capture the second screen shot for LIS TCP/IP Configuration. Print or capture the configuration by saving a screen shot of the fields to the USB memory stick. Name the image Screen Shot, LIS TCPIP-Screen2.
|
|
Screen Shot, LIS TCPIP-Screen2 will be used during the LIS Configuration procedure. |
- Scroll down the page to capture the third screen shot for LIS TCP/IP Configuration. Print or capture the configuration by saving a screen shot of the fields to the USB memory stick. Name the image Screen Shot, LIS TCPIP-Screen3.
|
|
Screen Shot, LIS TCPIP-Screen3 will be used during the LIS Configuration procedure. |
- Close the Panther System main assay software.
Click the  button at the top of the page to send feedback, comments, or change requests.