Installing Panther Remote Dashboard Software
Parts and Materials Required
- Panther System PC
- Panther Remote Dashboard Software (not to be confused with Panther Link Dashboard)
Time Required
- 10 minutes

|
Read the entire procedure first before beginning the installation process. |
Procedure
- Power down the system.
- Ensure that the Panther Remote Remote Dashboard software is not running.
- Insert the disk labeled Panther Remote Remote Dashboard Software into the CD drive.
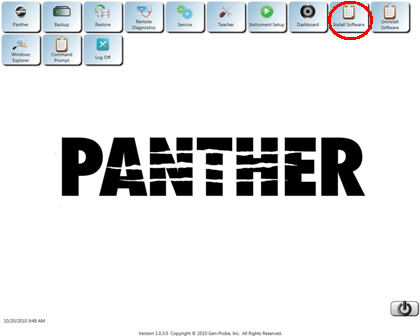
- Log in to the Panther FSE Shield software.
 Select the Install Software icon.
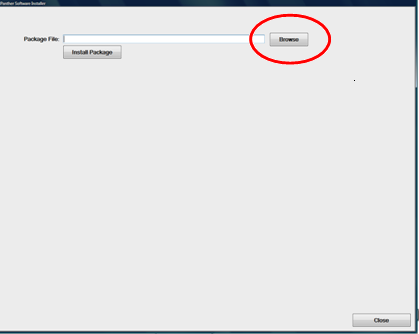
A Panther Software Installer dialog box appears.
- Select Browse.
- Navigate to the CD drive and select the .gpz file.
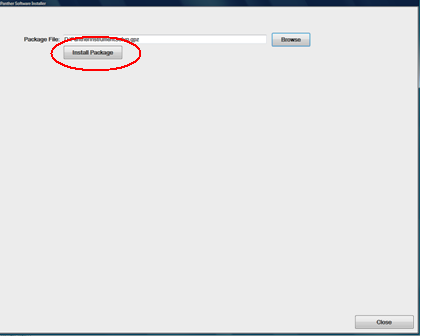
- Select Install Package.
The CD-ROM will start flashing and reading the installation file. - Select Install.
A status bar at the bottom of the screen shows the progress of the installation.
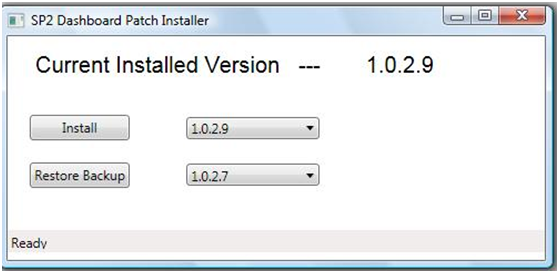
If the installation is successful, the following messages appear:
- Remote Remote Dashboard Version X.x.x.x is restored …
- Remote Remote Dashboard Version X.x.x.x is installed …
Verification
- After running the installer, ensure that the new version number displays on the Remote Dashboard Patch Installer screen.
- Launch the Panther Remote Dashboard software and verify that it starts up correctly.
- Select the About menu on the left side of the Panther Remote Dashboard software screen and verify that the new version number displays.
- After verifying a successful installation, click the X located in the top right corner of the screen to close the Remote Dashboard Patch Installer.
- If the Panther Remote Dashboard software either freezes or displays an error message on start-up, then the installation failed. Repeat the installation procedure.
- If the Remote Dashboard software still does not start up, capture screen shots of any error messages and contact Technical Support.
|
|
Notes on the Remote Dashboard Patch Installer Screen
|
 button at the top of the page to send feedback, comments, or change requests.