BIOS Configuration Procedure
Parts and Materials Required
Time Required
- 10 minutes
Procedure
 On a Dell OptiPlex XE for Image v3.0.11 (Win Vista)
- Shut down and reboot the Panther System PC.
- Press F12.
- Scroll down to BIOS Setup.
- Press Enter.
- Scroll down to Boot Sequence.
- Press Enter.
The Boot Device Menu screen appears.

Note — If the Boot Device Menu is locked, complete the following steps to unlock it: - Tab to highlight the Unlock button.
- Press Enter.
- Enter gpservice in the input field.
- Press Enter.
- Using the Tab key, navigate to the right screen and clear the following checkbox options by pressing the Enter key:
- Onboard or USB floppy drive
- Onboard or USB controller USB CD-ROM
- Onboard network controller
- Onboard USB device
- Tab to Apply and press Enter.
- Scroll down to Security.
- Press Enter.
- Scroll down to administrator password.
- Tab over to the New Password field.
- Press the Num Lock key and the Caps Lock key to turn them off.
Note — Ensure LEDs on the keyboard over Num Lock and Caps Lock are off. - Enter gpservice in the New Password and Confirm New Password fields.
- Tab over to OK and press Enter.
- Scroll down to Post Behavior.
- Press Enter.
- Scroll down to Numlock LED.
- Tab over to uncheck Enable Numlock LED.
- Tab to Apply.
- Press Enter.
- Tab to Exit and press Enter.
The PC reboots.
- When prompted in the upper right corner of the Dell OptiPlex XE screen, press F12 to enter into BIOS.
- Confirm the Administration Password control access.
The Boot Device Menu screen appears.
- Scroll down to System Setup and press Enter.
- Tab to highlight the Unlock button.
- Press Enter.
- Enter gpservice in the input field.
- Tab to OK and press Enter.
- Tab to Exit and press Enter.
- Shut down and reboot the PC and system.
- Continue to Resetting the PC Clock and Date.
On a Dell OptiPlex XE2 for Image v3.0.11 (Win Vista) and Image v5.7.1 / v5.8.3 (Win 7)
- Restart the Panther System PC.
- Press the F12 key when the boot process begins.
- On the Boot Screen, use the arrow keys to select BIOS Setup.
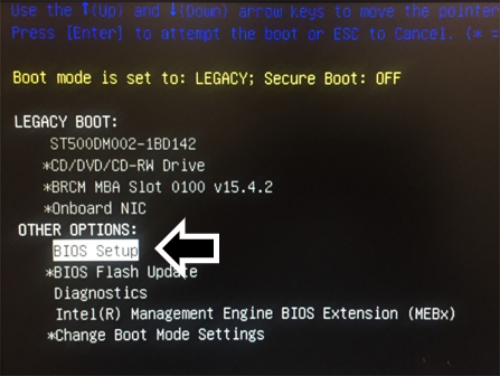
- Press Enter and the Dell OptiPlex XE2 BIOS Configuration window appears.
Note — If the BIOS Menu is locked: - Click the Unlock Button (at the bottom of the screen).
- Enter "gpservice" in the input field and click Enter.
If "gpservice" is accepted, proceed to Step 5.
If "gpservice" is NOT accepted as a password, you will have to reset the BIOS password. Refer to Resetting the BIOS password on an XE2
- Select Boot Sequencein the General section on the left of the BIOS Configuration window.
- Only the hard drive, shown in the following figure as ST500DM002-1BD142, should be checked.
Note — The name of the hard drive will vary from system to system. Uncheck (clear) all other options under Boot Sequence. 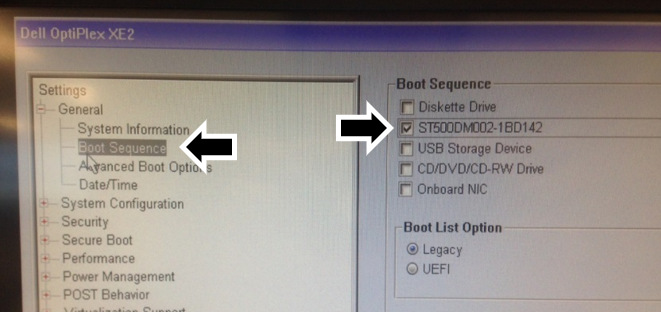
- Expand the POST Behavior section in the left-hand pane.
- Select Numlock LED. Uncheck the Enable Numlock LED option in the right pane.

- Expand the Security section in the left-hand pane.
- Select Admin Password.
- Enter gpservice as the password in both the New password and Confirm password fields in the right pane.
NOTE — ENSURE THAT NUM LOCK IS TURNED OFF when entering the new password. - Click OK.
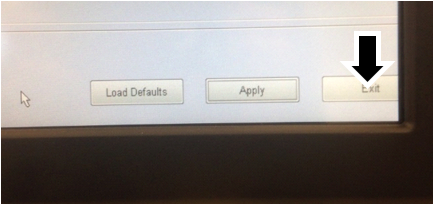
- Click Exit to reboot the Panther System PC.
- On initial boot up USB drivers will auto-install.
- After USB drive installation, reboot the PC.
- Continue to Resetting the PC Clock and Date.
On a Dell OptiPlex XE2 OR a Dell OptiPlex XE3 for Image v6.0.13 (Win 10)
- Restart the Panther System PC.
- Press the F12 key when the boot process begins.
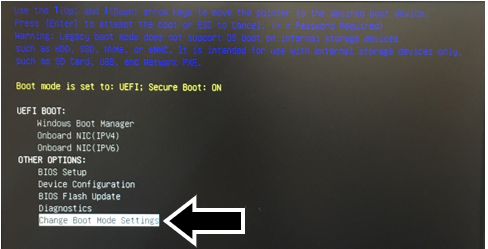
- Set the Boot Mode to: UEFI; Secure Boot: OFF.
- Confirm the current Boot Mode Setting.
(In the example below the Boot Mode is set to: UEFI; Secure Boot: ON, listed in yellow)- If the UEFI; Secure Boot is ON, proceed to Step 5
- If UEFI; Secure Boot is OFF, this procedure is complete.
- Use the arrow keys to highlight Change Boot Mode Settings.
- Press Enter.
- When offered "CHANGE BOOT MODE TO:" select UEFI Boot Mode, Secure Boot OFF.
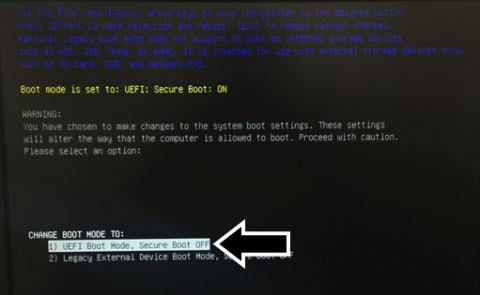
- Press Enter.
- Select Yes when asked DO YOU WISH TO PROCEED?
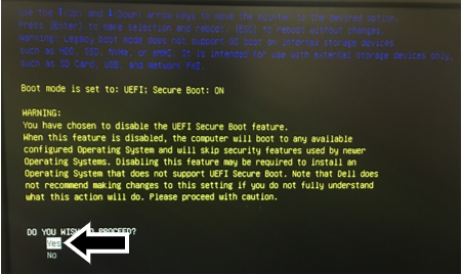
- Press Enter.
- Select Apply the Changes for Final Confirmation.
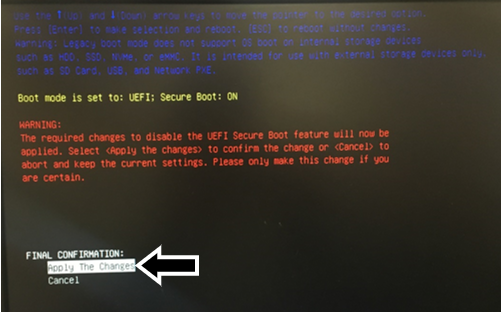
- Press Enter.
- Restart the PC.
 button at the top of the page to send feedback, comments, or change requests.