Configuring the PC with a Static IP Address
Time Required
- 15 minutes
Prerequisite
- Programming the Firewall with Firewall Wizard v6.0.1.0
Procedure
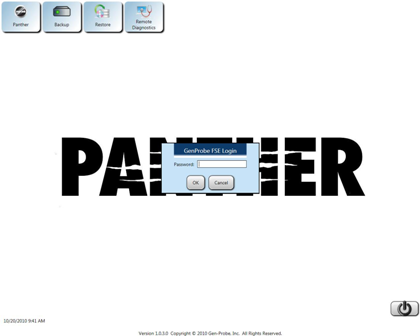
- Upon PC boot up, touch the screen or press any key.
 The Panther Shield software screen appears.
Note—If no key is pressed or the touch screen is not touched, the Panther System main assay software launches. - Press Shift + F10.
- Enter the following password:
!G9x53rvic3y
Where x = the last digit of the day and y = the last digit of the month.
- Click OK.
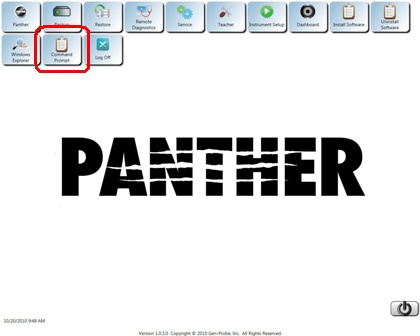
- Click the Command Prompt button.
- Enter control NCPA.CPL into the DOS Window and press Enter.
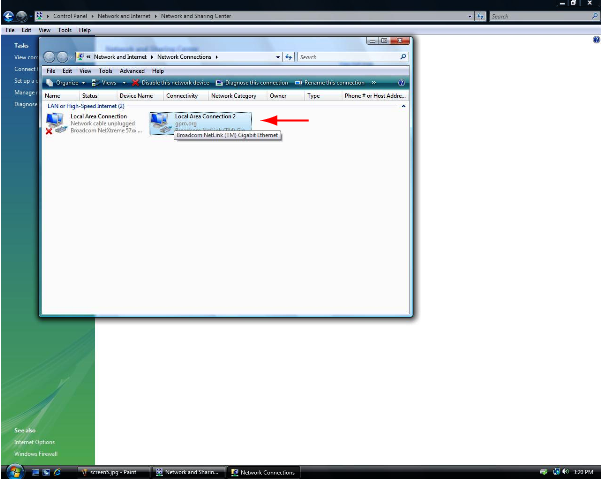
- Select the Local Area Connection that is currently enabled; the other connection should have a red X next to it.
- Position the mouse pointer over the enabled Local Area Connection, click the right mouse button, and select Properties.
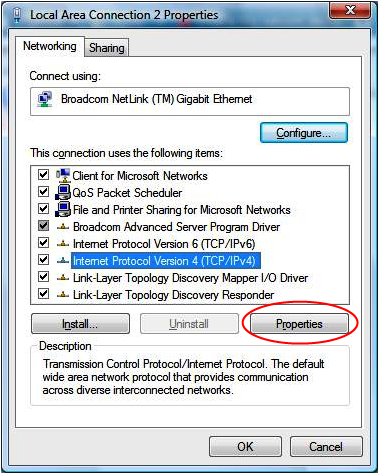
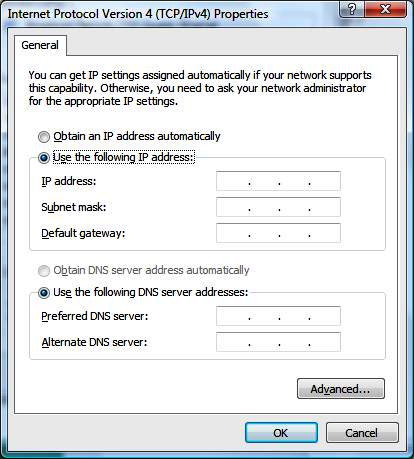
- Select Internet Protocol Version 4 (TCRTarget capture reagent—An assay-specific reagent added as part of specimen pipetting./IPv4) and click the Properties button.
Note—At this point, a dialog box appears requesting the IP address, Subnet mask, Default gateway, Preferred DNS server, and Alternate DNS server values. - Select the Use the following IP address optionAn Internet Protocol Version 4 (TCP/IPv4) properties dialog box appears..
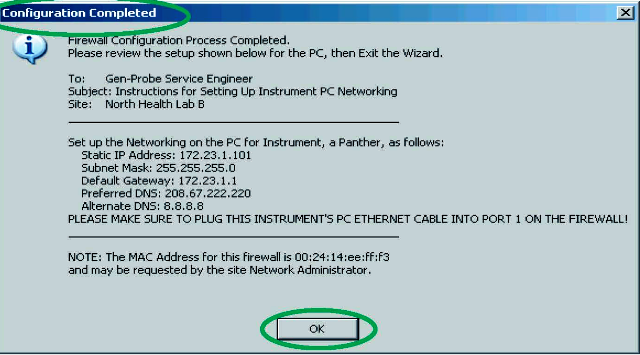
- Enter the information from the Firewall Configuration Wizard Configuration Completed screen.
- After entering the information, click OK.
- Click Close.
- Close all open windows.
- Click the Start button in the lower left corner of the screen and select Restart.
- Checking PRO360° Remote Diagnostics Connectivity from the Panther Remote Dashboard


 button at the top of the page to send feedback, comments, or change requests.