Tapping the Waste Bottle Mounting Block
Purpose
To provide service personnel with a step-by-step procedure to enlarge and re-thread the waste bottle mounting block holes to accommodate the Polysulfone CPC male fittings on Panther Systems with serial numbers less than 674.
What is Affected
The waste bottle mounting block on systems with serial numbers less than 674 were threaded to accommodate the Polypropylene CPC connector [PN 900578, Insert, 3/8 NPT-M]. A more reliable Polysulfone CPC fitting [MME-02058, Coupling, Panther, waste bottle CPC] was released for upgrade but it is difficult to thread into the preexisting holes. In this procedure we introduce a tap tool needed to enlarge and re-thread the holes and provide instructions on the adjustment of the waste bottle mounting block.
Please reference Replace the Two Male Fittings in the Waste Drawer that Connect to the Waste Bottle.
Parts and Materials Required
- Proper PPE
- Adjustable Wrench
- Dow Corning High Vacuum Grease
- 4 mm Allen Wrench
- PANTHER, KIT, WASTE FITTING 3/8 IN NPT TAP
- 2x COUPLING, PANTHER, WASTE BOTTLE CPC
Time Required
- 25 Minutes
Procedure
- Put on proper PPE.
- Power down the Panther System.
- Open the waste drawer.
- Remove the liquid waste bottle.
- Clean the waste block seat and CPC fittings with a towel soaked in 10% bleach.
- Wait 10 minutes and remove the bleach from the surfaces with a disposable towel.
 Remove the 2 CPC male fittings from the waste bottle mounting block with an adjustable wrench.
- Use a PANTHER, KIT, WASTE FITTING 3/8 IN NPT TAP to re-thread the existing holes in the waste bottle seat block following the steps below:
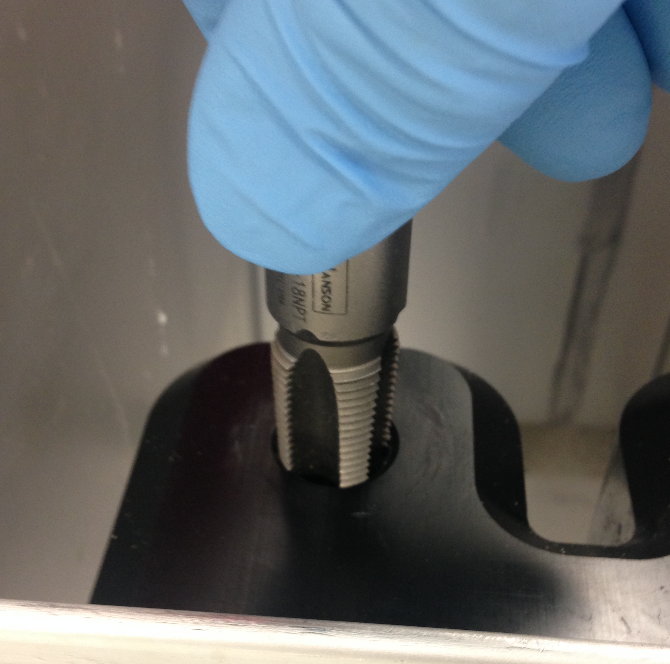
- Slowly rotate the tap into the hole clockwise using only your fingers.

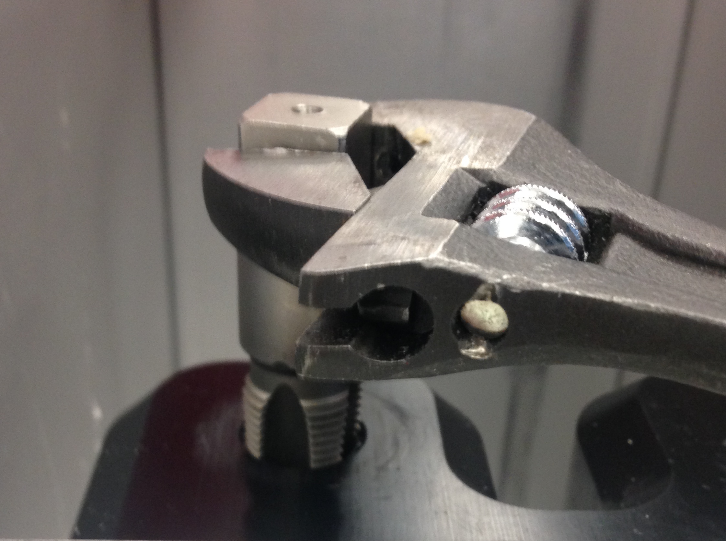
Caution—Do not cross-thread the tap in the hole. - Once the tap can no longer be threaded by hand, use an adjustable wrench to continue tapping the hole.
- Progress with tapping the hole by rotating the tap ¼ turn clockwise then ¼ turn counterclockwise followed by a ¼ turn clockwise.
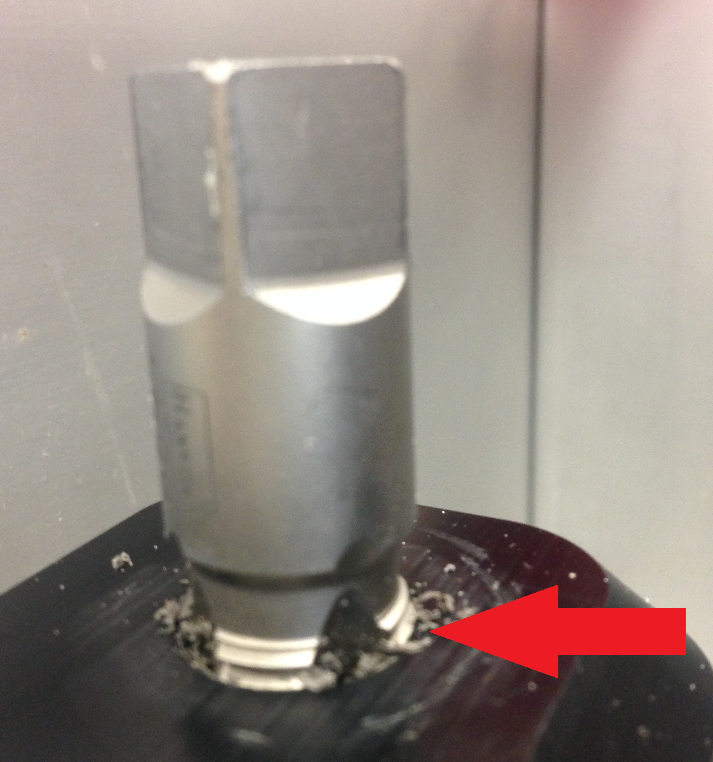
- Repeat the step above until the tap bottoms out in the hole; this should correlate with 2 threads on the top of the tap exposed above the waste bottle seat block.
- Once the tap is fully seated, remove the tap by rotating it counterclockwise while cleaning any filings that were produced during the tapping process.
- Clean any filings that may have been left behind in the tapped hole.
- Repeat the steps above on the second hole in the waste bottle mounting block.
- Hand thread the 2 new polysulfone CPC fittings into the waste bottle mounting block.
- Tighten the CPC fittings with an adjustable wrench until the fittings are fully seated.
- Once the 2 CPC fittings are in place apply a thin layer of vacuum grease to the black o-rings on the fittings.
- Adjust the height of the waste block seat.
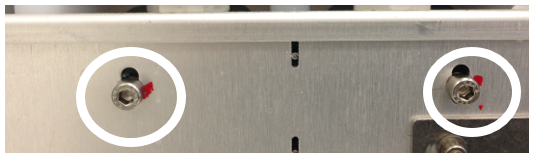
- Loosen the 2 bolts on the side of the waste drawer with a 4mm Allen Wrench shown in the image below.
- With the bolts loose lift the waste bottle mounting block up as high as it will travel and tighten the 2 bolts loosened in the previous step.
- Fully seat the waste bottle in the waste drawer.
- Loosen the bolts on the side of the waste drawer shown in step a and push down on the waste bottle.
- Allow the waste bottle to settle then fully tighten the bolts on the side of the waste drawer.

Verification
- Power on the Panther System.
- Open the Panther GUI.
- Monitor the vacuum pressure through the Panther GUI.
- After 5 minutes the Panther vacuum pressure should settle into a range of 7 in/Hg +/- 1 in/Hg.
- Verify that the system can successfully pass prime.
 button at the top of the page to send feedback, comments, or change requests.