MTU Expansion Manual Teach
- Open the Service Software Configuration page.
- Verify that the Panther HV is a configured module.
- Reset the Panther Configuration, if necessary, go to the Main & Com. tab.
- Open PX- Expansion Tab.
- Select the Teach tab.
- Select MTU Lift under the Drive section
- Select the desired location to teach to under Select Position.
- Select Get stored position .
- Select Move.
 | Note—The MTU lift drive will move to the desired location. |
- Select MTU Scissors under Select Drive.
- Under the Select Position, select the desired location to teach to.
- Select Get stored position.
- Select Move.
- Under the Select Drive, select MTU Lift.
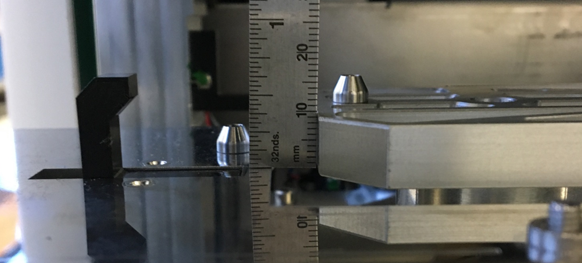
- Using the controls on the Service Software UI, adjust the lift position with the arrows until the spacing between the carrier shelf and upper edge of the empty scissor drive is approximately 8mm +/- 1 mm.
- When desired lift adjustment is achieved, select the Get current position, then Save current position.
- Select Overwrite NVM.
- Select MTU Scissor under Select Drive.
- Using the arrows and slide, or keyboard, align the scissor drive pins and the MTU Queue pins.
| Note—If necessary, adjust the lift position until the scissor is in plane with the MTU Queue carrier platforms. The default height for the Lift Drive is 125 steps above this location. Lowering the lift 125 steps will allow an easier view for aligning the Scissor drive. |
- If the scissor drive is not parallel to the pins in the MTU Queue, the MTU Sidecar must be adjusted with shims in the front of back. Unclip the MTU Sidecar, adjust the MTU Sidecar, apply the shims, clip the MTU Sidecar to the MTU Expansion Guide Plate. Verify that the scissor is now parallel.
- When desired scissor position is achieved, select Get current position, then Save current position.
- Select Overwrite NVM.
Click the  button at the top of the page to send feedback, comments, or change requests.
 Multi-tube unit—Container used to process tests in the instrument. An MTU contains five separate reaction tubes. The MTU is moved through the instrument by the linear distributor and includes five tiplets for pipettiing to be used in the mag wash station. Expansion Tab.