16GB Memory Upgrade for XE2 PCs
Parts and Materials Required
- Panther Tool Kit
- Requires two 8GB RAM sticks.
- The part number only includes one RAM stick
Time Required
- 30 Minutes
Procedure
- Power on the Panther System and PC.
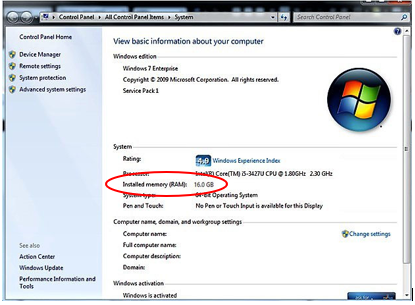
- Log into Service Software, open Windows Explorer, then right-click on Computer and select Properties.
 In the System Properties window, the system will list "Installed memory (RAM)" with the total amount detected.
- If 4 GB of RAM is indicated, order the 16 GB RAM Upgrade Kit . When the memory kit is available, proceed to Step 4.
- If 16 GB of RAM is indicated, the PC has already had the RAM upgrade and no further action is needed.
- Prepare a flat work surface with an absorbent pad where the Dell XE2 can be opened.
- Shutdown the Panther System and PC.
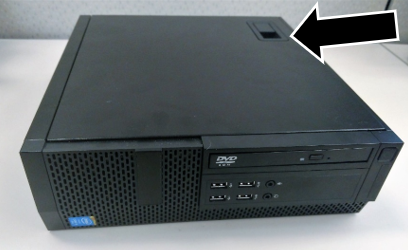
- Open the Computer Access Door.
- Open the left side door to access the connectors on the back of the PC.
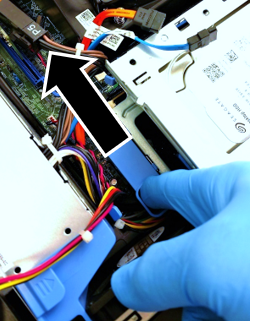
- Unplug ALL cables connected to the Dell XE2 PC
- Move the Dell XE2 to a flat stable workspace.
- Lay the Dell XE2 on its side with the door latch facing up.
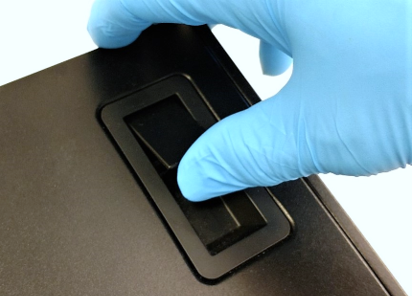
- Pull up on the cover-release latch.
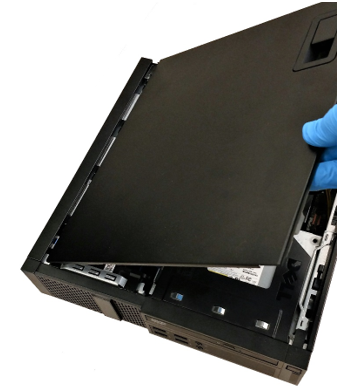
- Lift the cover upward to a 45-degree angle to remove the cover. Set the cover aside.
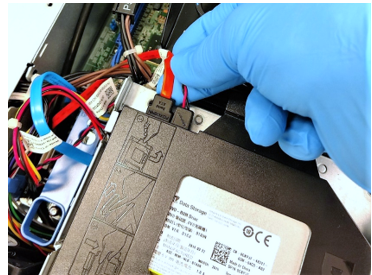
- Disconnect the data and power cables from the back of the optical drive.
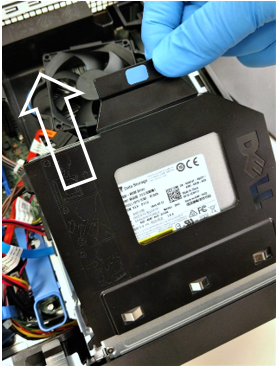
- Lift the tab and slide the optical drive out to remove it from the computer. Set aside for reassembly.
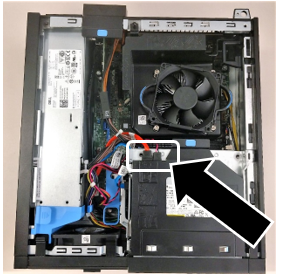
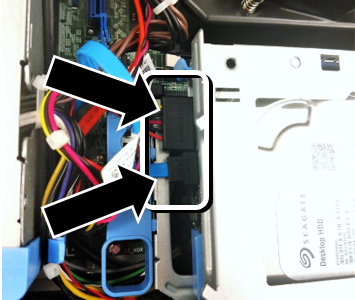
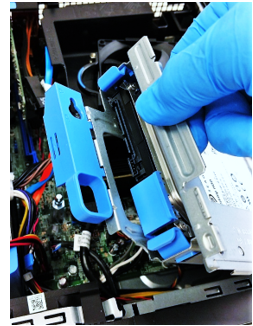
- Disconnect the data and power cables from the back of the hard drive.
- Slide the blue drive-cargo lock toward the unlock position and lift the hard drive cage from the computer.
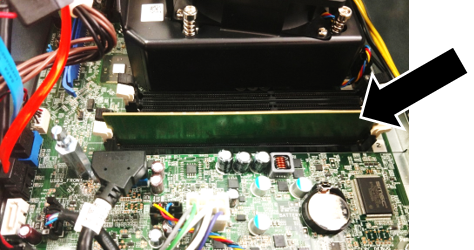
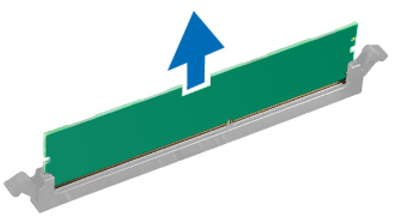
- Locate the single 4GB RAM card.
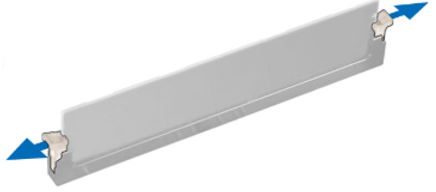
- To remove the RAM card, first unlock it by pressing down on the two memory card retaining tabs on either end of the RAM slot.
- Remove the 4 GB RAM card by pulling it straight up and out of the slot.
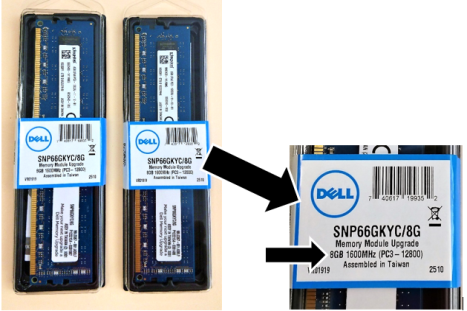
- Open the new memory kit and verify that the two new RAM cards are 8 GB each.
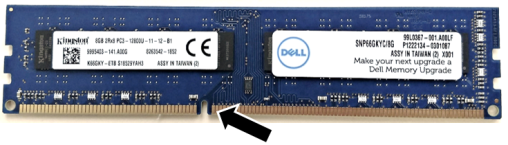
- Insert one of the 8 GB RAM cards into the white / tan tabbed memory slot where the old 4 GB RAM card was previously installed.

Note—
Ensure the RAM is installed in the correct orientation.
The memory card has a slot in the connector edge to ensure that the card can ONLY lock in the correct orientation.
Note— Ensure the RAM is ONLY installed in the WHITE / TAN tabbed slots.
Installation in any other tab can lead to decreased System Performance. - Press down firmly until the white locking white locking tabs rotate up into position to lock the RAM card into the slot.
- Locate the second memory slot with the white tabs.
- Before inserting the second RAM card you MUST unlock the slot. Do this by pressing down on the two white tabs at the ends of the memory slot.
- Insert the second 8 GB RAM card into the second white / tan tabbed memory slot.
Note—
Ensure the RAM is installed in the correct orientation.
The memory card has a slot in the connector edge to ensure that the card can ONLY lock in the correct orientation.Note— Ensure the RAM is ONLY installed in the WHITE / TAN tabbed slots.
Installation in any other tab can lead to decreased System Performance. - Reinstall the drive cage and reconnect its power and data cables.
- Reinstall the optical drive and reconnect its power and data cables.
Note—Make sure that the faceplate of the optical drive is flush with the outside surface of the PC. - Reattach the side cover.
- Insert the XE2 into the Panther computer compartment.
- Plug in the various connectors to the XE2.
Verification
- Power on the Panther System and PC.
- Log into the FSE Shield.
- Open Windows Explorer.
- Right-click on Computer and select Properties.
- In the System Properties window, the system will list "Installed memory (RAM)" with the total amount detected.
- Verify that 16 GB of RAM is displayed.
- Verification is complete.
 button at the top of the page to send feedback, comments, or change requests.