Network Fileshare Configuration Procedure
(For GRIFOLS USE ONLY)
Parts and Materials Required
- N/A
Time Required
- 1 Hour
Procedure
- Boot the Panther PC.
- Hit F10 at the Panther Shield.
- Log in as gpservice user.
- Run Windows Explorer.
- Select Computer.
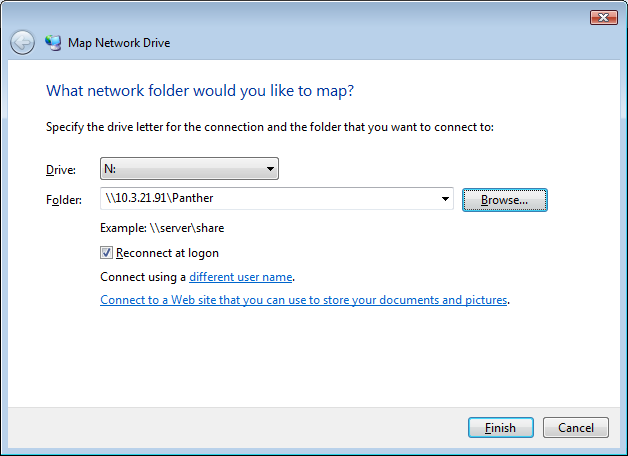
 Click on Map Network Drive.
- Select a drive letter.

Note—It is recommended to pick a letter above "I" as USB drives use letters below "I" and can possibly cause an issue. Recommendation: "N" for NatManager. - Obtain the "IP Address" and "Share Folder Name" from the client. Type in the folder location as "\\IPaddress\ShareFolderName".
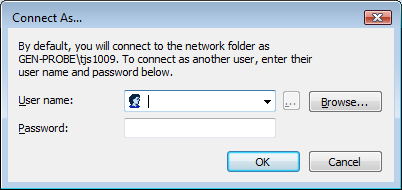
- Check "Reconnect at logon" and click on "Connect using a different user name."
- Type in the "User name" and "Password" supplied by the client that will be allowed on the share.
- Click OK.
- Click Finish.
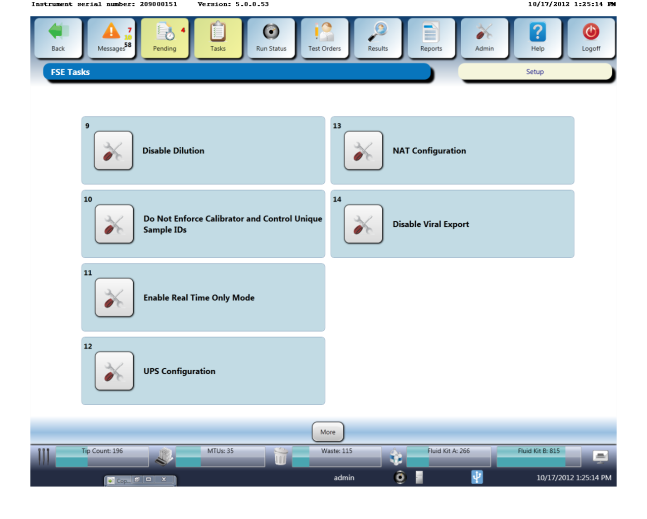
- Launch the Panther Software via the Admin logon.
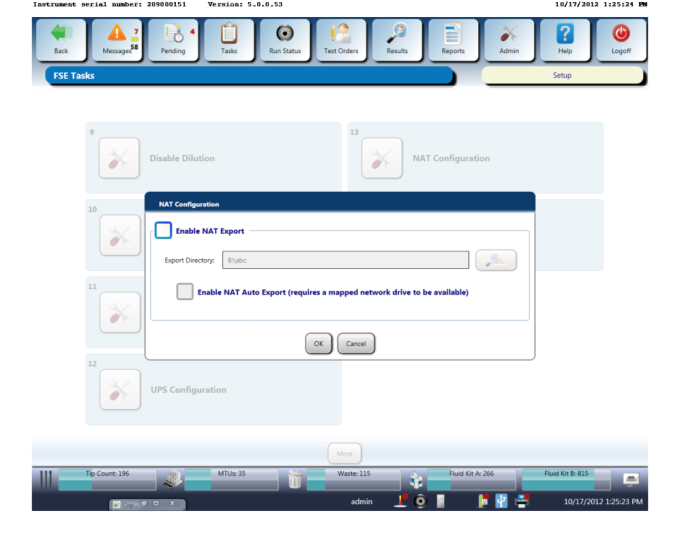
- Navigate to the Nat Manager screen. Tasks > Perform Maintenance > Service > More > Nat Configuration
- At the Nat Configuration screen enter the mapped network drive created in Step 7.
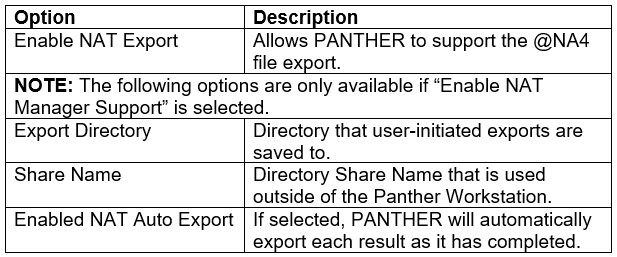
- Options for configuring the Nat Manager are listed below.

Verification
- Log in to the FSE Shield.
- Run Windows Explorer.
- Navigate to the drive created in Step 7 of the procedure.
- Right click on an open area in the Explorer window, and choose New > Text Document.
- Name the file test.txt.
- Ask the customer to check the network drive to ensure the file can be opened and viewed.
Appendix
Client Server Configuration Instructions
- Run Windows Explorer.
- Create a folder where the NAT Manager files are expected to be exported to.
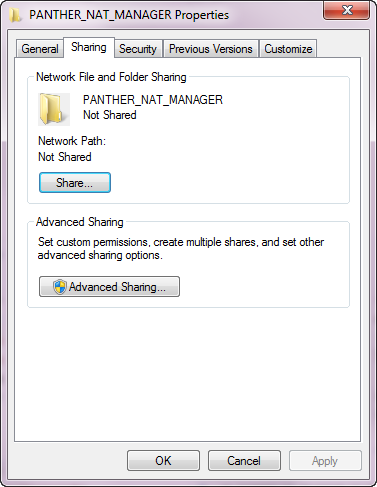
- Right click on the folder and select Properties.
- Click the "Sharing" tab.
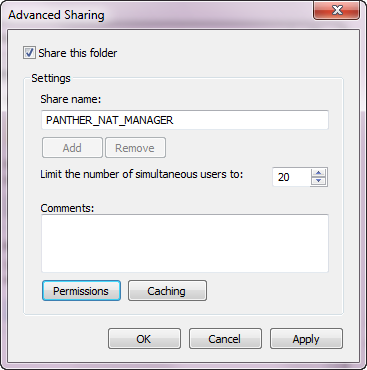
- Select Advance Sharing...
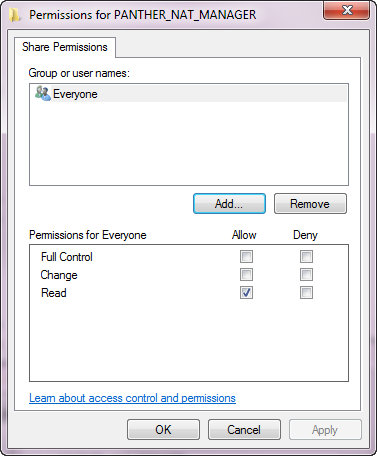
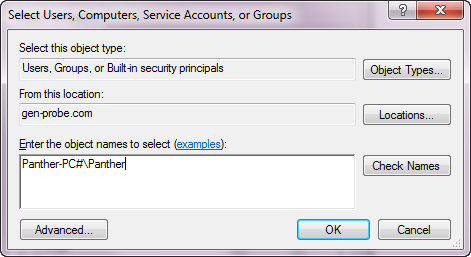
- Select permissions and either allow full control to everyone, or select Add...
Note—Choose a user on the NatManager PC with a password that won't expire or type in the Panther-PC#\Panther as the user.
Note—Panther-PC# is the computer name. The updating of the "Computer Name" is part of the overall Panther Installation Procedures. - Obtain the static IP address (from the IS contact or via the IP config of the PC) and share name (created in Step 5) of the folder to be mapped.
Appendix
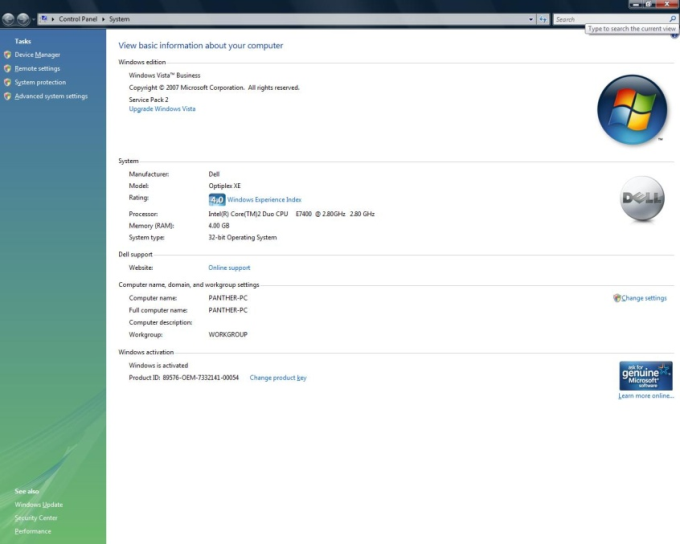
How to check the "Computer Name"
- Run Windows Explorer.
- Right click on My Computer.
- Select Properties.
- The computer name is located below "Computer name, domain, and workshop setting".
 button at the top of the page to send feedback, comments, or change requests.