Dashboard - Administration

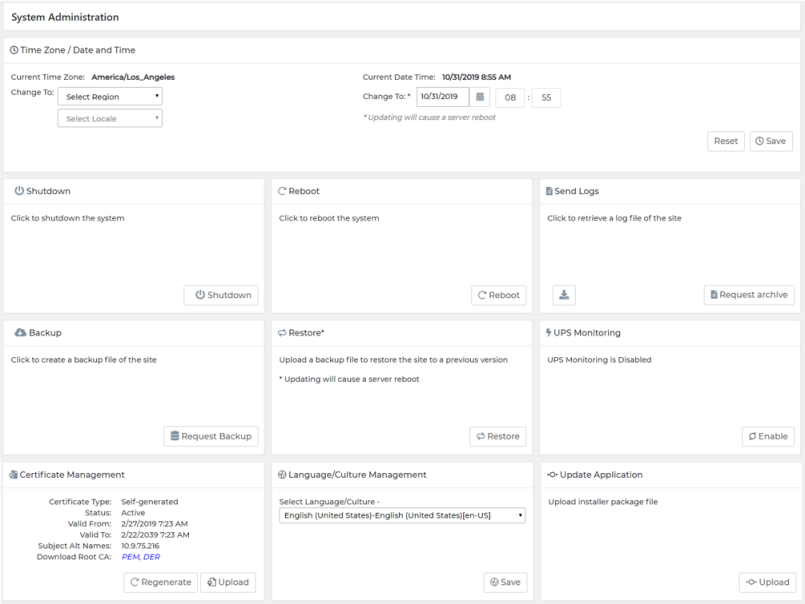
From the System Administration screen, users can configure the Dashboard Command server.

To access the Administration screen, select Administration from the Navigation Menu .

ClosedClick on the System icon in the left menu.

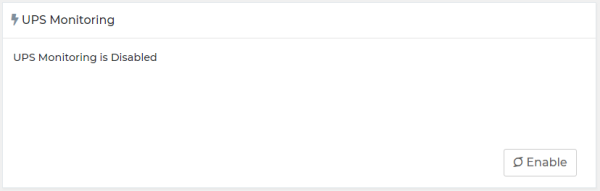
Note— Super Users can ONLY access Time Zone, Date and Time, Reboot, Send Logs, and UPS Monitoring options.
Dashboard Administrators can access all the System Administration screen options.

Note—Only Super User or Administrator can access the Administration screen.
Left Panel Options Description
Home

Access the Dashboard Management Grid.

Features

Access the Feature Management screen.

System

Access the System Administration screen.

Note: Only Administrators can access the System Administration screen.

Clients

Used to create Client IDs.

Note: Applicable to Test Order Status Report only.

Pooling

Access the Pooling Management screen.

Instruments

Access the Instrument Management screen.

Note: Only Administrators can access the Instrument Management screen.

Thresholds

Access the Threshold Configuration screen.

Network

Access the Network Configuration screen.

Note: Only Administrators can access the Network Configuration screen.

Users

Access the User Management screen.

Note: Only Administrators can access the User Management screen.

Work Cell Access the Work Cell Management screen.

ClosedTime Zone/Date and Time

  1. Select the appropriate time zone, date and time.
  2. Click Save.
  3. Select Reset to cancel any changes.

ClosedShutdown

  1. Select Shutdown to shut down the Dashboard Command server
    The confirmation window will open.
  2. Select Shutdown to proceed with shutdown of the Dashboard Command server.

ClosedReboot

  1. Select Reboot to restart the Dashboard Command server
    The confirmation window will open.
  2. Select Reboot to proceed with restart of the Dashboard Command.

ClosedSend Dashboard Logs

  1. Select Request Archive to prepare Dashboard Command logs for download.
  2. Once the archive of logs is ready, the Download button will appear.

  3. Click the Download button.

ClosedBackup

The backup/restore feature backs up settings, instruments, work cells, saved dashboard views, thresholds, users, clients / pools, results report templates, network configuration, and site certificates.

  1. Click on Request Backup.
    Note—This process can take a few minutes to complete.
  2. Click Save to download the zip file.

ClosedRestore

  1. Select Restore to reinstate the previous configuration of the Dashboard Command.
    The Upload Backup File window will open.
  2. Click Select File.
  3. Locate the backup file and select Open.
  4. Select Reset Network Settings, if applicable.
    Note—If Reset Network Settings is selected, Dashboard Command restores the backed up Network Configuration settings in the restore process.
  5. Click Restore.

All the of the settings in the backup file will be reinstated including: settings, instruments, work cells, saved dashboard views, thresholds, users, clients / pools, results report templates, network configuration, and site certificates.

ClosedUPS Monitoring

  1. Click Enable to enable monitoring of an approved UPS device.
  • Users can view UPS status, connection, battery charge, and time-to-shutdown if enabled.

ClosedCertificate Management

These certificates are for the TLS connection to the server (aka https). We generate our own certificates and keys to make sure traffic is always encrypted. The user can regenerate with their own internal domain names or IP addresses or they can provide their own certificate and key.

Dashboard Command generates certificates and keys to ensure that communication between web browser clients and Dashboard Command is secure at all times.

Users can regenerate certificates and keys with internal domain names, hostname, or IP addresses for added security.

To regenerate certificates:

  1. Select Regenerate.
  2. The Subject Alternative Names window will open.
  3. Enter name(s) if required.
  4. Select Regenerate &Save.
  Warning—The self-signed root CA (certificate authority) is regenerated and is required to add trust for the new root CA.

Format a custom certificate prior to uploading it onto the dashboard. The requirements for formatting a custom certificate:

  • Intermediate certificates and root certificate authority must be bundled in the certificate file.
  • Bundled certificates must be in the same order as their trust chain with the server certificate first, followed by any intermediate authorities, and finally the root certificate authority.
  • Certificates must be in X.509 PEM format.
  • Private keys must be in RSA format and must not be encrypted with a passphrase.

To upload custom certificates to the site:

  1. Select Upload.
  2. The Upload Certificate Files window will open.
  3. Select the appropriate Certificate and Key files.
  4. Select Upload Certificate.

To replace custom certificates to the site:

  1. Select Replace.
  2. The Upload Certificate Files window will open.
  3. Select the appropriate Certificate and Key files.
  4. Select Upload Certificate.
  5. Confirm that the new custom certificate is to replace the existing certificate.

ClosedLanguage/Culture Management

  1. Select language from the drop-down menu and then select Save.
  2. Dashboard updates to display all screens and windows with the selected language.

ClosedUpdate Application

Note—Backup the Dashboard Command before any attempt to update it.
  1. Select Upload Application.
  2. The Computer window will open.
  3. Find Hologic-provided installer for the Dashboard Command application.
  4. Select Open.
  5. The installer package automatically installs once it passes authenticity and integrity test.
  6. The system will automatically reboot afterwards.