Recovering Configuration from Firewall (5505 Only)
Parts and Materials Required
- If pulling the configuration from the Firewall the following is required:
- An FSE Laptop
- A serial-to-USB converter
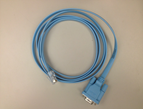
- The light blue console cable supplied with the firewall
Time Required
Important Notes
If you have access to the input.xml file generated after a successful configuration of the firewall, reconfiguring the firewall requires much less time. This file holds all the information that will be obtained by pulling the configuration directly from the firewall. It is located by default in C:\Program Files\ Gen-Probe\Firewall\Data
The naming convention for input.xml is as follows:
<Site Name>_<Serial Number>_<Configuration Date>_<Time Stamp>_input.xml

|
Caution— Before reprogramming any firewall it is extremely important to download the current firewall configuration for backup purposes. This will ensure that no information is lost and will be vital in troubleshooting in the case that the reprogramming is not successful. |
Attaching the firewall configuration backup and the four output files to a Service Order will help make future reprogramming much faster. As well these files can be used or troubleshooting purposes. The four output files can be found by default in C:\Program Files\Gen-Probe\Firewall\Data.
Procedure
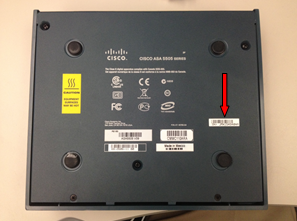
 Locate the correct input.xml file by referencing the serial number located on the bottom of the firewall.

|
NOTE— If you cannot find the file based on the serial number locate it based on the site name. |
- For backup purposes, pull the configuration from the firewall by following the procedure Downloading Firewall Configuration.
- Create a Service Order with the description "Firewall Wizard X Configuration Info" where X is the version number. Complete the Service Confirmation and attach the four output files and the firewall configuration backup obtained in step 2 to the Service Order so the possible reprogramming in the future requires less time.
- If the input.xml file cannot be found, complete the remainder of this procedure. Else complete section 6, verification.
- Ensure the firewall is powered on by checking that the Power, Status, and Active lights located on the front of the firewall are solid green.
- Connect the Serial-to-USB adapter to a USB port on your FSE laptop.
- Connect the Serial end of the light blue console cable to the Serial-to-USB adapter.
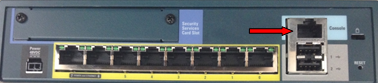
- Connect the other end of the console cable to the firewall console port.
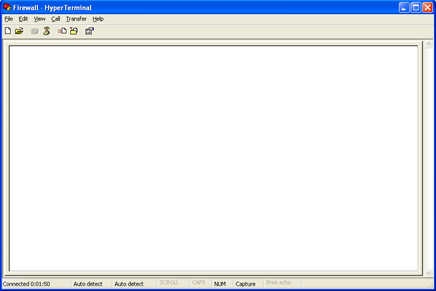
- Run HyperTerminal located in Start >> Programs >> Accessories >> Communications.
- At the Connection Description screen, give the connection an arbitrary name and select an icon. The actual name of the connection and the icon selection does not affect the outcome of this procedure.
- At the Connect To screen, select the correct COM port being used by the Serial-to-USB adapter.
- At the ComX (X is the port number chosen above) Properties screen, change the Bits per second to 9600 and click OK.
- Now you will be looking at the main HyperTerminal window.
- Open the Transfer drop-down menu and click Capture Text. The Capture Text feature will capture all text seen in the window into a text file.
- Choose a directory to save the text file to and choose a name for the file, such as "XXXXX mm-dd-yy firewall config backup", where XXXXX is the Serial# of the Panther System.
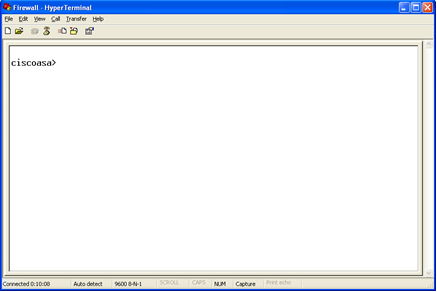
- Once back at the main window press the Enter key. The prompt message will appear.
- Type "enable" and press Enter. A password prompt will appear. The password is the same password used to log in to the gpservice account on service software.
- Press Enter once you have type in the password.
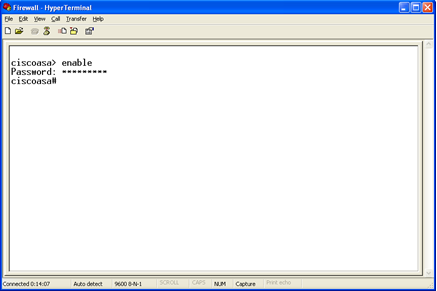
- A prompt message will now appear.
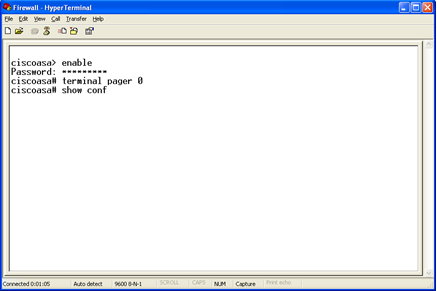
- Type "terminal pager 0" and press Enter. This allows the configuration to continuously scroll as opposed to having to manually hit enter as each short section appears.
- Type "show conf" and press Enter.
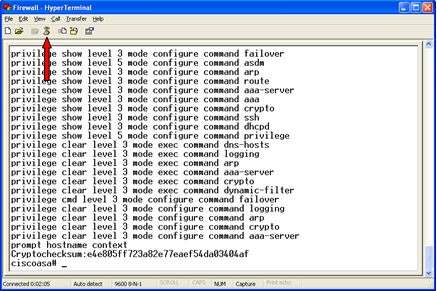
- The configuration will begin scrolling down the screen. It is finished when the "ciscoasa#" prompt reappears.
- Type "exit" and press Enter. You will now be taken to the ciscoasa> prompt.
- Type "exit" and press Enter once more. You will still be at the ciscoasa> prompt.
- Click the Disconnect button.
- Close the window and choose not to save the connection.
- Disconnect the power from the firewall, wait one minute, and reconnect the power. This is to ensure no connection issues when reprogramming the firewall.
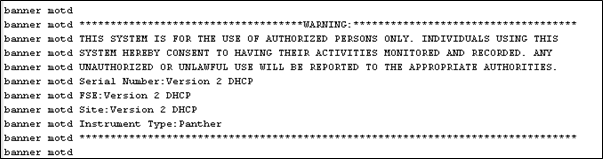
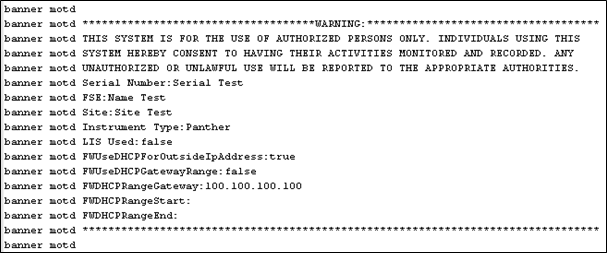
- To successfully pull the necessary information from the configuration you must know the version of the Firewall Wizard that was used to program the firewall. Either it is version 3.0.3.2 or version 2.0.5.0 and lower.
- Open the text file created in step 11 under the section "Downloading Firewall Configuration".
- To determine the version, inspect the "banner motd" fields.
- Version 2.0.5.0 and lower, example below.
- Version 3.0.3.2, example below.
- If the version of output file 3.0.3.2, see section 4, otherwise, see section 5.
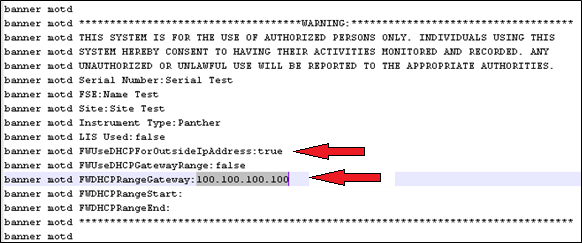
- If "FWUseDHCPForOutsideIPAddress" is set to true, record the IP Address in the field "FWDHCPRangeGateway". This would be 100.100.100.100 as shown below. This indicates that the Panther is configured to use a DHCP gateway for its outside interface. Make note of this IP address in section 2 of the Firewall Configuration Sheet located at the end of this document. Skip to step 5 of this section.
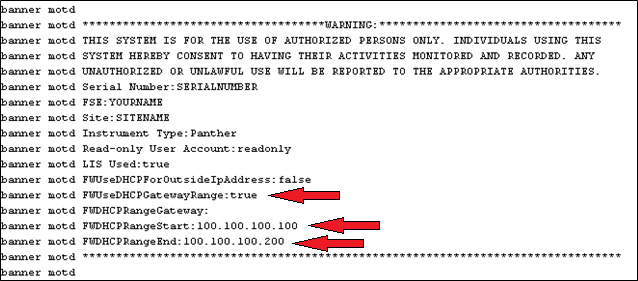
- If "FWUseDHCPGatewayRange" is set to true, it indicates the firewall is configured to use a DHCP range for its outside interface. This would be 100.100.100.100 and 100.100.100.200 respectively. Record the IP addresses for "FWDHCPRangeStart" and "FWDHCPRangeEnd" in section 3 of the Firewall Configuration Sheet located at the end of this document. Skip to step 5 of this section.
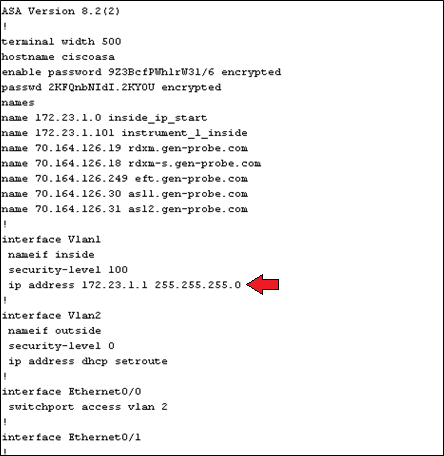
- If both "FWUseDHCPForOutsideIPAddress" and "FWUseDHCPGatewayRange" are set to false it indicates the outside interface is configured with a static IP. Near the top of the page you will find "interface Vlan2", beneath this is the IP address and net mask. In the example below, 10.10.10.1 is the IP address and 255.255.0.0 is the net mask. Make a note of each of these in section 4 of the Firewall Configuration Sheet located at the end of this document.
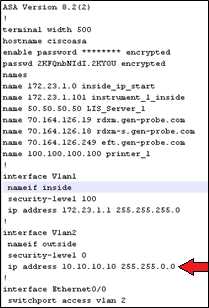
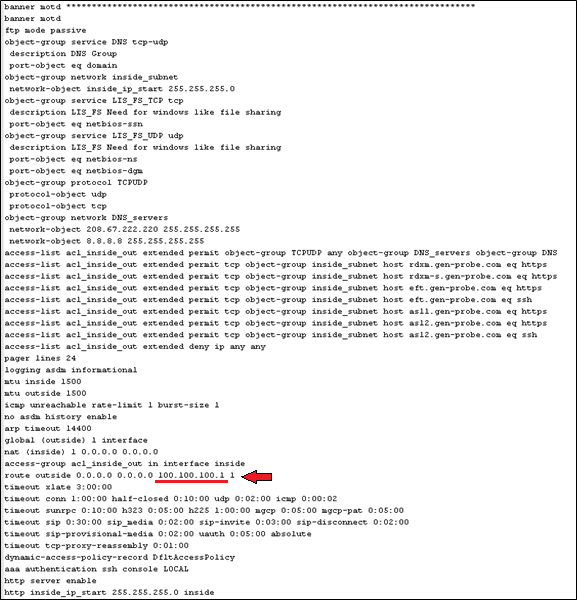
- The gateway for static IP configuration is found elsewhere on the page. Look for the phrase “route outside”, next to it is the gateway IP address. The gateway IP address is 10.10.10.1. Make note of this in section 4 of the Firewall Configuration Sheet.
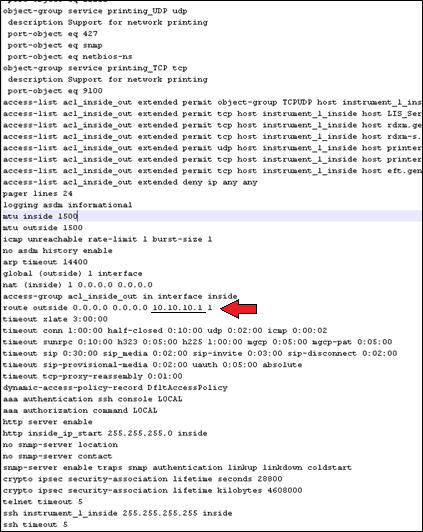
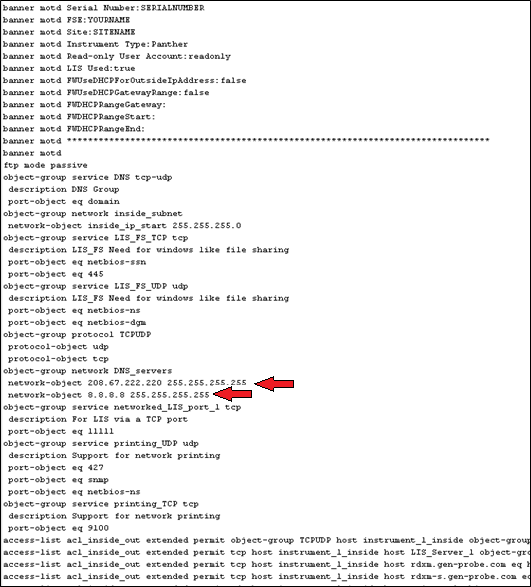
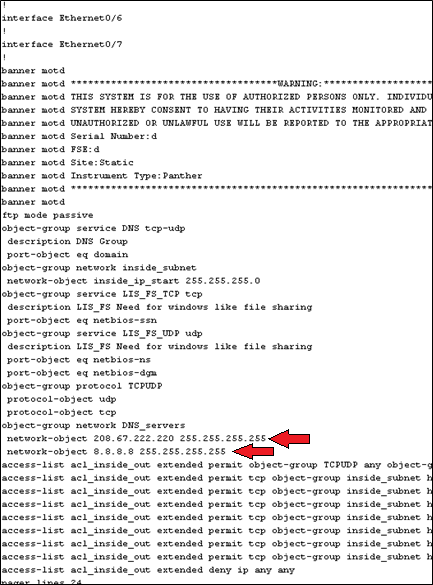
- The location of the two IP addresses for the two DNS servers. These addresses are 208.67.222.220 and 8.8.8.8. Note these two addresses in section 5 of the Firewall Configuration Sheet.
- In Panther UI check if the Panther is configured for TCP/IP LIS. This can be found under the Admin Tab, then by selecting LIS Configuration. If TCP/IP is checked scroll to the bottom of the page and record the IP address and port in section 6 of the Firewall Configuration Sheet.
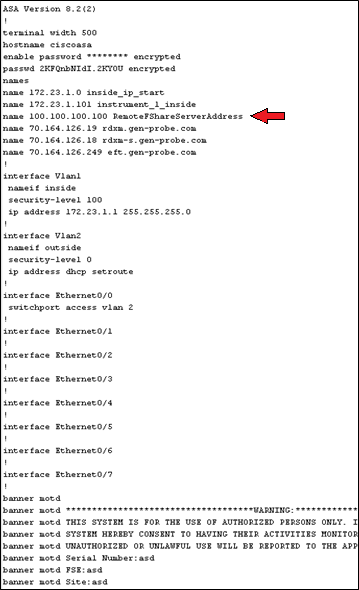
- Located near the top of the page look for “RemoteFShareServerAddress”. If found this indicates the Panther is setup for remote fileshare. Record the IP address located to the left in section 7 of the Firewall Configuration Sheet. Check the following screen with the IP address is 100.100.100.100.
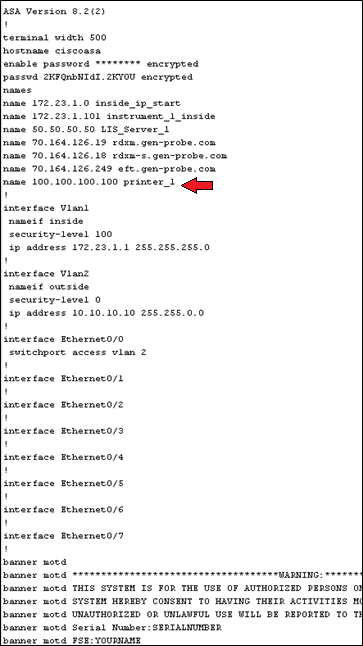
- Locate near the top of the page look for “printer_1”. If found this indicates the printer is setup as a network printer. Record the IP address located to the left in section 8 of the Firewall Configuration Sheet. Check the following screen with the IP address is 100.100.100.100.
- Follow GP11-265-FSN to reprogram the firewall using the information on the Firewall Configuration Sheet.
- Create a Service Order with the description "Firewall Wizard X Configuration Info" where X is the version number. Complete the Service Confirmation and attach the four output files, firewall configuration backup obtained in section 2, and the Firewall Configuration Sheet to the Service Order so the possible reprogramming in the future requires less time.
- Near the top of the output file you will see “interface Vlan2”. If below this line “ip address dhcp setroute” is observed this indicates that the Panther is set for DHCP. If an address is in the place of “dhcp setroute” skip to step 12 of this section.
- Firewall wizard 2.0.5.0 and lower does not display the DHCP address that was configured. This is because the address entered is not physically used by the firewall to transmit data. Instead it is used to ensure there are no network conflicts. Because of this an arbitrary IP address will be entered for the DHCP address.
- Login to the FSE Shield.
- Click the Command Prompt icon.
- Type "control ncpa.cpl” with no quotes and hit Enter.
- Right-click on the icon that does not state “Network cable unplugged".
- Select Properties.
- Select Internet Protocol Version 4 (TCP/IPv4) by left-clicking on the name. It should now be highlighted.
- Select Properties.
- If the IP address configured is 172.23.1.101, record 5.5.5.5 in section 2 of the Firewall Configuration Sheet. Close all windows and skip to step 14.
- If the IP address configured is anything else, record 172.23.1.1 in section 2 of the Firewall Configuration Sheet. Close all windows and skip to step 14.
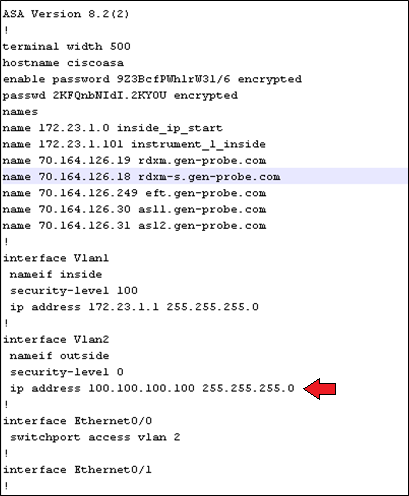
- Record the address and net mask found next to IP address under “interface Vlan2”. Check this screen with the IP address is 100.100.100.100 and the net mask is 255.255.255.0. Record these address in section 4 of the Firewall Configuration Sheet.
- The gateway is found elsewhere on the page. Look for “route outside” which is located near the end of the file. Check this screen with the gateway IP address is 100.100.100.1. Record this address in section 4 of the Firewall Configuration Sheet.
- The DNS Server IP addresses are located below the “banner motd”. See example below with the addresses 208.67.222.220 and 8.8.8.8. When configuring the firewall using the Wizard it does not matter which address is set as DNS 1 or DNS 2. Record these address in section 5 of the Firewall Configuration Sheet.
- In Panther UI check if the Panther is configured for TCP/IP LIS. This can be found under the Admin Tab, then by selecting LIS Configuration. If TCP/IP is checked scroll to the bottom of the page and record the IP address and port in section 6 of the Firewall Configuration Sheet.
- Follow GP11-265-FSN to reprogram the firewall using the information on the Firewall Configuration Sheet.
- Create a Service Order with the description "Firewall Wizard X Configuration Info" where X is the version number. Complete the Service Confirmation and attach the four output files, firewall configuration backup obtained in section 2, and the Firewall Configuration Sheet to the Service Order so the possible reprogramming in the future requires less time.
- Open Dashboard either from the FSE Shield or Panther UI. In Panther UI under the Tasks tab click Perform Maintenance, click Service, and then click Dashboard.
- On the PRO360 Connectivity Tester click Execute Tests in the right pane. All results should be green.
- If the site is using TCP/IP LIS use the left pane to check connectivity. Enter the IP address and port used by the Panther to communicate with the server, section 6 of the Firewall Configuration Sheet. Then select Execute Test, the result should be green.
 button at the top of the page to send feedback, comments, or change requests.