Parts and Materials Required
- Allen wrench, 2.5 mm
- Cable ties
- WASTE DWR, WASTE BAG SENSOR ASSY
Time Required
- 30 minutes
Removal Procedure
- Put on proper PPE.
- Power down the Panther System.
- Open the left and right side panel doors.
- Open the Waste Drawer.
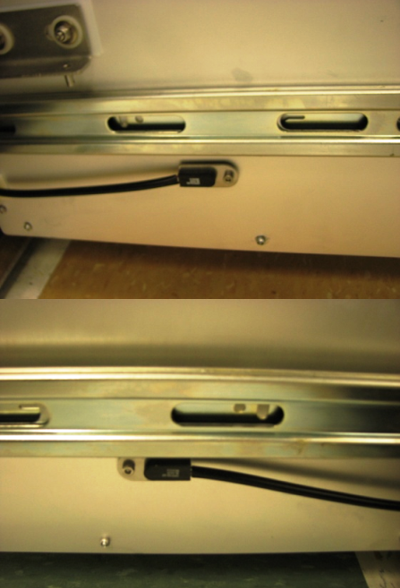
 Locate the waste present sensors on the left and right sides of the Waste Drawer..
- Using a 2.5 mm Allen wrench, remove the screw that secures each sensor in place (one on the left side and one on the right side of the drawer).
- Pop each sensor out of its sensor holder.
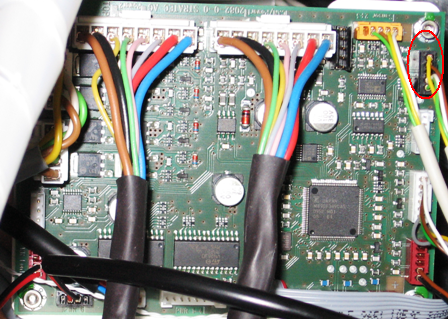
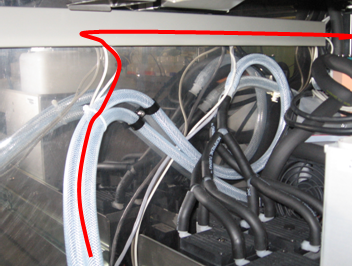
- On the Liquid Cooling Module PCB, unplug the Waste Drawer bag sensor.
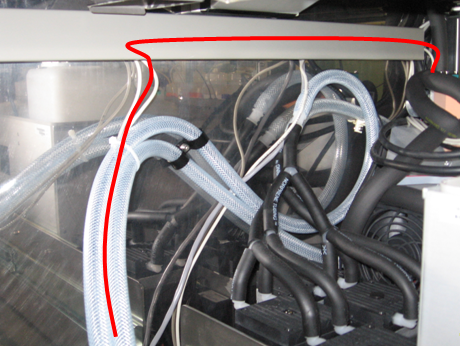
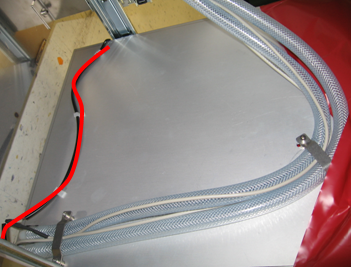
- Free the Waste Drawer bag sensor cable from the cable holder and vacuum hose. Cut the cable ties if necessary. The red line in the picture below shows the path of the cable.
- Remove the Waste Drawer bag sensor cable.
Replacement Procedure
- Pop each sensor into its sensor holder.
- Using a 2.5 mm Allen wrench, install the screws that secure each sensor in place.

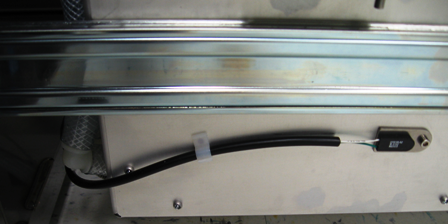
Note—One washer is located behind each waste sensor holder. - Route the left side of the Waste Drawer bag sensor along the side and back of the drawer. Use the existing cable holders to secure the cable in place.
- Route the right side of the Waste Drawer bag sensor cable along the side and back of the drawer. Use the existing cable holders to secure the cable in place. The red line in the picture below shows the path of the cable.
- Route the cable along the vacuum hose and along the cable holder. The red line in the picture below shows the path of the cable.
- On the Liquid Cooling Module PCB, plug the waste bag sensor into its slot.
- Close the left and right side panel doors.
- Close the Waste Drawer.
- In Service Software, calibrate the Waste Drawer bag sensor.


Verification
- In Service Software, make sure the Waste Drawer bag sensor is reading correctly.
 button at the top of the page to send feedback, comments, or change requests.
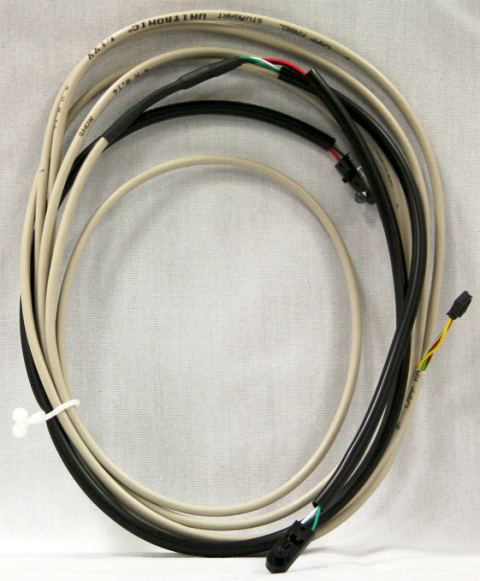