Parts and Materials Required
- Open-ended wrench, 8 mm
- WASTE DWR, LOCK ASSY
Time Required
- 20 minutes
Removal Procedure
- Put on proper PPE.
- Power down the Panther System.
- Open the left side system panel door.
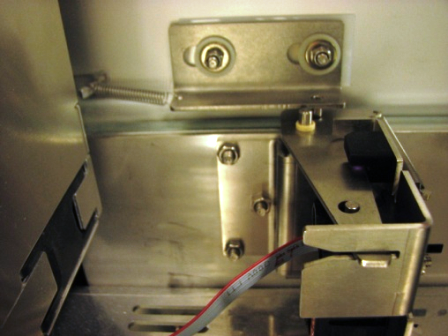
 Locate the Waste Drawer lock on the left side of the Waste Drawer.
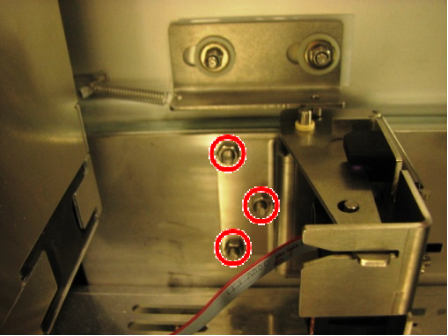
Note—You may need to move the computer to get to the lock. - Using an 8 mm open-ended wrench, remove the three nuts that secure the Waste Drawer lock.
- Gently remove the Waste Drawer Lock with the Flex Cable connected. Do not pull on the Flex Cable.
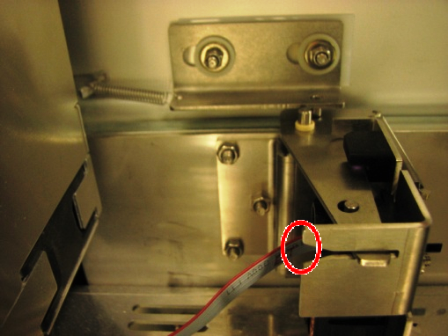
- Face the Lock towards you to note the orientation of the Flex Cable connector onto the Solenoid Lock connector. The Flex Cable will be keyed on one side.
- Disconnect the flex cable from the Waste Drawer lock solenoid.
Replacement Procedure
- Connect the flex cable to the Waste Drawer lock solenoid as per orientation noted during the removal procedure.
- Insert the Waste Drawer lock.
- Tighten the three nuts that secure the Waste Drawer Lock.
- Ensure that all cables in this region of the system are routed so that they do not interfere with the operation of the lock mechanism.
- Verify that both lock mechanism springs are present. One spring is on the lock mechanism and one spring is on the drawer slider.
Verification
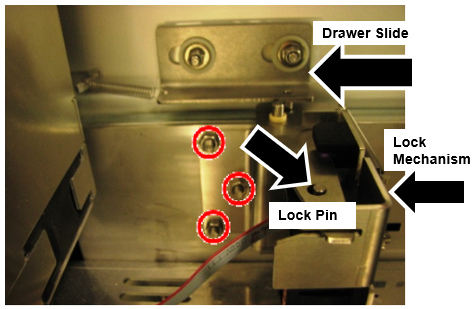
- When the waste drawer is closed ensure the lock mechanism sits above the lock pin
- Adjust and align the Drawer slide or lock mechanism as necessary to ensure the lock mechanism sits above the lock pin
- Verify the Waste Drawer locks and open in SSW and PMain.
 button at the top of the page to send feedback, comments, or change requests.
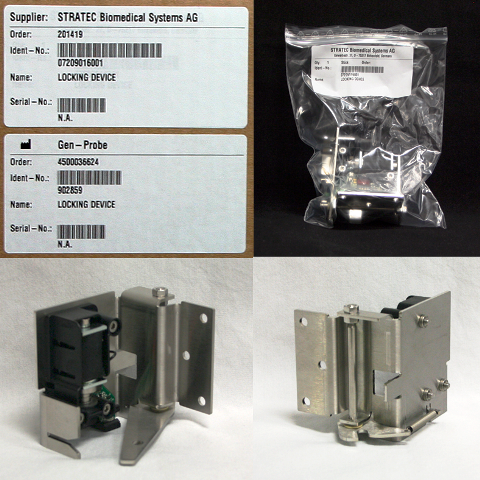