Ported Vacuum Manifold Silencer Plate Installation
Purpose
The purpose of this procedure is to explain how to install the manifold silence plate in the Panther System. The silence plate will significantly reduce the noise level of the vacuum port manifold.
|
|
Caution—Read the entire procedure before beginning. This procedure involves opening the Panthers Waste Manifold and requires careful handling to avoid contamination of the system. |
Parts and Materials Required
- Proper PPE
- 2.5mm Hex Key
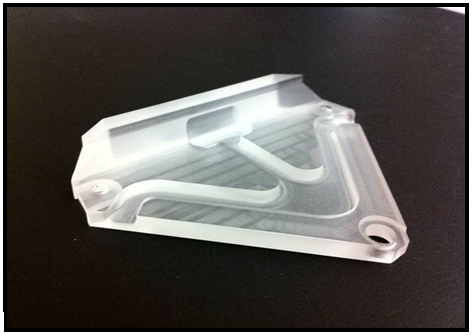
 Ported Vacuum Manifold, Silencer Plate
Time Required
30 Minutes
Procedure
- Put on proper PPE.
- Verify that the vacuum system is performing properly by checking the vacuum level by either using the "Temperatures and Sensors" screen in the Panther User Interface or the Service Software method described in the Configuration section . The vacuum level should be between 6 and 8 in Hg (-203 and -271 mbar).
- Address any problems (leaks, clogged filter, etc.) that result in low vacuum levels prior to proceeding with the installation of the ported vacuum manifold cover.
- Power down the Panther System.
- Replace the vacuum filter in the waste drawer if it has been more than 3 months since a new filter was installed.
- Open the right-side door panel and locate the vacuum manifold.
- Place an absorbent pad under the vacuum manifold to catch any dropped components and to absorb any fluid leaks.
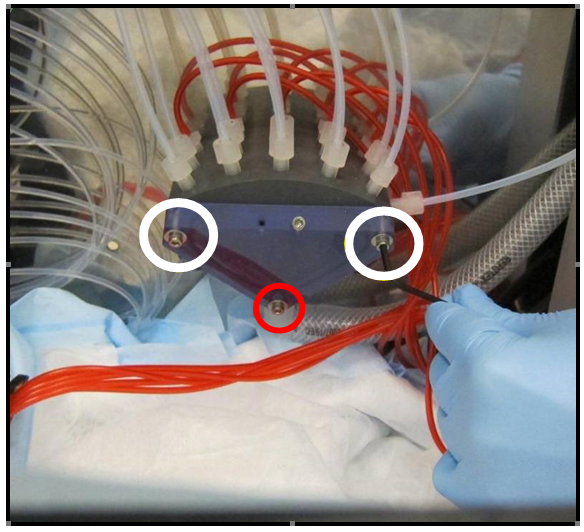
- Remove the top 2 M3 mounting screws (white) and washers from the ported manifold cover and save them for later use.

Note—DO NOT remove the bottom mounting screw (Red). - Check to make sure that the manifold sealing O-Ring did not move of shift out of position.
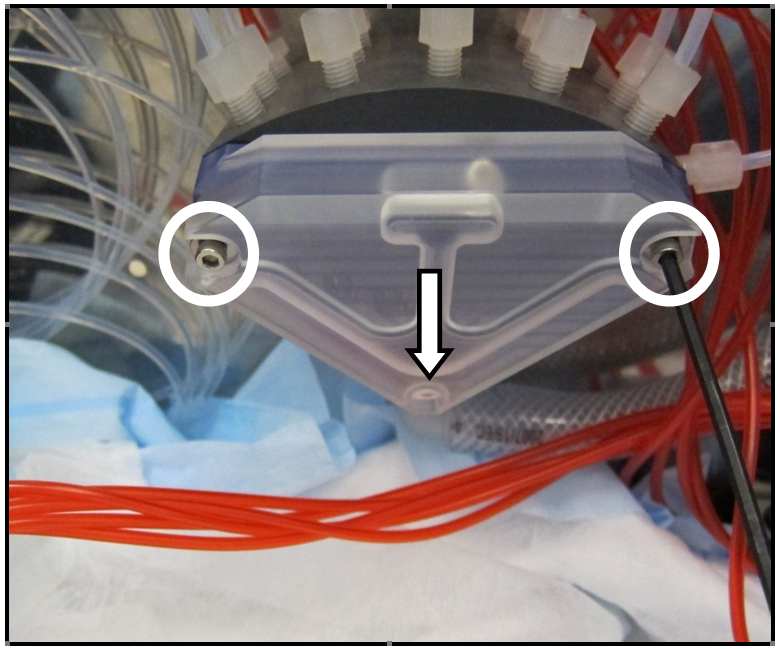
- Place the manifold silencer plate over the front of the vacuum manifold ported cover.
- Align the bottom of the silencer plate with the lower mounting screw (shown with arrow in image below.)
- Secure the silencer plate with the 2 M3x16 mounting screws and 2 M3 washers that were removed in step 7.
Note—DO NOT over tighten the mounting screws. - Power on the Panther System.
Verification
- Open Service Software
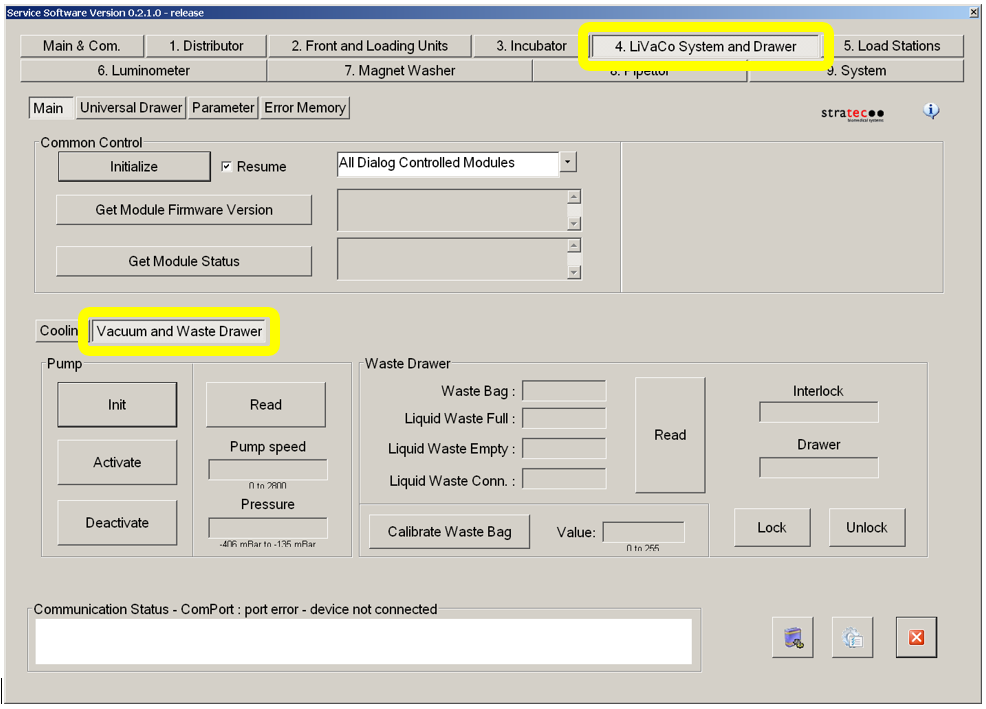
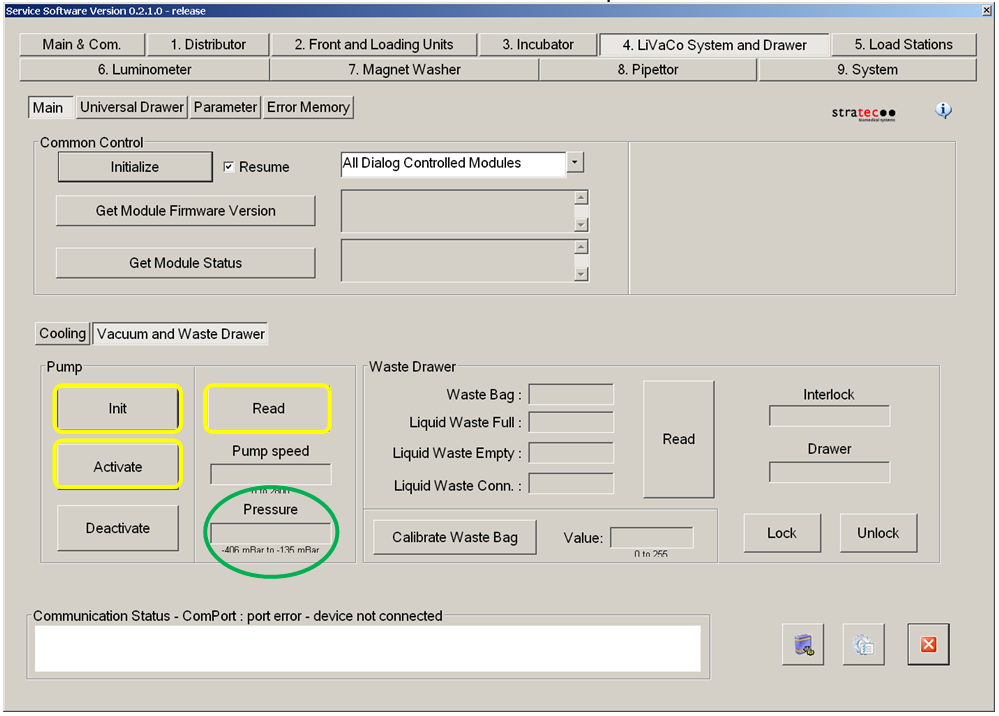
- Select the "4. LiVaCo System and Drawer" tab and select "Vacuum and Waste Drawer" button in the lower section.
- Select "Init" button then "Activate" button in the "Pump" section.
- Run the vacuum system for at least 5 minutes.
- Check the vacuum level by clicking on the "Read" button.
- Verify that the vacuum pressure is betwen 6 and 8 in Hg (-203 to -271 mbar).
 button at the top of the page to send feedback, comments, or change requests.