Parts and Materials Required
- Allen wrench, 2.5 mm
- UFD, A/B BOTTLE VALVE 4 AD1/AD2/OIL
Time Required
- 20 minutes
Removal Procedure
- Put on proper PPE.
- Power down the Panther System.
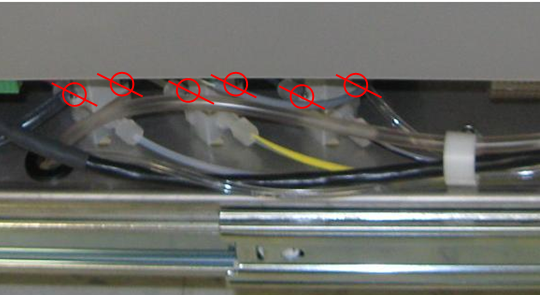
- Locate the solenoid valve that you want to replace.
- Using a 2.5 mm Allen wrench, loosen the two screws from beneath the Universal Fluids Drawer to allow removal of the secured solenoid valve. Slide the valve off the mounting plate

 Warning—Do not remove the top screws. Remove only the screws from the bottom.
 - Unscrew the tubing that is connected to the solenoid valve.
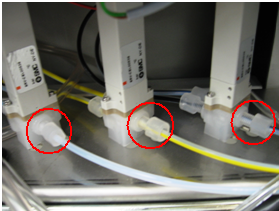
- Remove the solenoid valve.
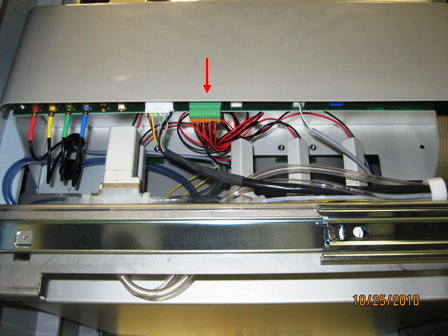
- Unplug the connector from the main Universal Fluids Drawer PCB.
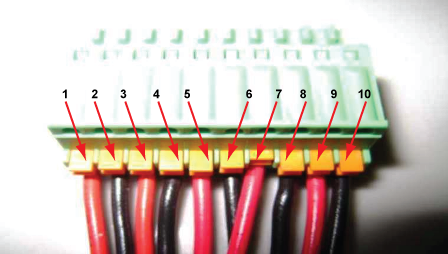
- Remove the two solenoid valve wire leads from the connector. Note the correct wiring orientation as shown in the following photo.
- Red
Wash Solution Valve - Black
Wash Solution Valve - Red
Buffer Valve - Black
Buffer Valve - Red
Auto Detect 1 Valve - Black
Auto Detect 1 Valve - Red
Auto Detect 2 Valve - Black
Auto Detect 2 Valve - Red
Oil Valve - Black
Oil Valve
Replacement Procedure
- Reverse the removal procedure.
Verification
- Start up the Panther System and PrimeOperation of pumping fluid through tubing to ensure proper and consistent fluid delivery (remove air from the tubing, etc.). the system (see the Panther System Operator's Manual).
- Inspect for leaks around the valve fittings.
- Without disconnecting the quick-connect fitting, unscrew the bottle from the bottle cap assembly and inspect the aspiration tube to ensure it was fully primed and the valve is actuating between the A and B bottles.
 button at the top of the page to send feedback, comments, or change requests.
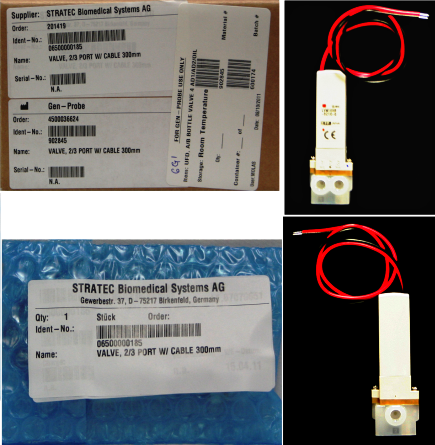