Universal Fluids Drawer Main PCB Removal and Replacement
The following details the instructions to remove and replace the UFD Main PCB.
Parts and Materials Required
- Proper PPE
- Allen Wrench, 2.5 mm
- PCB, Main, Universal Fluids Drawer
Required Time
- 30 minutes
Procedure
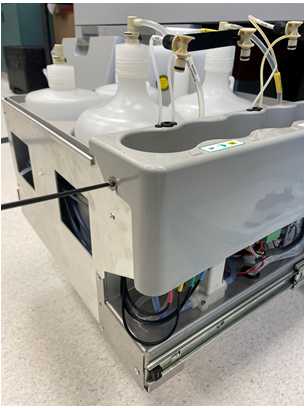
- Remove the UFD Cover.
- Remove and set aside the Auto Detect 1, Auto Detect 2, and Oil bottles.
 Locate and loosen (do not remove) the two 3mm socket head cap screws that secure the Detect and Oil bottle on both sides of the carrier.
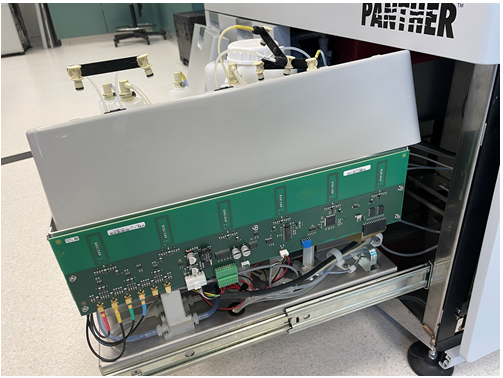
- Move the carrier out of the way to expose the UFD, Main PCB with RFID antennas for AD1, AD2, and oil fluids.
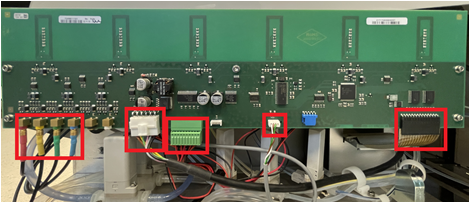
- Disconnect the Buffer and Wash Solution RFID antennae connections (red, yellow, green, and blue connections).
- Disconnect the CAN BUS module connection, the A/B Solenoid valve power/signal connections, the Bleach bottle empty/full sensor connection, and the UFD, RFID Display Flex Cable Connection.
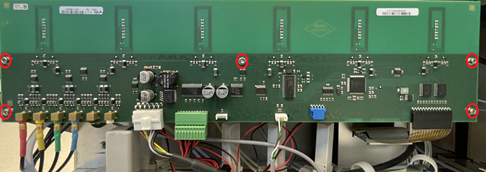
- Remove the five 2.5mm Socket Head Cap Screws that secure the UFD Main Board in place.
- Remove the old UFD Main Board and install the new UFD Main Board.
Use the reverse procedure in the above steps. - Run Instrument Set Up to ensure the new board has the correct Firmware installed.
Verification
- Start up Panther Main and PrimeOperation of pumping fluid through tubing to ensure proper and consistent fluid delivery (remove air from the tubing, etc.). the instrument.
- Ensure all LEDs are correctly indicating bottle presence or absence.
 button at the top of the page to send feedback, comments, or change requests.