Purpose
How to install screw-in bottle straws.
What is Affected
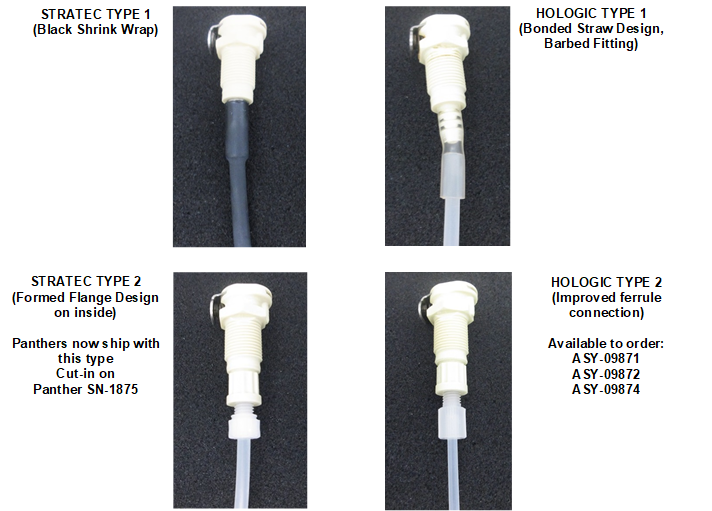
The screw-in design assembly uses a threaded connection that securely screws the straw into its quick-connect fitting.
Parts and Materials Required
- Proper PPE
- Bench pads
- Panther Tool Kit
- Panther, ASM, Wash Bottle Straw w/Fittings Set
- Panther, ASM, Deactivation Buffer Bottle Straw w/Fittings Set
- Panther, ASM, Oil/AD1/AD2 Bottle Straw w/Fittings Set
Time Required
- 60 minutes
Procedure

|
Note—Wash Bottle A is shown below. Check to match the correct bottle straw fitting to its bottle. |
- Put on proper PPE.
- Lay out clean bench pads to prepare a work surface.
- Open the Universal Fluid Drawer.
- One at a time, unscrew each bottle cap and inspect the straw connection fitting for wear.
- If the straw connection is loose or damaged, complete this procedure.
- If the straw connection is secure and intact, reconnect the bottle cap and straw connection.
- Disconnect the fluid line from the bottle.
 Unscrew the bottle cap.
- Place old cap and straw on a clean bench pad.
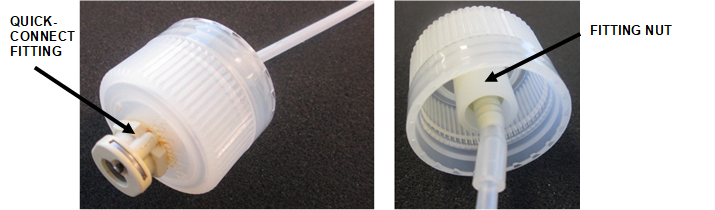
- Holding the fitting nut inside the bottle cap, unscrew the quick-connect from the plastic fitting nut inside the bottle cap.
- Discard the quick-connect fitting and straw.
- Clean the cap and fitting nut with DI water and dry.
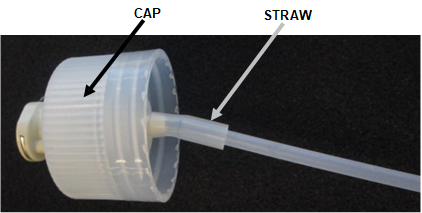
Note—Check the ventilation port on top of the bottle cap is clear. - On the new straw assembly, check the threaded straw is secured to its quick-connect fitting securely.
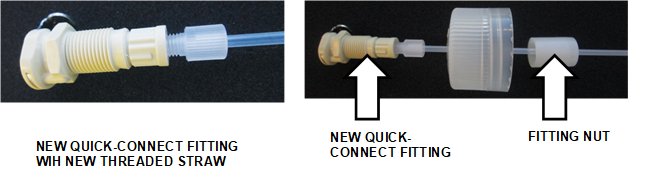
- Holding the fitting nut in the new assembly, screw in the new fitting into its matched bottle cap.

Caution—DO NOT unscrew the straw from the fitting as the connection is torqued according to manufacturer specifications. - Screw the bottle cap with new fitting and straw into the matched bottle.
- Reconnect the fluid line.
- Repeat Steps 5-–14 for every straw that requires replacement.
- Proceed to Verification.
Verification
- Run a full system prime.
- Inspect all fluids fittings for signs of leakage.
Verification is complete when the prime passes.
 button at the top of the page to send feedback, comments, or change requests.