Indications that Pipettor Belts Need to be Replaced
The system reports encoder errors (position not reached) or problems with coordinates when no obstruction is visible, wire and flex connections have been checked and motor/encoder has been ruled out.
The tension feels non-uniform when moving pipettor along the y-axis by hand. Visually, the belts will ride in and out on the toothed pulleys.
Parts and Materials Required
- Set of Hex Keys
- Y-AXIS RACK BELTS
Time Required
- 1 hour
- 30 minutes for Pipettor re-teaching
Removal Procedure
- Put on proper PPE.
- Power down the Panther System.
- Move the system away from the wall.
- Remove the gantry shield, partition wall, and front cover.
 Create a working area by placing absorbent pads over dirty areas (e.g., Load Stations, Reagent Bay, Tip Drawers, Sample Bay, etc.)
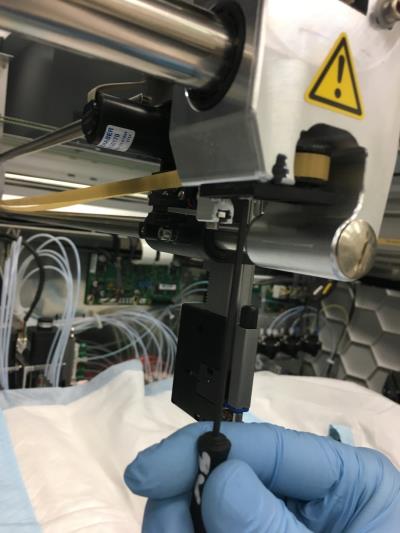
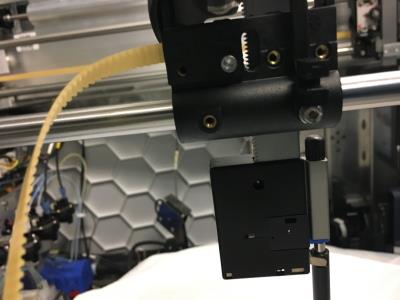
- Move the Z-pipettors up and slide them in the Y direction towards the front of the system so the pipettors can move freely in X‑direction clear of MagWash or Universal fluid bay pump manifold.
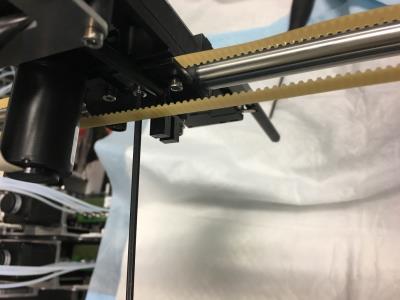
- Using a 2 mm hex driver, loosen the auto-tensioner pulley on the front X-Axis sledge and re-tighten in its compressed position to allow for easier belt removal and installation.
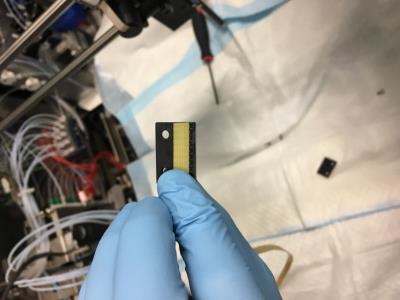
- Remove the old belt by removing the clamping plates using an M2.5 hex driver.

Note—Depending on the age of the system, the plates may be steel instead of the injected plastic as shown.

Replacement Procedure
- Before installing the belts, clean the rails with lint-free towels (and if necessary lubricate with the pipettor rail cleaning kit).
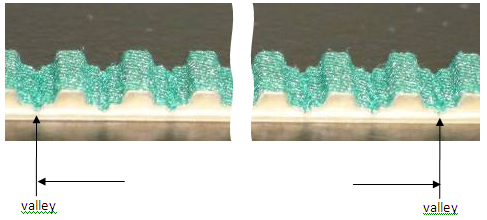
- Verify that the new belt length is the same length as the belt removed; if it is not, cut the new belt so that it has the same number of teeth as the old belt. When measuring the new belt, measure from valley to valley.
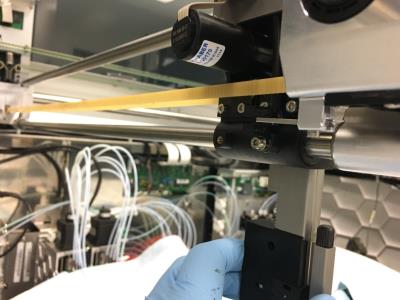
- Attach one clamp to the belt, make sure to seat the belt so that every depression in the clamp is occupied by a tooth of the belt.
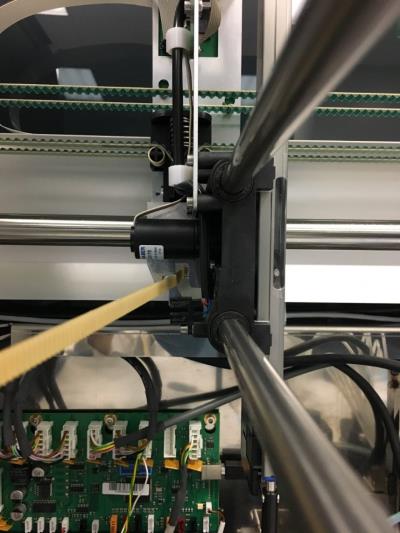
- Proceed to feed the belt around the Y-axis motor pulley, being sure to clear the rear X-axis sledge components as shown.
- Feed the belt around the idler pulley and affix to the Y-axis sledge with the remaining clamp.
- Loosen the idler pulley auto-tension bracket to finger-tight and manually move the Y-axis sledge to allow the spring to adjust the bracket.
- Secure the bracket and verify the Y-axis home flag does not make contact with the Y-axis home sensor.
 button at the top of the page to send feedback, comments, or change requests.