Parts and Materials Required
- Proper PPE
- Hex Key, 2.5 and 3 mm
- PIPETTOR, REAGENT, X-AXIS FLEX CABLE
or
- PIPETTOR, SAMPLE, X-AXIS FLEX CABLE
Time Required
- 30 minutes
Removal Procedure
- Put on proper PPE.
- Power down the Panther System.
- Move the system to allow access to the rear of the system.
- Remove the rear canopy cover.
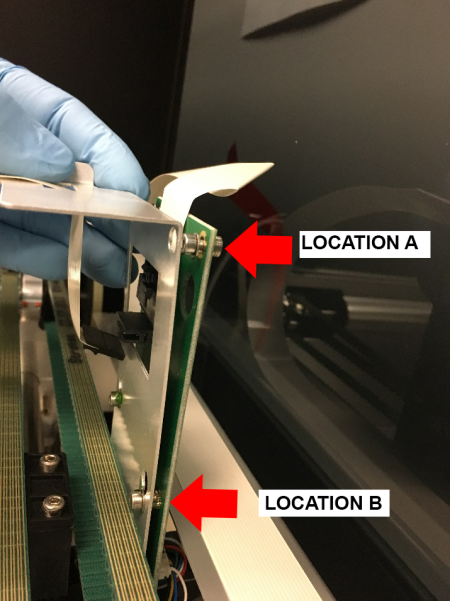
 Loosen the 2 screws (Location A) securing the X-Axis Cable suspension bracket from the X-Axis sledge PCB. Loosen the lower screws (Location B) to allow the PCB relief from the X-axis sledge.
- Depress the clip and remove the X-Axis Flex cable from the X-Axis Sledge PCB.
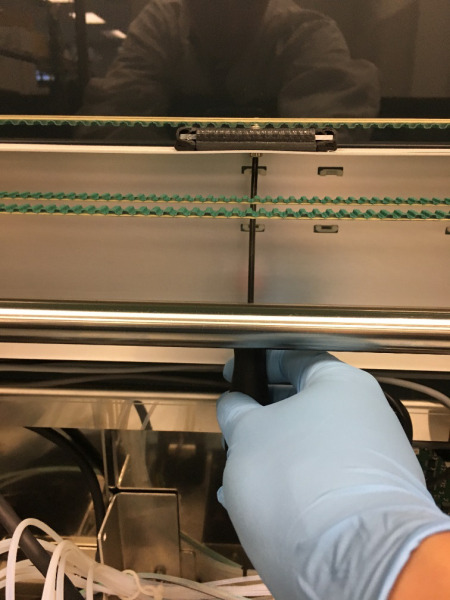
- Loosen the screw securing the cable clamp located in the center of the system.
- Release the securing clips and/or bands holding the flex cable to the cable shroud.
- Disconnect cable from Pipettor Main PCB.
- Set aside the old cable to match folding to the new cable.
Replacement Procedure
- Prepare the new flex cable by matching the folds from previous cable. Take note of orientation and degree of folds. Ensure the connectors are the same orientation on both ends.
- Insert the new flex cable into the Pipettor Main PCB and route along the Cable Shroud, securing with the clips/bands.
- Place the cable at the right-angle fold under the clamp previously loosened at Step 7 of the Removal Procedure. Lightly tighten the clamp, to allow for minor adjustments.
- Continue routing the cable to the X-Axis Sledge PCB. Connect and secure the bracket at the top of the PCB, taking care to keep the washers on the same side as the socket head of the screw.
- Align the cable so that it tracks with the shroud for the full movement of the pipettor in the X-axis. Secure the clamp from Step 3 of the Removal Procedure.

Note—The clamp is installed in a key hole mount. If the clamp is secured in the larger portion of the key hole, you may overtighten and damage the cables. - Replace the rear canopy cover.
- If moved previously, return the system to its original location.
- Power on the Panther System.
Verification
- Using Service Software, initialize the Pipettors.
- Test Pipettor communication by running a repeated LLD test (N >= 10) for the side whose cable was replaced.
 button at the top of the page to send feedback, comments, or change requests.