PCAP Monitor Installation Procedure
Parts and Materials Required
- Panther Tool Kit
- The following items are included to install the monitor:
- PCAP Monitor
- Monitor Arm
- (2) M6x20 screws to install arm to frame (temporarily installed in place on bracket)
- (4) M4x8 screws to install monitor to arm (temporarily installed in place on back of monitor)
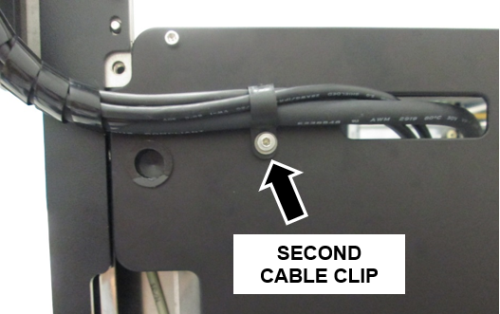
- (1) Cable Clip (already installed on the back on the bracket)
 | Note—A second cable clip is recommended to secure the cables to the USB plate, but may not be included. Obtain a cable clip similar to the installed clip if possible before installation. |
Time Required
Procedure
- Remove the ends of the monitor cables from the packaging inside the system. (Leave the plastic spiral wrap on the cables)
- Gently remove the USB Hub Cover (and disconnect the USB and power cables) from the USB plate and set aside (slowly pull out, it is a "press-fit" cover, no screws).
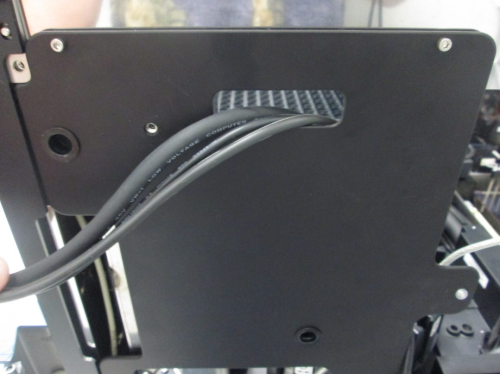
 Route the 3 monitor cables out through the opening in the USB plate as shown.
- Install the monitor arm to the bracket with the two M6x20 screws (5mm hex driver). The two screws are temporarily installed on the bracket. Ensure the plastic green arrow (on the inside of the monitor mounting plate) is pointing up. Remove the plastic arrow after install.

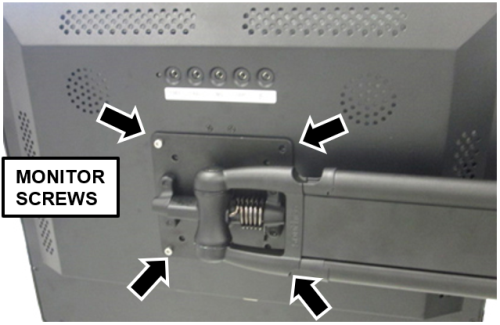
- Install the monitor to the monitor arm using the four M4x8 screws (3mm hex driver). The four screws temporarily installed on the back of the monitor. Hold the monitor in place and get two screws started and tightened, then you can safely install the rest.
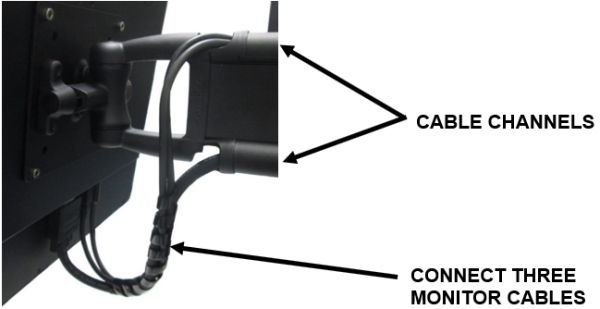
- Plug in all 3 cables to the monitor, and route the cables through the channels on the monitor arm. Run the VGA cable through the bottom channel, and the other two cables through the top channel. Snap the channel covers back into place.

|
Caution— When routing the cables through the cable channels in the arm, keep the slack in the cables to a minimum. Do NOT put too much stress on the cables at any point. The monitor arm must be able to swing all the way from one side to the other without any strain on the cables. |
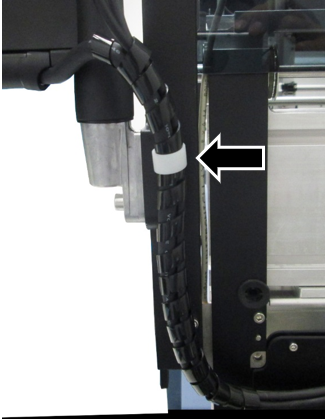
- Attach a second cable clip (optional but recommended) on the USB Plate as shown, then secure the cables in the clips.
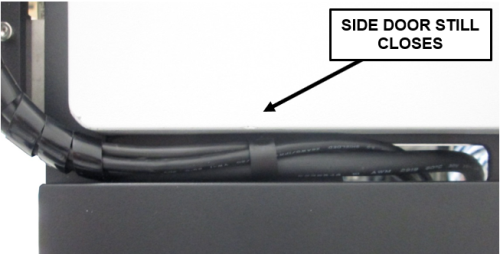
- Reinstall the USB Hub Cover and ensure the side door can still open and close. Readjust the cable routing through the cable clips if necessary.
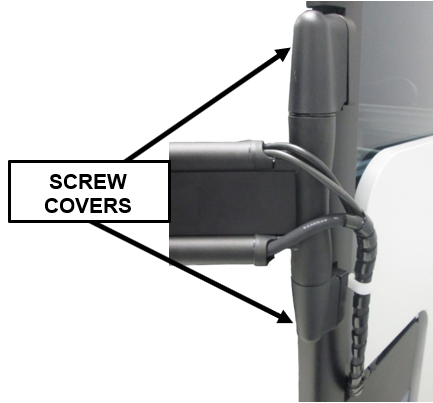
- Snap the new monitor arm plastic covers that hide the attachment screws.
- Power on the system and start the PC.
- Proceed to the Monitor Configuration section below.
Monitor Configuration
| |
|
Note—If the Panther Image is v5.8.2 or above, this section is NOT required. |
- Login to the FSE Shield.
- Click the Command Prompt button.
- Type in services.msc and press Enter.
- From the list of Services, right click the "Tablet PC Input Service".
- Select Properties.
- From "Tablet PC Input Service Properties" window, use the "Startup Type" dropdown menu to set the Startup Type to Automatic.
- Select the Apply button.
- Restart the PC.
- Login to the FSE Shield.
- Click the Command Prompt button.
- Type in "control" and press Enter.
- From the Control Panel window, select "Programs and Features".
- From the "Programs and Features" left pane, select "Turn Windows features on or off".
- When the Features list populates, scroll down to "Tablet PC Optional Components" and check the box to enable the feature. (If already checked, DO NOT uncheck. Leave the feature checked and proceed.)
- Select OK.
- Wait for the "Tablet PC Optional Components" feature to be configured. (This process can take up to 10 minutes if previously uncheck.)
- Restart the PC.
- Login to the FSE Shield.
- Click the Command Prompt button.
- Type in tabletPC.cpl and press Enter.
- From the "Pen and Input Devices" window, select the Touch tab.
- Uncheck the "Show the pointer when I'm interacting with items on the screen" checkbox.
- Select OK.
- Restart the PC.
Verification
- After reboot, verify the display and touchscreen functionality works correctly.
Click the  button at the top of the page to send feedback, comments, or change requests.