
|
Note—A Firmware Installation procedure must be performed when replacing the COP. |
Parts and Materials Required
- FSE Tool Kit
- Bench Top Pads
- COP board
Time Required
- 30 Minutes
Removal Procedure
- Put on proper PPE.
- Power down the Panther System and PC.
- Fully open the Waste Drawer.
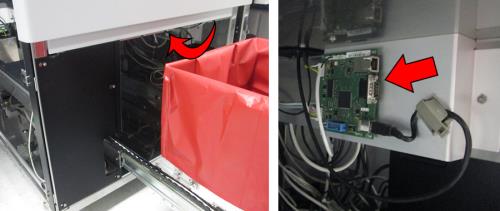
 Locate the COP behind the Waste Drawer, on the inside of the frame.
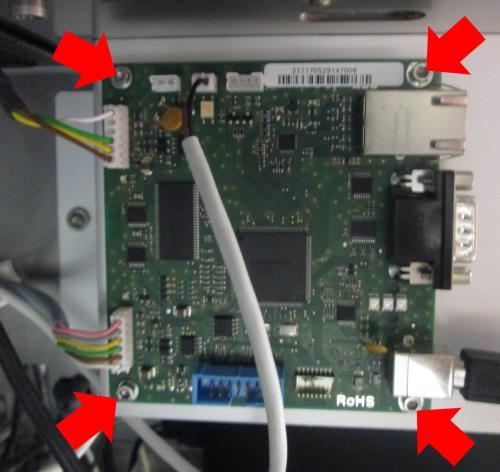
- Disconnect all the cables from the COP. Label the cables or take a picture to ensure proper connections after replacement. Then remove and save the 4 hex screws shown (2.5mm) and remove the COP.
Replacement Procedure
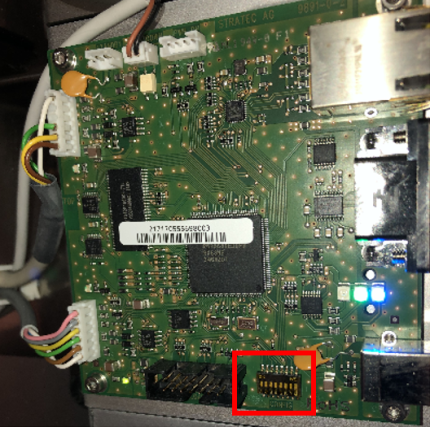
- Ensure the Sidecar COP’s 8 dip switches are all facing down.
- Install the new COP using the 4 hex screws (2.5mm).
- Reconnect all the cables to the COP.
- Close the Waste Drawer.
Verification
- Power on the Panther System and PC.
- Load firmware (Instrument Setup).
Refer to Panther Fusion System Installation > Run Instrument Setup (Fusion). - Verify Panther Main starts and the system initializes without errors.
 button at the top of the page to send feedback, comments, or change requests.