Dashboard - Installing Root Certificate Authority
Parts and Materials Required
- N/A
Time Required
- 30 Minutes
Procedure
 Option 1: Uploading Site's Certificate (Preferred Option)
Format the custom certificate prior to uploading it onto the Dashboard Command. The requirements for formatting a custom certificate are:
- Intermediate certificate(s) and root certificate authority must be bundled in the certificate file.
- Bundled certificates must be in the same order as their trust chain with the server certificate first, followed by any intermediate authorities, and finally the root certificate authority.
- Certificate must be in X.509 PEM format.
- Private key(s) must be in RSA format and must not be encrypted with a passphrase.

|
Note—A customer certificate is required if the preferred option is desired. |
To upload a custom certificate to the Dashboard Command site:
- Navigate to the Dashboard Command web site.
- Login as an administrator.
- Navigate to the Dashboard Command System Administration screen and locate Certificate Management as shown below.
- Select Upload.

- The Upload Certificate Files window will open.
- Select the appropriate Certificate and Key files.
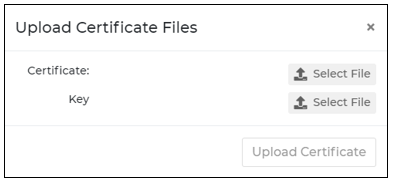
- Select Upload Certificate.
If custom certificate is not available, follow instructions below for self-signed individual or multiple PC certificate installation.
Option 2: Self-Signed Individual PC Certificate Installation
Chrome on Windows 10
- Navigate to Dashboard Command web site.
- Login as an administrator.
- Navigate to the Dashboard Command System Administration screen and locate Certificate Management.
- Select PEM or DER link depending on which format is preferred.
- Save the PEM or DER file to the computer that requires the certificate.
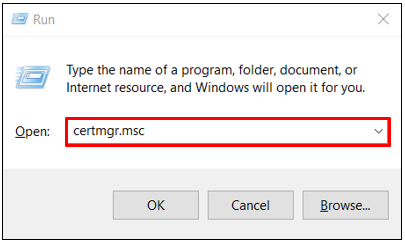
- Select Start and then Run.
Note—Press Windows + R keys if Run option is not available. - Enter "certmgr.msc" and click OK.
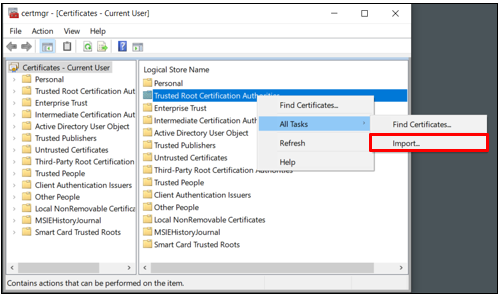
- Right click on Trusted Root Certification Authorities.
- Select All Tasks.
- Select Import...
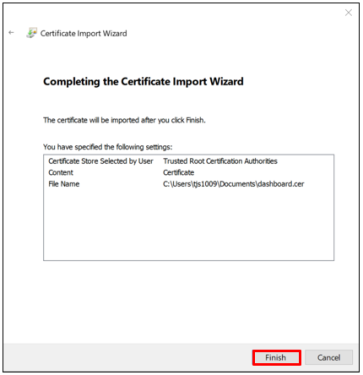
- Choose the file that was saved in step 5.
- Navigate through the wizard windows to complete set up.
- Restart the computer for the change to take effect.
Mobile Safari on iPad
|
|
Note—Installation of self-generated root CA is required for proper Dashboard operation. |
- Type in the Dashboard URL and add "CA.crt" or "CA.der" to the end to download directly.
- For example: https://dashboard-command/CA.crt
- A warning window opens.
- Select Allow.
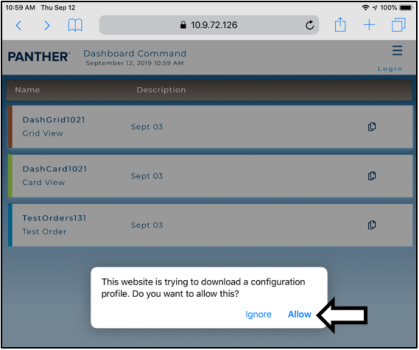
- The warning window will close.
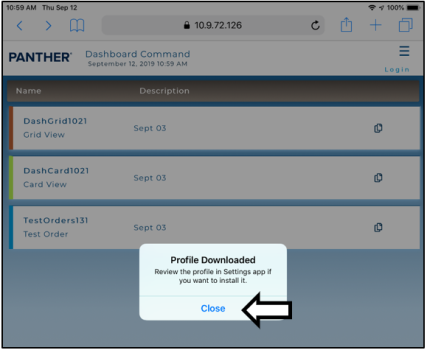
- A Profile Downloaded window opens and instructs the user to continue setup in Settings.
- Select Close.
- Select Settings.
- Select Profile Downloaded.
- Tap on Install in the top right corner.
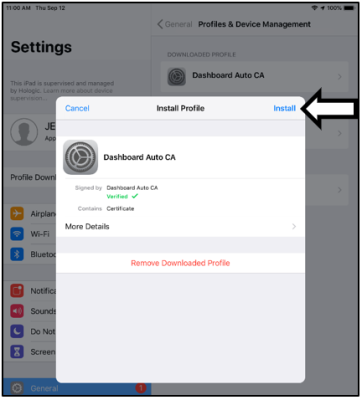
- Enter iPad passcode.
- Select Install and then Done.
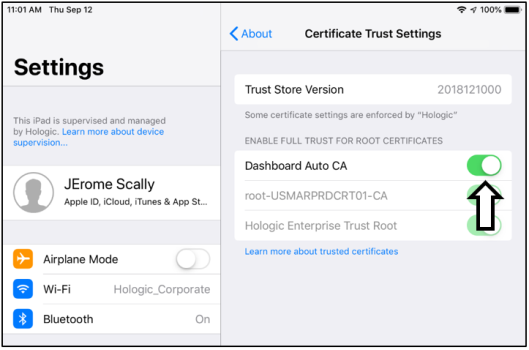
- Select General in Settings.
- Select About.
- Scroll to the bottom and select Certificate Trust Settings.
- Locate Dashboard Auto CA.
- Enable the new root certificate.
Self-Signed Multiple PC Certificate Installation
Follow the instructions below if site desires to use the Dashboard Command self-signed certificate:
- Follow the directions listed in the Self-Signed Individual PC Certificate Installation section.
- Download the certificate in the desired format (PEM or DER).
- Deploy using site's institution certificate management system (i.e. active directory, group policy, etc.).
 button at the top of the page to send feedback, comments, or change requests.