Assemble the Fusion Sidecar
- Ensure that the Fusion power switch is in the OFF position.
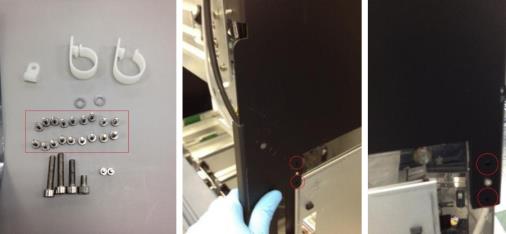
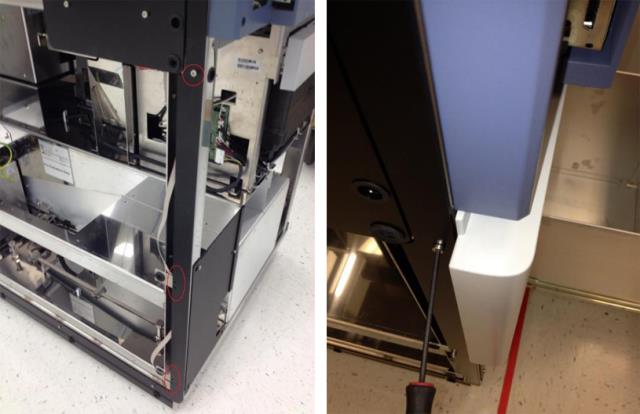
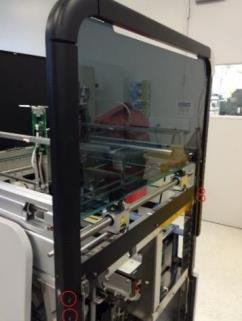
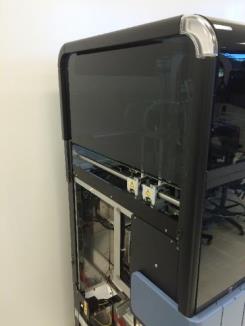
 Place the Fusion right-side canopy cover from the Fusion ancillary crate onto the Fusion using the front mounting dowel pin and the rear mounting screw. Secure the panel with four 3mm screws from the Panther Fusion upgrade screw kit. Ensure that the door shock zip-tie is removed. (Mounting screws may already be installed on the Fusion for you.)
- Place the adhesive foam insert onto the Fusion right-side intermediary panel cover. Ensure that it lines up with the pre-attached foam insert on the Fusion. See the following figure for placement.
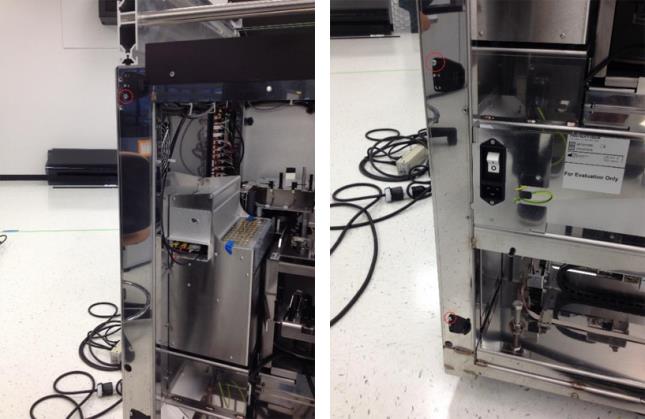
- Place the Panther left-side canopy metal mounting bracket onto the Fusion. Secure the bracket with one 3mm screw in the bottom left of the bracket and the 2.5mm countersunk screw removed from the Panther.
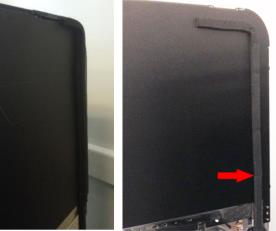
- Place the Fusion front panel cover onto the Fusion. Ensure that the cover tabs fit into the grooves on either side of the Fusion chassis and push in to secure the cover flush with the Storage Carousel drawer.

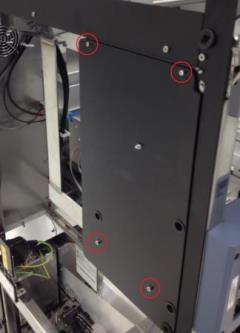
Note—The cover will be secured to the frame of the system later. - Place the Panther front left-side black trim onto the Fusion. Secure the trim with the six 3mm screws previously removed from the Panther. See the following figure.
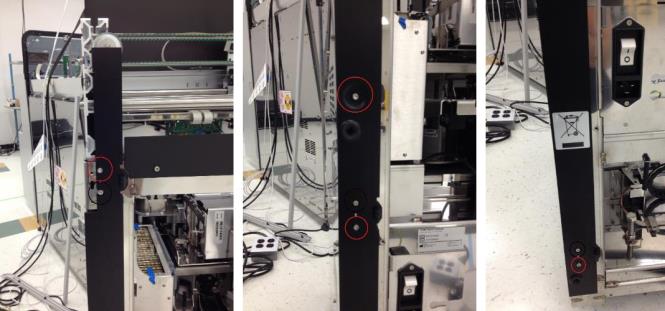
Note—One of these screws secures the front panel cover to the chassis of the Fusion. - Place the three Panther door hinges onto the back left of the Fusion. Secure each hinge with one 3mm screw previously removed from the Panther System. The top hinge should have one screw in the bottom position of the chassis, while the other two hinges should have one screw in the top portion of the chassis. See the following figure.
Note—These hinges may be different from those pictured here. In this case, the procedure is unchanged. - Place the Panther rear black trim onto the Fusion over the door hinges. Secure the trim with the four 3mm screws previously removed from the Panther as shown in the following figure.
- Place the Panther left-side front panel cover mounting trim onto the Fusion. Secure the trim with the two 3mm screws and two 2.5mm screws previously removed from the Panther.
- Place the Panther left-side canopy cover onto the left side of the Fusion using the four 3mm screws that secured the canopy cover to the Panther. (Screws may already be installed on the Fusion for you.)
- Secure the front black trim from the Panther left-side canopy cover back onto the canopy cover with the screws from the Panther.
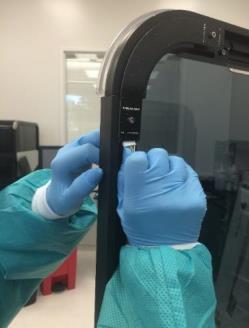
- Plug the left-side canopy cover LED PCB connector into the Fusion Front Cover PCB.
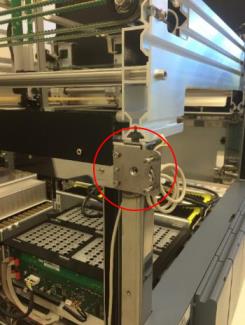
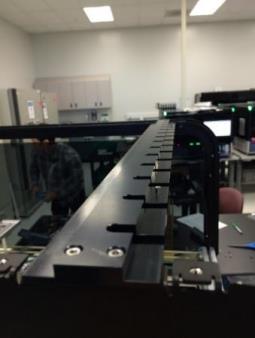
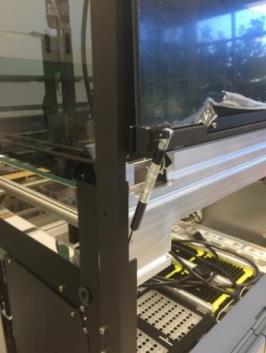
- Place the Fusion canopy supporting bar in between the two side canopy covers. Ensure that the dowel pins face the back of the System. Secure with 4 SHCSs, 2 from the Panther and the other 2 from the Fusion black right-side panel.
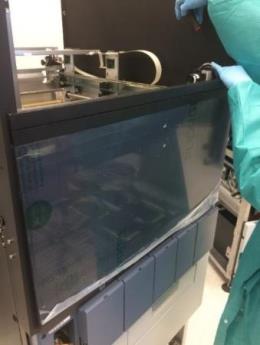
- Place the Fusion front canopy door onto the Fusion. Secure with two 3mm SHCSs from the Fusion upgrade screw kit. Remove the plastic protective film from the door.
Note—Removing the door shock may make this step easier. - Using a flat-head screwdriver, reattach any removed door springs to the Fusion front canopy doors.
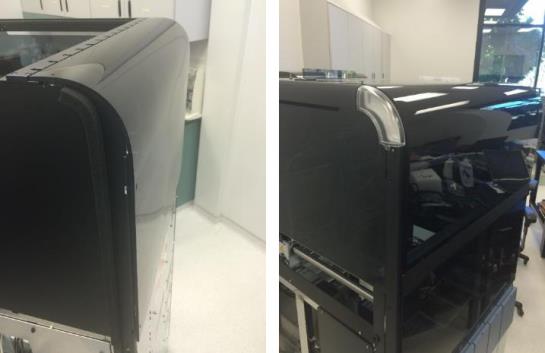
- Place the front and back canopies onto the Fusion and secure them with the button-head screws supplied in the Fusion upgrade screw kit. Remove the plastic protective film.
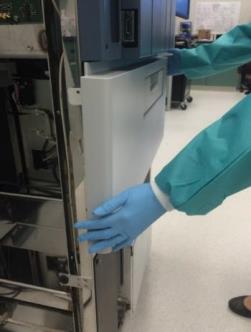
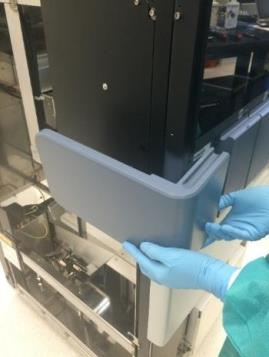
- Place the Fusion left-side Front Cover Panel onto the Fusion and push in to mount it to the system.
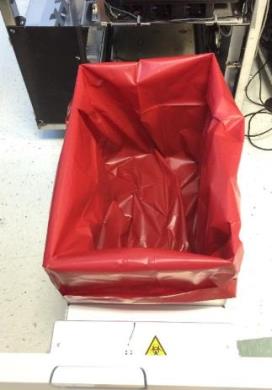
Note—This panel is different from the Panther left-side Front Cover Panel that was removed earlier in the procedure. - Place an empty Panther biohazard waste bag into the Fusion waste bin.

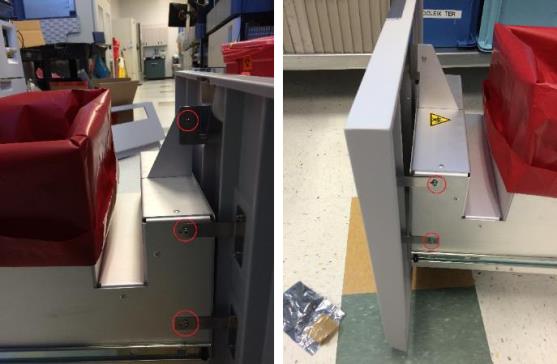
Caution—Ensure the bag is flush with the walls of the Waste Drawer to prevent a jam or buildup of ejected capped tubes. - Place the Fusion waste cover onto the Fusion. Secure the cover using five 3mm screws (taped to the back of the cover) and washers.
Note—The cover may need to be adjusted in/out to ensure proper operation of the magnetic latches. -
Label the Fusion according to its intended use:
- Is the Fusion intended for CE-IVD? Go to Labels for CE-IVD Compliance.
- Is the Fusion being converted from IUO/PEO to CE-IVD? Go to Relabel from IUO/PEO to CE-IVD Compliance.
 button at the top of the page to send feedback, comments, or change requests.